Set up and Use FastestVPN App on Mac OS X
FastestVPN’s User-Friendly and Feature-Rich MacOS X VPN Client Application is compatible with MacOS X 10.15 and later versions. For an older version, please visit this guide
Step #1: Install the FastestVPN MacOS X Application from the Mac App Store

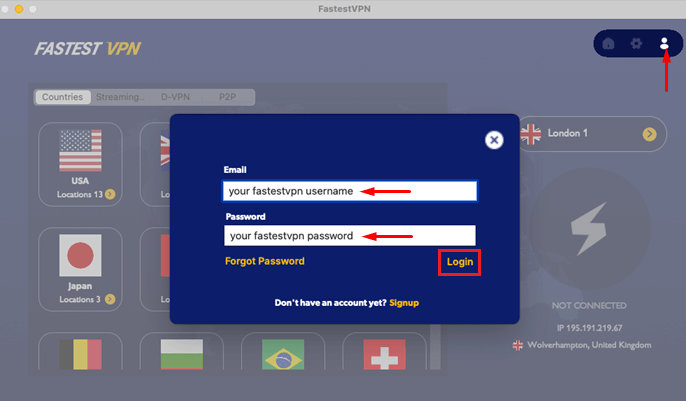
Step #2: Run the app and click on the user icon. Then enter your FastestVPN username and password, and click on “Login“.
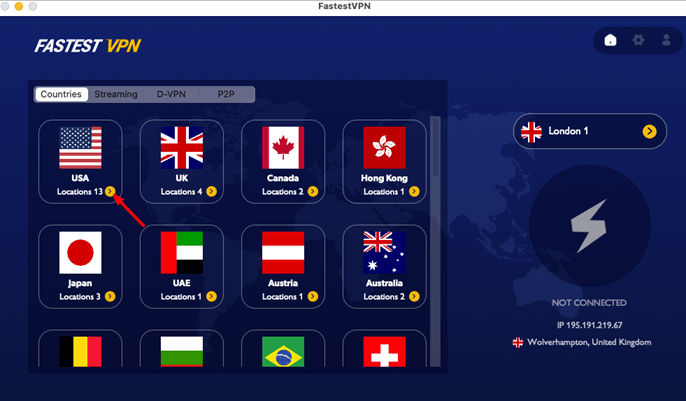
Step #3: Click on the arrow below any country name to view the available server locations in that region.
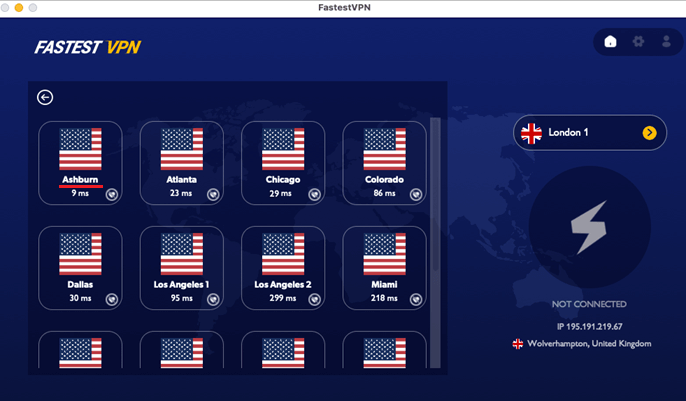
Step #4: Click on your desired server location to connect to it.
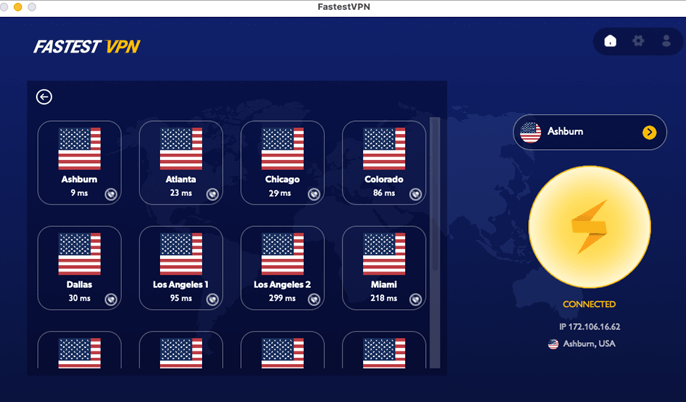
You’ll be Connected to the FastestVPN shortly.
Important Notes:
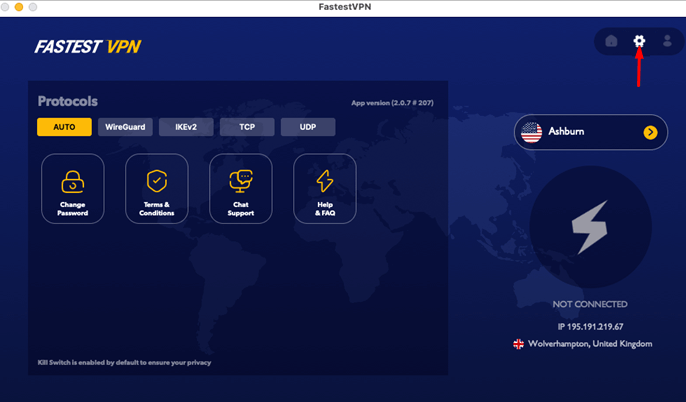
If you want to switch to another VPN protocol, click the Settings gear icon and select your desired protocol.
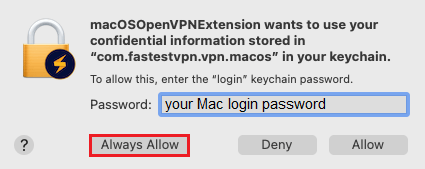
Switching to the OpenVPN TCP or UDP protocols will ask for permission. Enter your Mac login password in that case and click “Aways Allow”
FAQs and Troubleshooting
FastestVPN MacOS App includes IKEv2, WireGuard and OpenVPN (TCP, UDP) protocols. You can also set up FastestVPN via L2TP over IPSec protocol manually through the Mac network settings.
Yes, Internet Kill Switch is always turned on by default on the FastestVPN macOS application.
FastestVPN Mac App works on OSX version 10.15 and later. For older Mac versions, install another version of the FastestVPN application. Setup guide is avaulale here.
For connectivity issues, follow these steps:
- Log out of the FastestVPN app and log in again.
- Go to the app settings and choose another protocol such as UDP or TCP and then make a connection attempt.
- If it doesn’t work, select another server location.
- If the issue persists, connect to our 24/7 live support team.
