PfSense 2.4.x and 2.5.x (OpenVPN)
This tutorial describes how to set up FastestVPN on pfSense 2.4.x and 2.5.x using the OpenVPN protocol.
- Click here to find out how to set up FastestVPN on pfSense 2.6.x
Steps to set up the FastestVPN on pfSense
Step #1. Follow the steps given below.
- Download FastestVPN OpenVPN server configuration files from here. Unzip these files.
- Pick any server file such as “Austria-UDP” and open it with a text editor.
- Log in to your pfSense on a browser.
- Click System > Cert. Manager > Add.
- Choose a Descriptive name such as “FastestVPN_ca“
- Method: Import an existing Certificate Authority.
- Now go to the server config file which you already opened with a text editor. Copy the certificate text. This text starts with ‑‑BEGIN CERTIFICATE‑‑ and ends with ‑‑END CERTIFICATE‑‑

- Paste the copied text into the “Certificate data” box.
- Click on “Save“

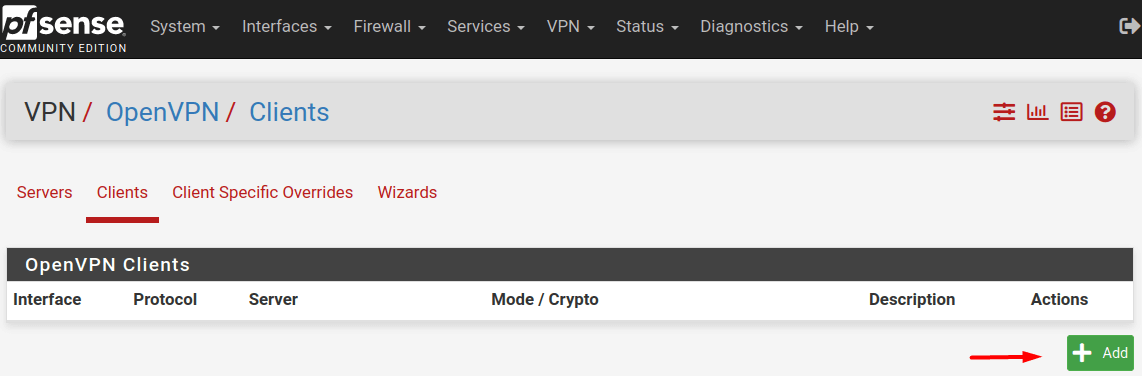
Step # 2: Click VPN > OpenVPN. Then select Clients. and click Add.
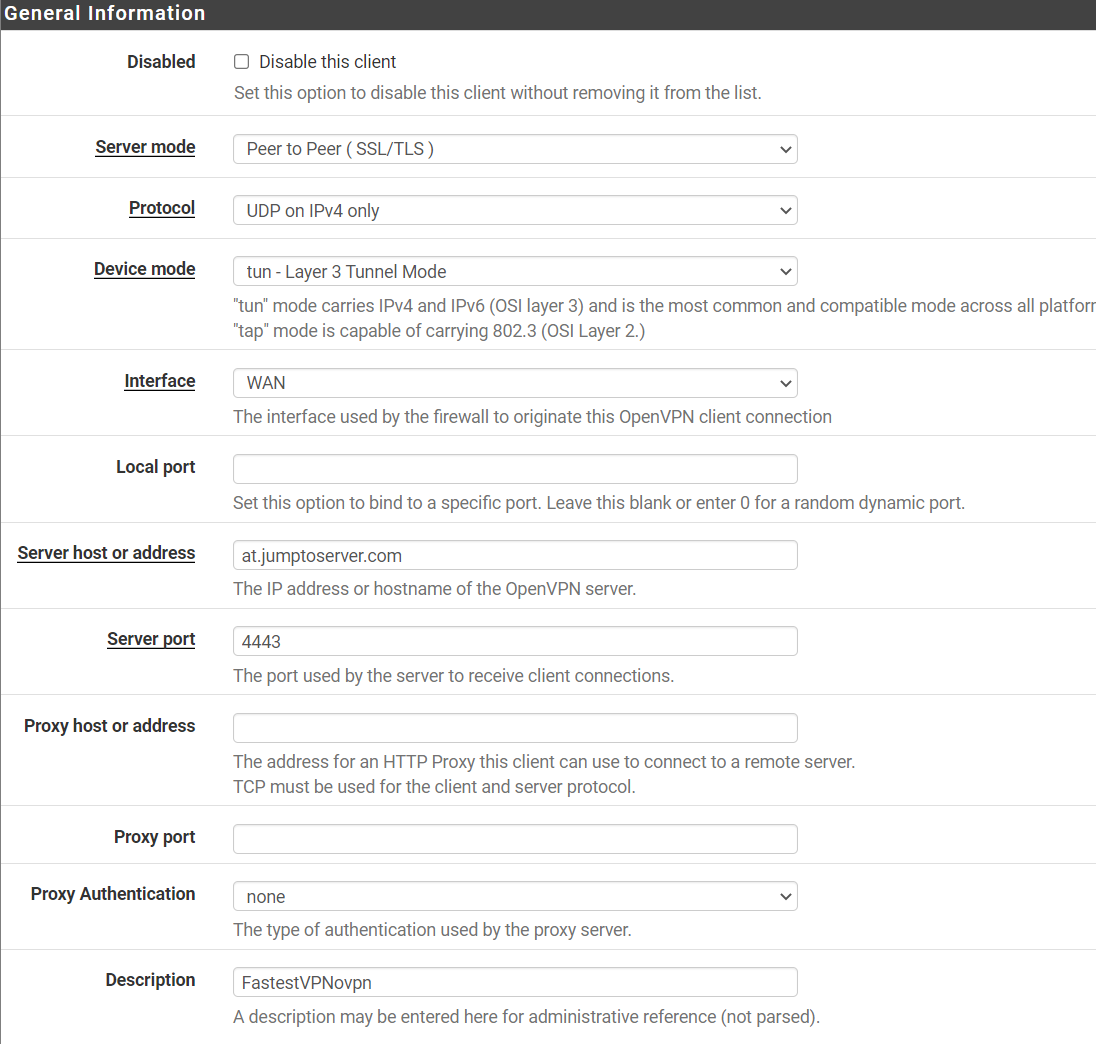
Step # 3: In the “General Information” section, fill in the required fields as given below:
- Disabled: Unchecked
- Server Mode: Peer to Peer (SSL/TLS)
- Device Mode: tun – Layer 3 Tunnel Mode
- Protocol: Select UDP on IPv4 only or TCP on IPv4 only
- Interface: WAN
- Local Port: Empty
- Server host or address: Enter your desired FastestVPN server address from here
- Server port: 4443
- Proxy host or address: Empty
- Proxy port: Empty
- Proxy Authentication: none
- Description: Choose a display name for this configuration. For example, FastestVPNovpn
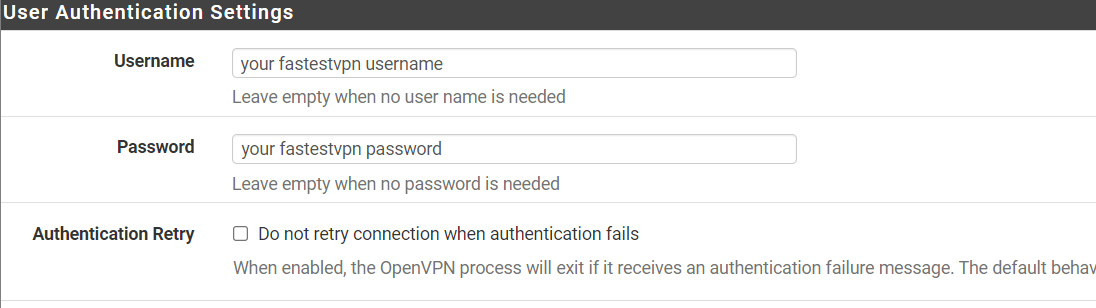
Step # 4: In the “User Authentication Settings” section, fill in the required fields as given below:
- Username: Enter your FastestVPN username
- Password: Enter your FastestVPN Password
- Authentication Retry: Unchecked
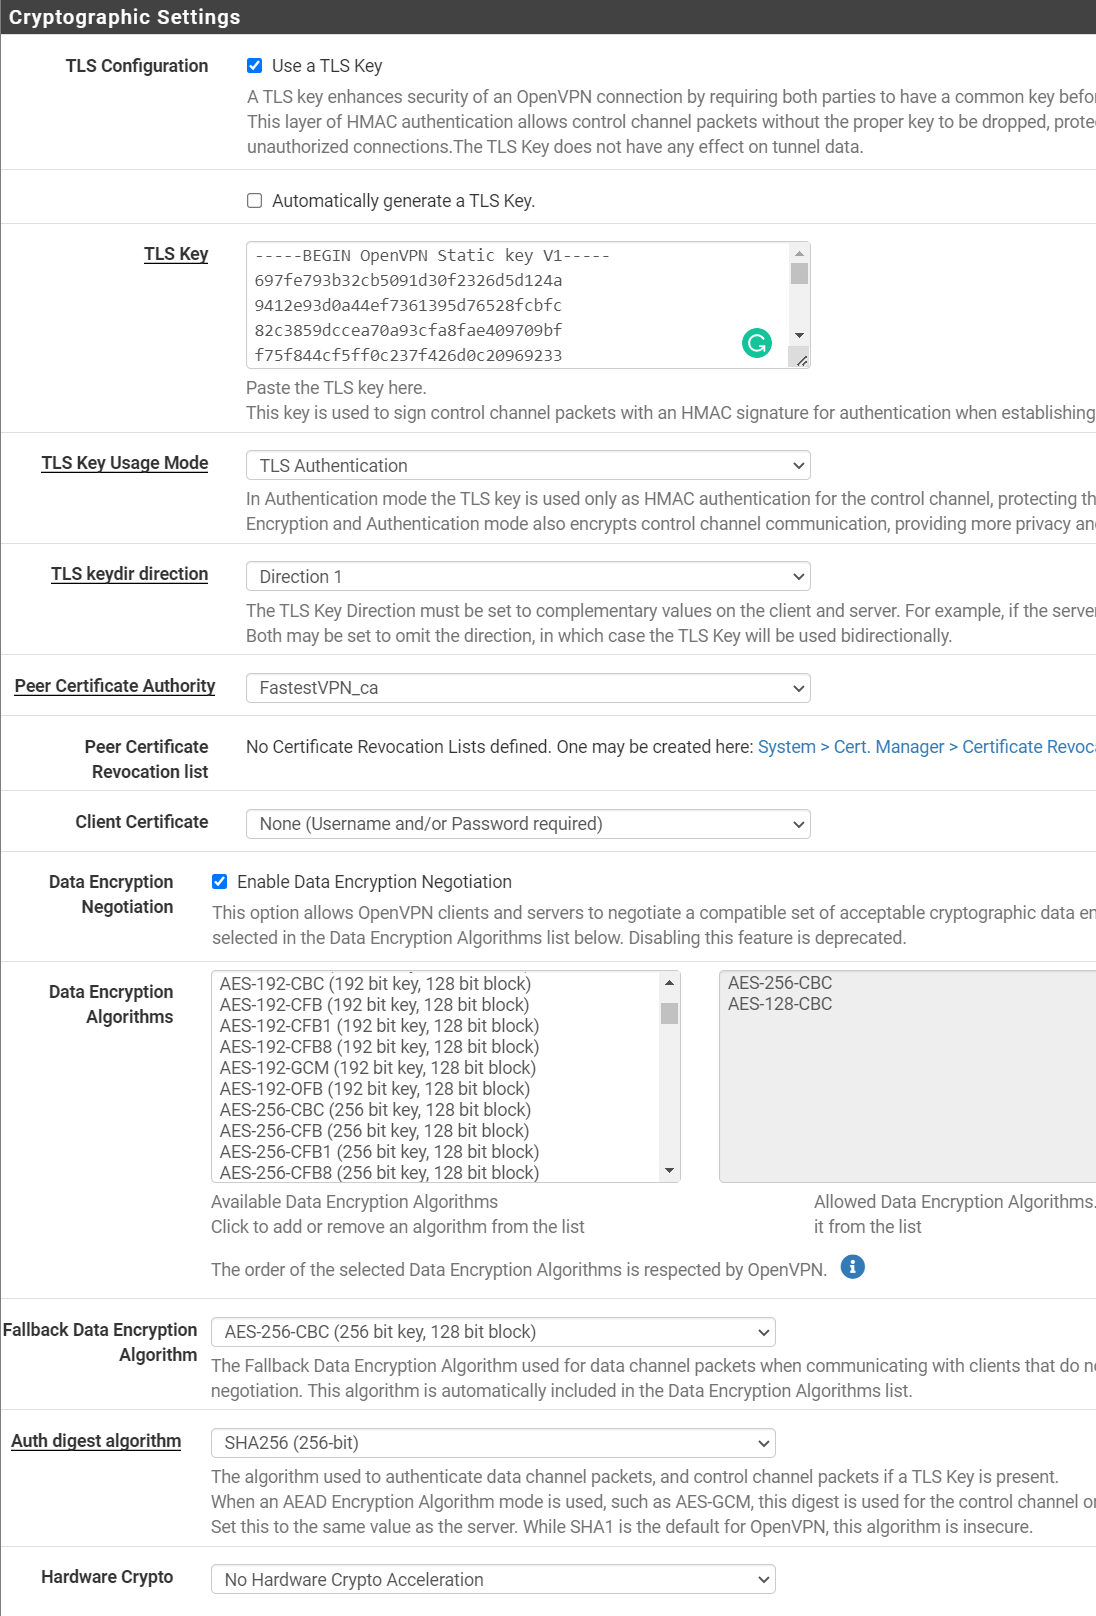
Step # 5: In the “Cryptographic Settings” section, fill in the required fields as given below:
- TLS Configuration: Check “Use a TLS Key”
- Automatically generate a TLS Key: Unchecked
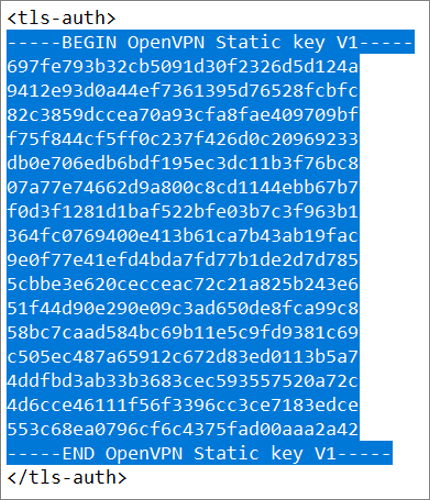
- TLS Key: Open the server configuration text file. Now copy the text that starts with ‑‑BEGIN OpenVPN Static key V1‑‑ and ends with ‑‑END OpenVPN Static key V1‑‑. Paste this text into the “TLS key” field.
- TLS Key Usage Mode: Select “TLS Authentication”
- TLS keydir direction: Direction 1
- Peer Certificate Authority: FastestVPN_ca (or add the certificate’s descriptive name which you used in Step # 1)
- Peer Certificate Revocation List: Leave as default
- Client Certificate: None (Username and/or Password required)
- Data Encryption Negotiation: Put a checkmark
- Data Encryption Algorithms: AES-256-CBC, AES-128-CBC
- Fallback Data Encryption Algorithm: AES-256-CBC (256-bit key, 128-bit block)
- Auth digest algorithm: SHA256 (256-bit)
- Hardware Crypto: No hardware crypto acceleration (unless you know about your device hardware otherwise)
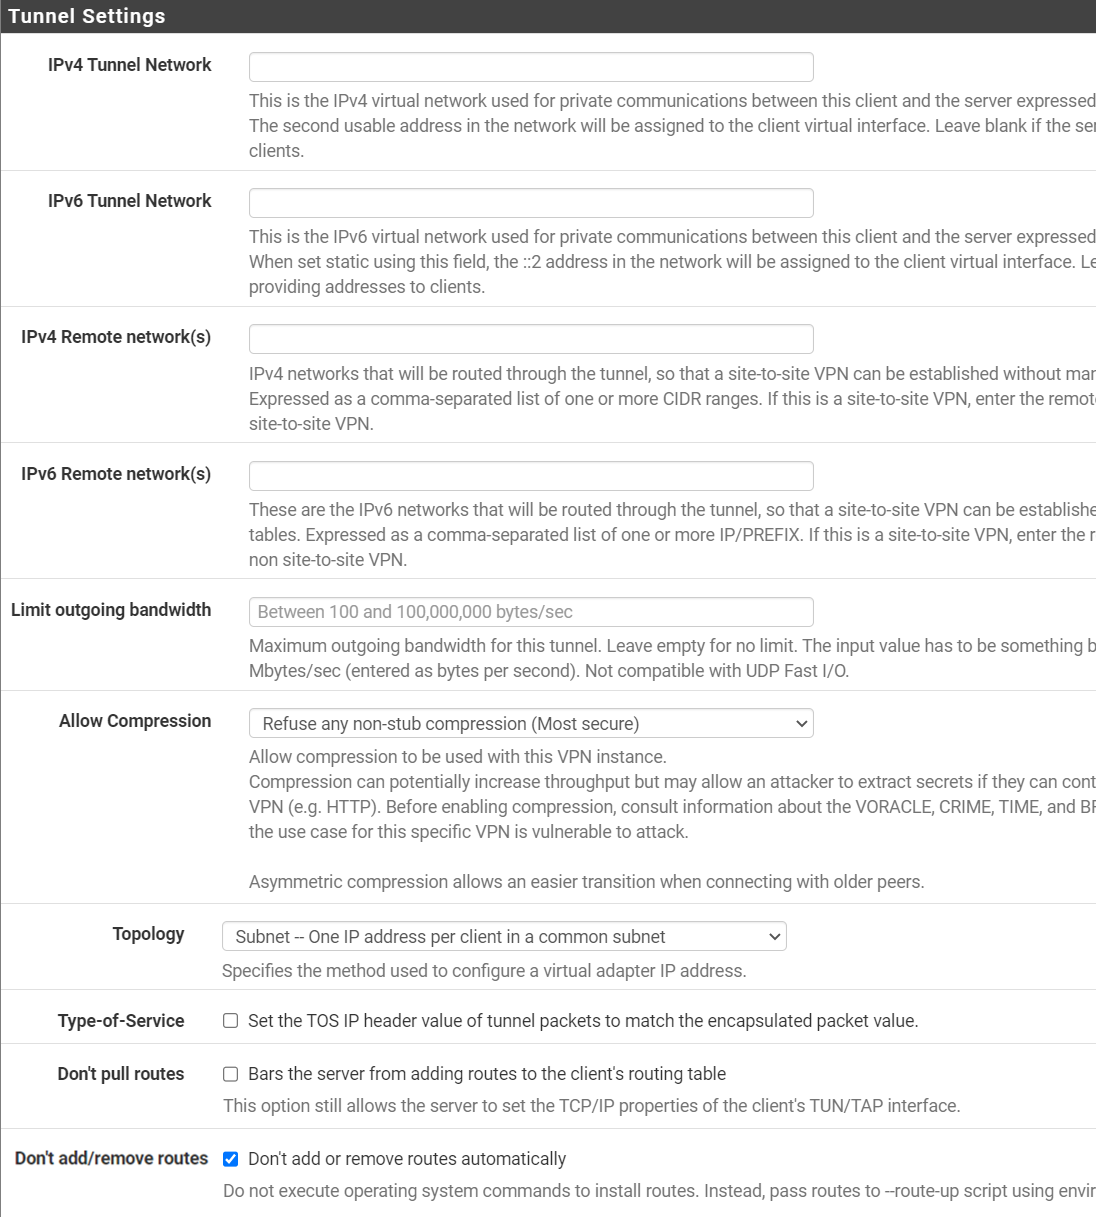
Step # 6: In the “Tunnel Settings” section, fill in the required fields as given below:
- IPv4 Tunnel Network: Leave empty
- IPv6 Tunnel Network: Leave empty
- IPv4 Remote network(s): Leave empty
- IPv6 Remote network(s): Leave empty
- Limit outgoing bandwidth: Leave empty (unless you want to limit the bandwidth)
- Allow Compression: Refuse any non-stub compression (Most secure)
- Topology: Subnet – One IP address per client in a common subnet
- Type of service: Unchecked
- Don’t pull routes: Unchecked
- Don’t add/remove routes: Checked
Step # 7: In the “Tunnel Settings” section, leave everything to their default.
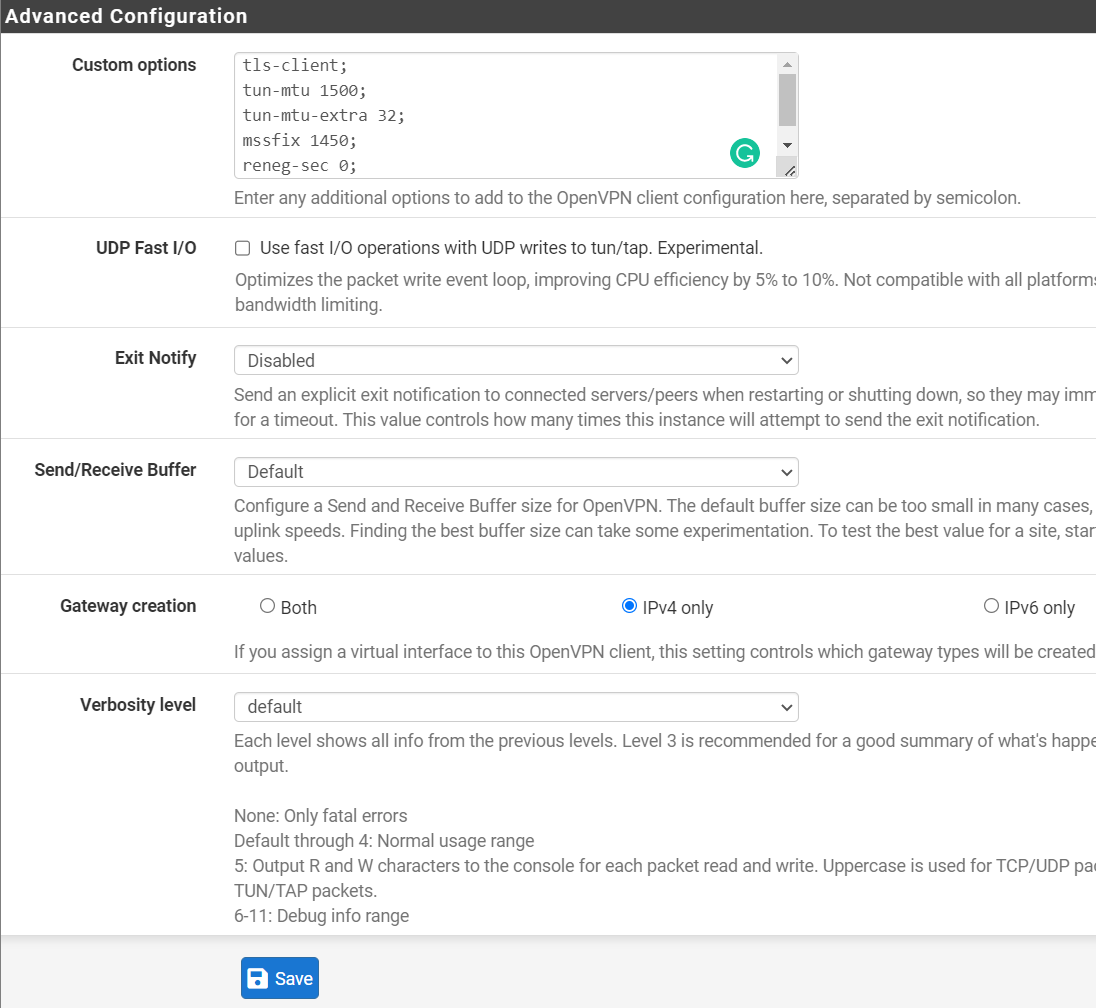
Step # 8: In the “Advanced Configuration” section, fill in the required fields as given below:
- Custom Options: Add the following text:
tls-client;
tun-mtu 1500;
tun-mtu-extra 32;
mssfix 1450;
reneg-sec 0;
remote-cert-tls server;
- UDP Fast I/O: Unchecked
- Exit Notify: Disabled
- Send/Receive Buffer: Default
- Gateway creation: IPv4 only
- Verbosity level: Default
- Click “Save” at the bottom of the page
Step # 9: Click the Interface tab and click Assignments.
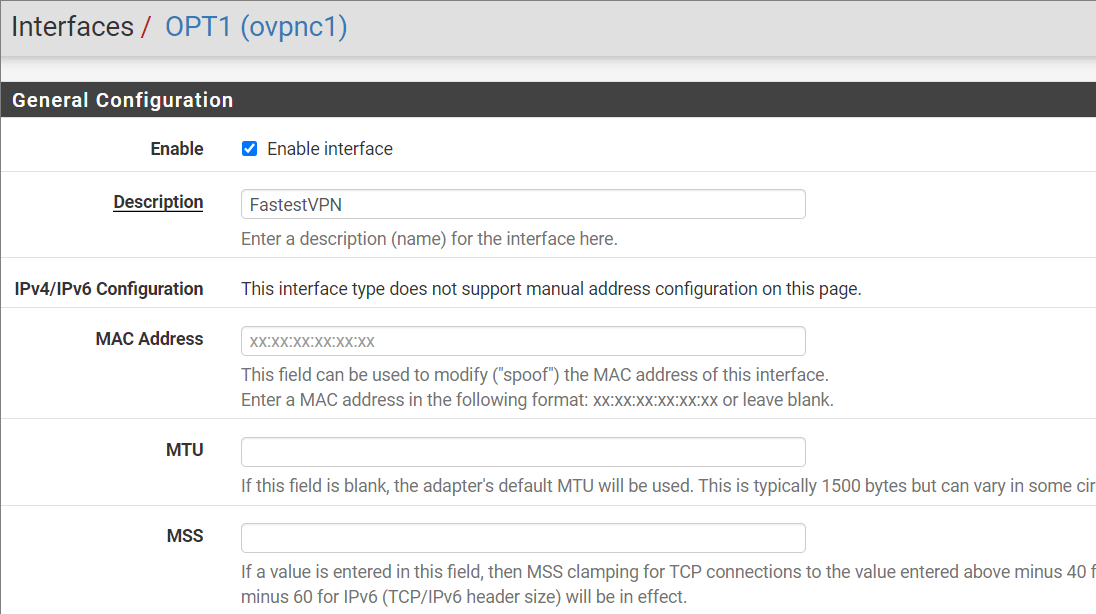
Step # 10: Click on the Add button next to the FastestVPN client that you just created, which is “ovpnc1 (FastestVPNovpn)” in our example. Then click Save. Then click on OPT1.
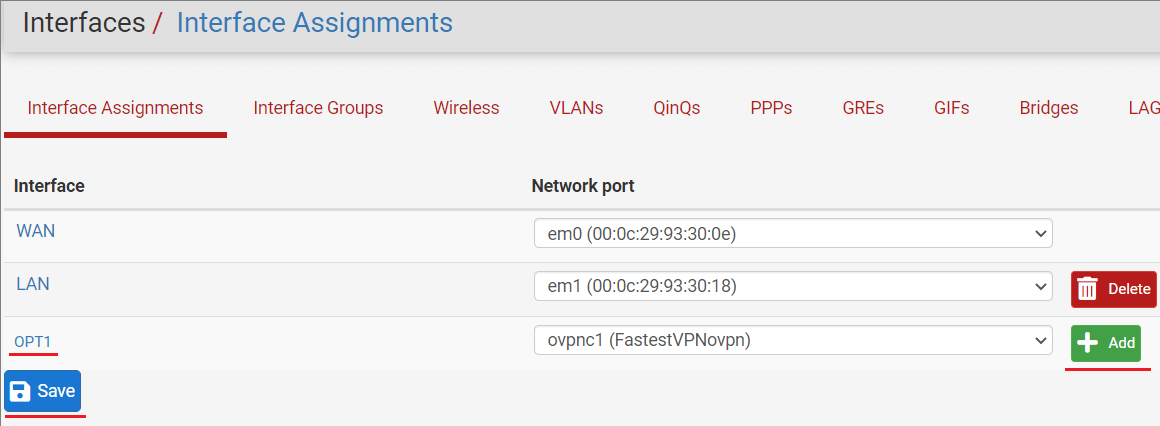
Step # 11: Provide the following information.
- Enable: Checkmark “Enable interface”
- Description: Any name for the interface such as FastestVPN
- Do not change the other fields and click Save and Apply Changes.
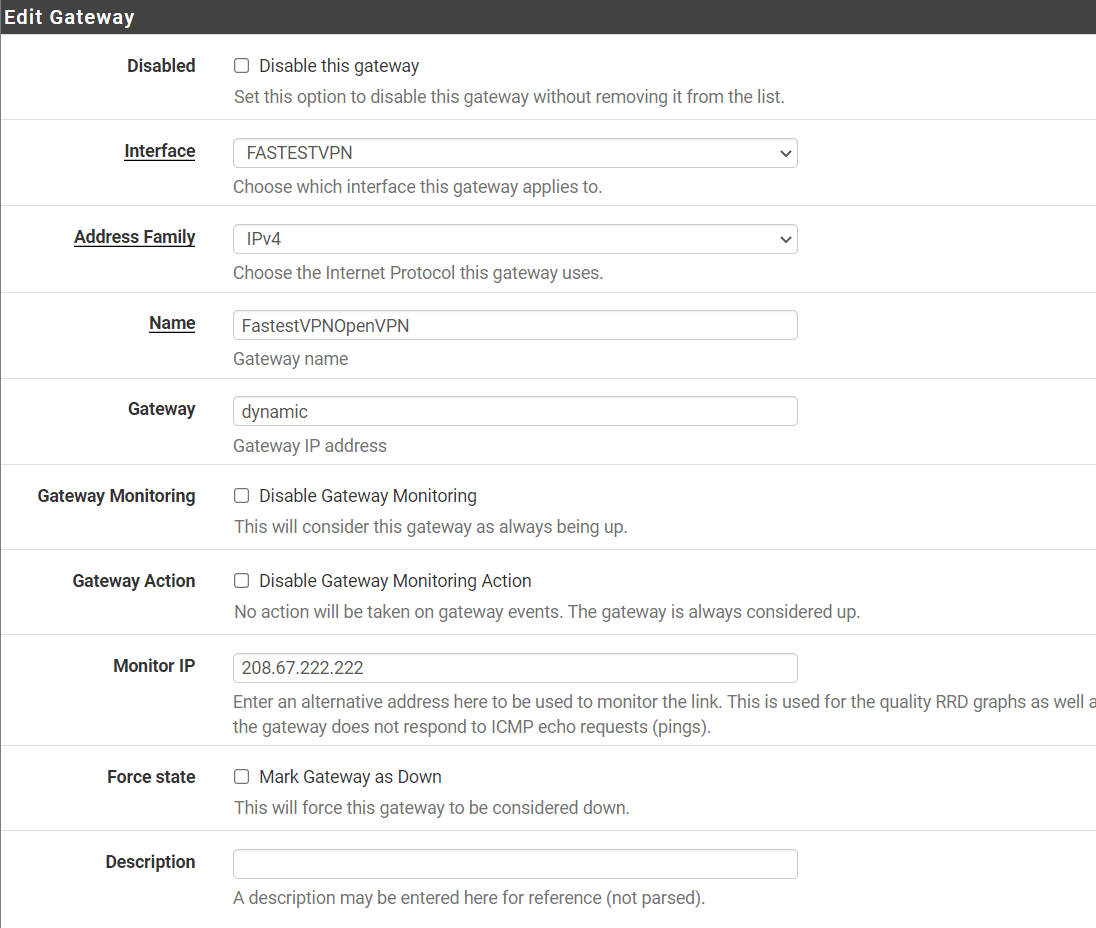
Step # 12: Click System > Routing and then click Add.
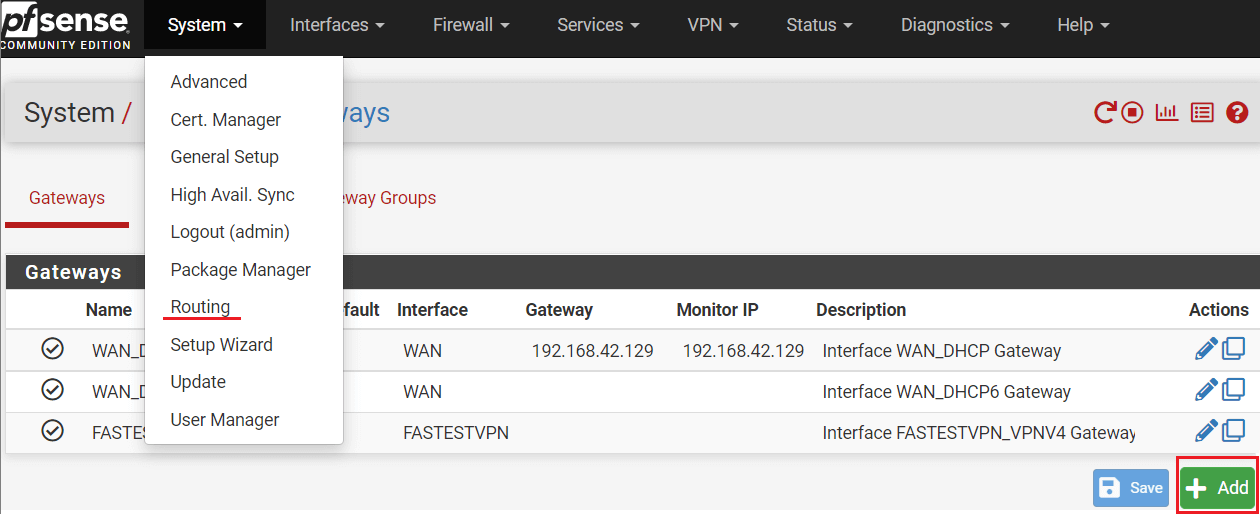
Step # 13: Enter the following information.
- Disabled: Unchecked
- Interface: Select the interface that you created in step # 11, which is “FastestVPN” in this example
- Address family: IPv4
- Name: Give it a name such as “FastestVPNOpenVPN”
- Gateway: Enter “dynamic”
- Monitor IP: Enter 208.67.222.222 or 8.8.8.8
- Do not make any other changes and click Save and Apply changes.
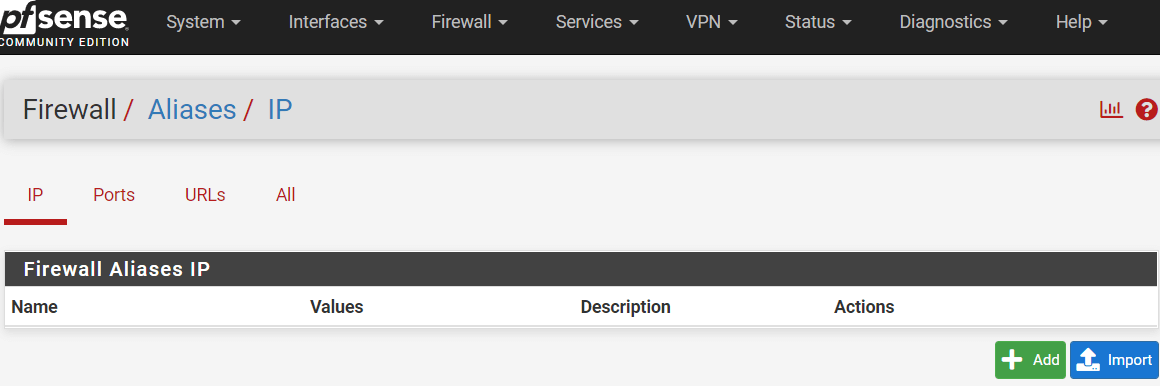
Step # 14: Click Firewall > Aliases > IP and then click Add.
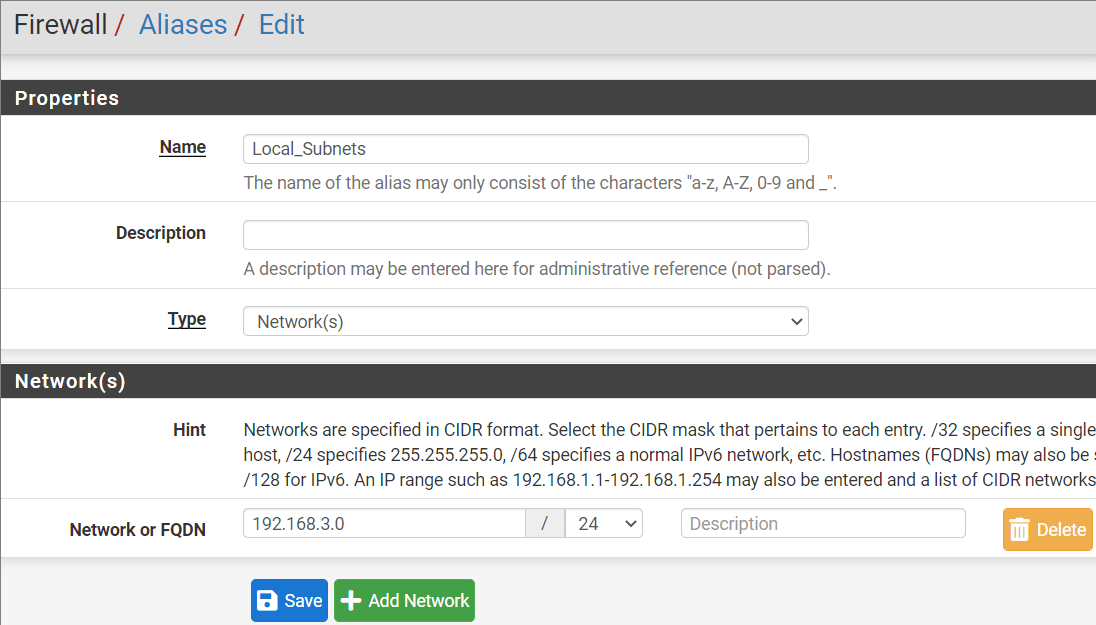
Step # 15: Provide the following information.
- Name: Local_Subnets
- Type: Network(s)
- Network or FQDN: Enter 192.168.3.0 in the first box and 24 in the second box as shown in the screenshot.
- Click Save and Apply changes.
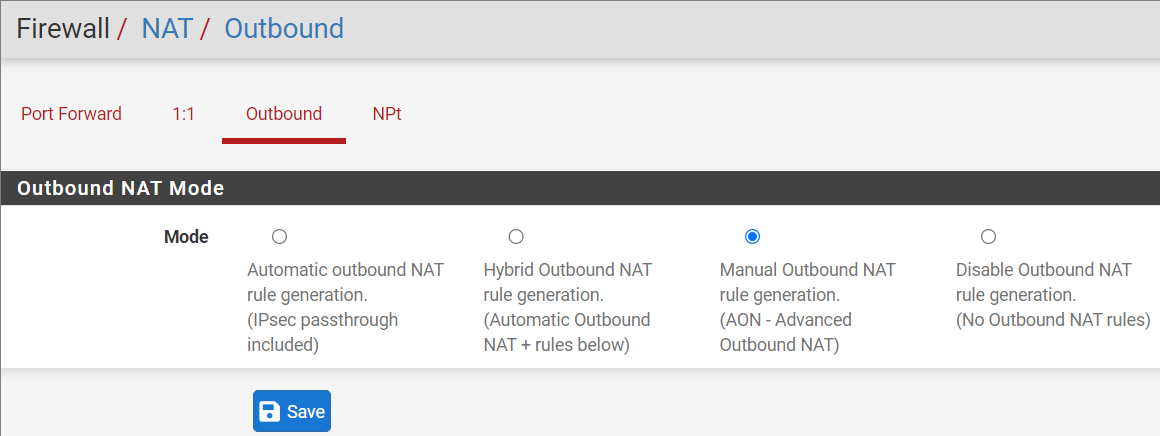
Step # 16: Click Firewall > NAT > Outbound.
Step # 17: Select the “Mode” as Manual and click Save and Apply Changes.
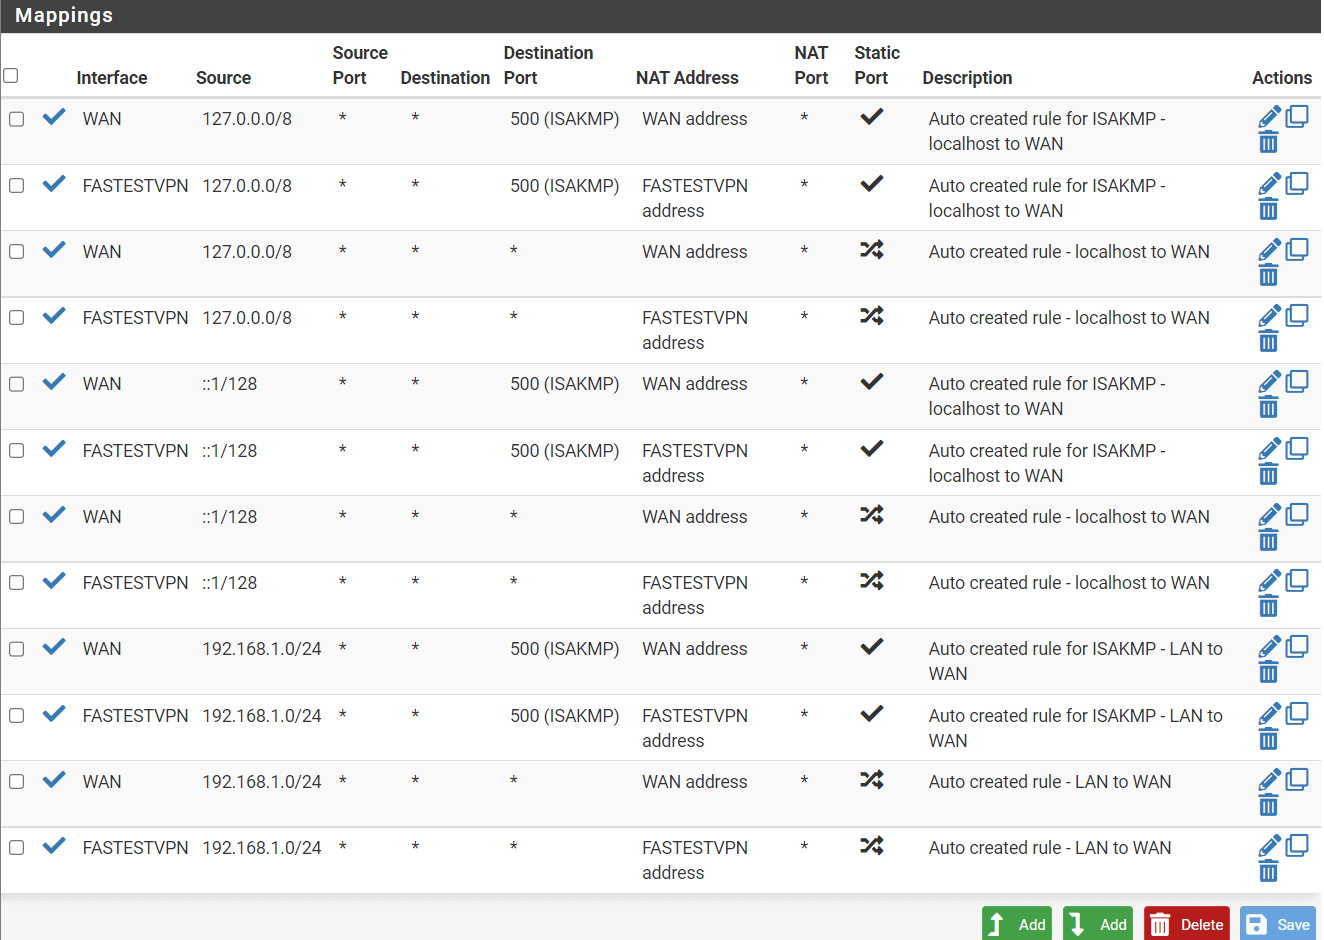
Step # 18: Scroll down to the mapping section. Here you’ll make copies of all the WAN connections one by one. First, click on the “copy” icon next to the first WAN connection.
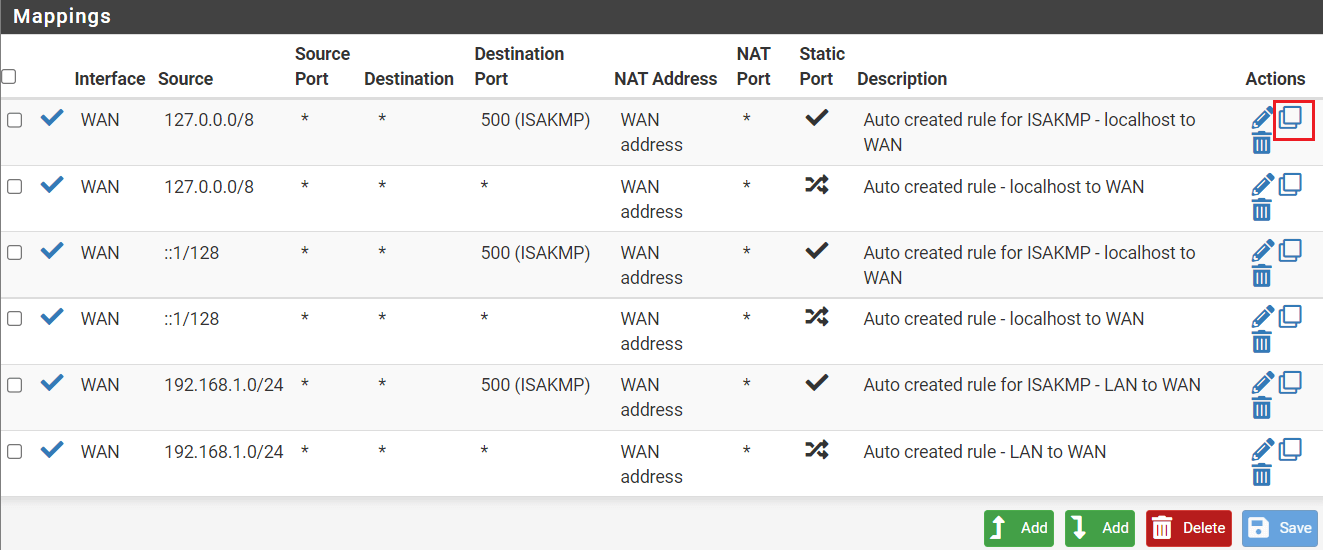
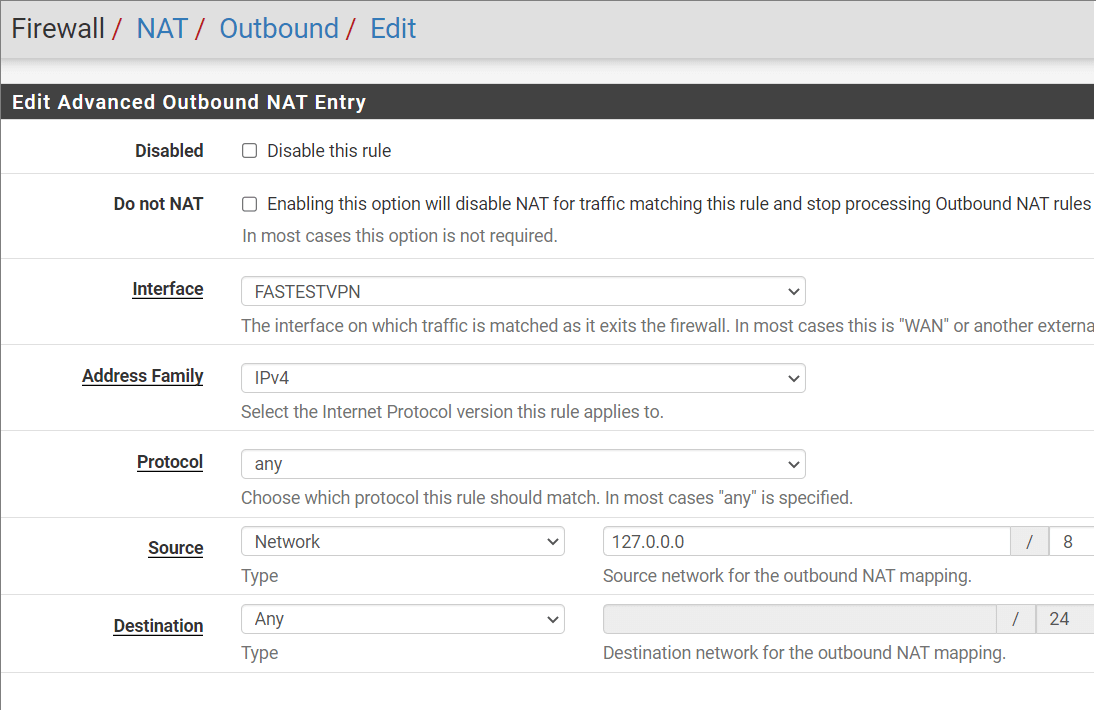
Step # 19: A new page will appear for your copied WAN connection. Here you need to change the “Interface” field to “FastestVPN” as shown in the screenshot. No other changes are required here. Click Save and Apply Changes.
Step # 20: Repeat steps # 18 and 19 for all your WAN connections, i.e make copies of the other WAN connections one by one and change their interface to FastestVPN. Finally, it will look like this.
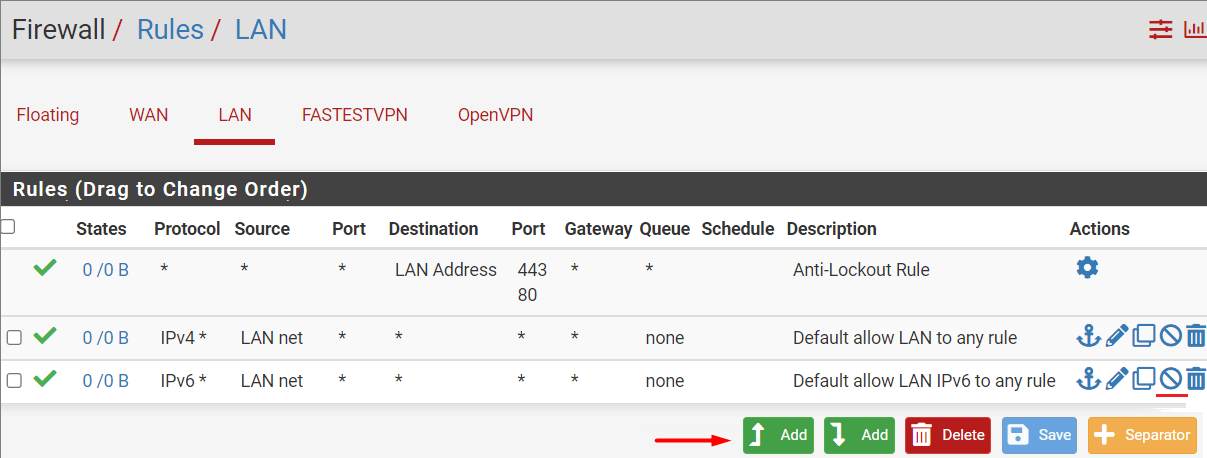
Step # 21: Click Firewall > Rules > LAN. Click on the Disable icon next to the IPv6 rule. Then click on the first Add button.
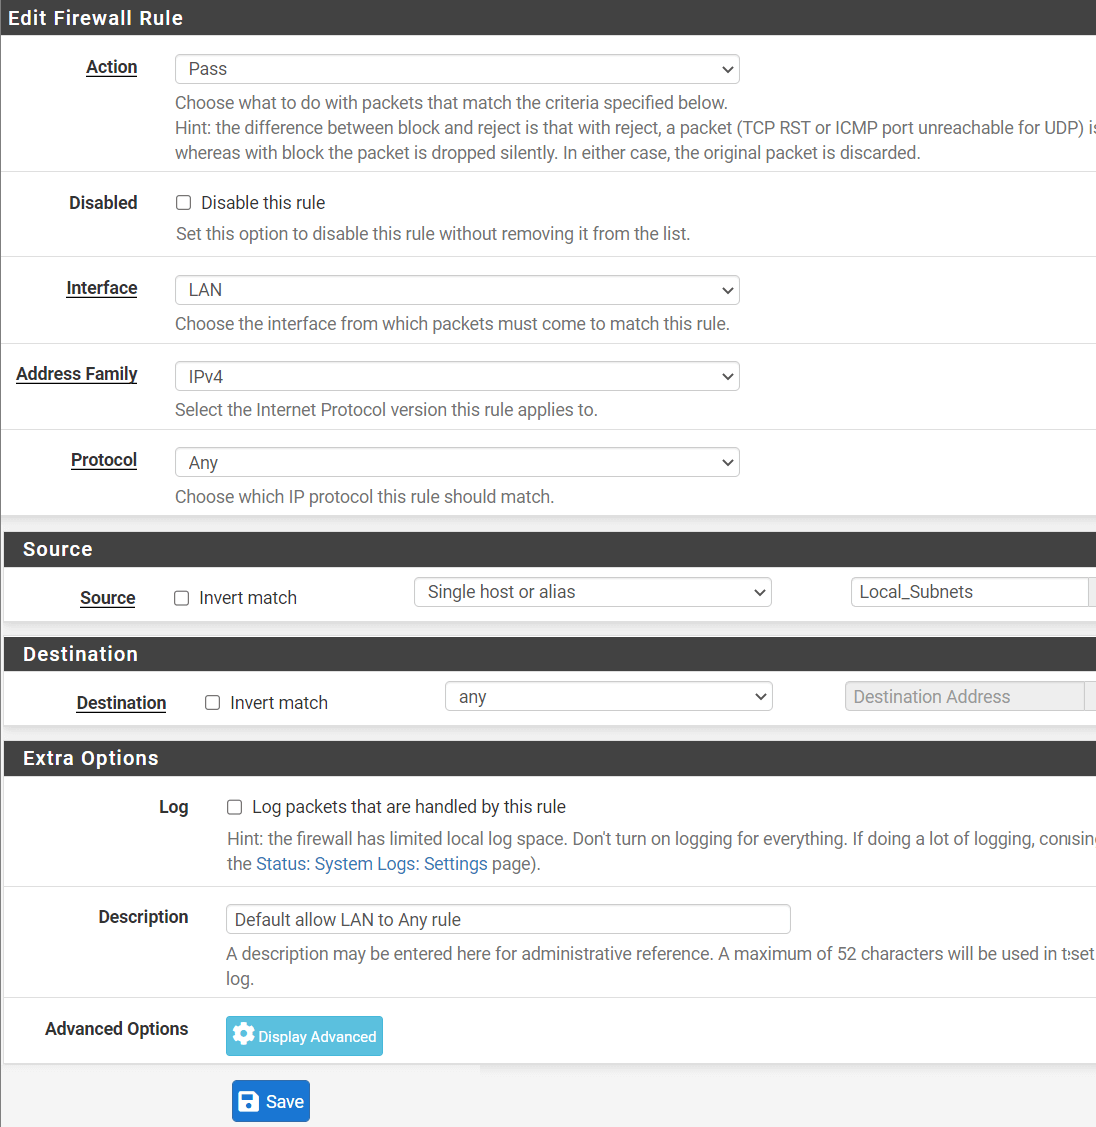
Step # 22: Enter the following information.
-
- Action: Pass
- Interface: LAN
- Address Family: IPv4
- Protocol: Any
- Source: Select “Single host or alias”. Then type Local_Subnets in the box next to it. (same as the “Local_subnets” was taken in Step# 14)
- Destination: Any
- Description: Under the “Extra Options” section, give a description such as “Default allow LAN to Any rule”
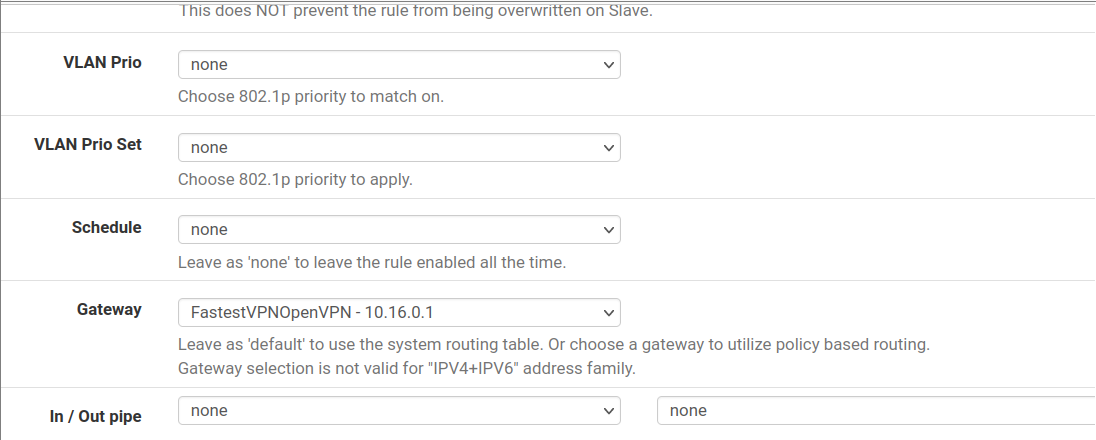
Step # 23: On the same page, click on the Display Advanced button. Scroll down and in the Gateway field, select your respective “FastestVPN” gateway. Do not make any other changes and click Save and Apply Changes.
Step # 24: Reboot your pfSense by clicking on Diagnostics > Reboot.
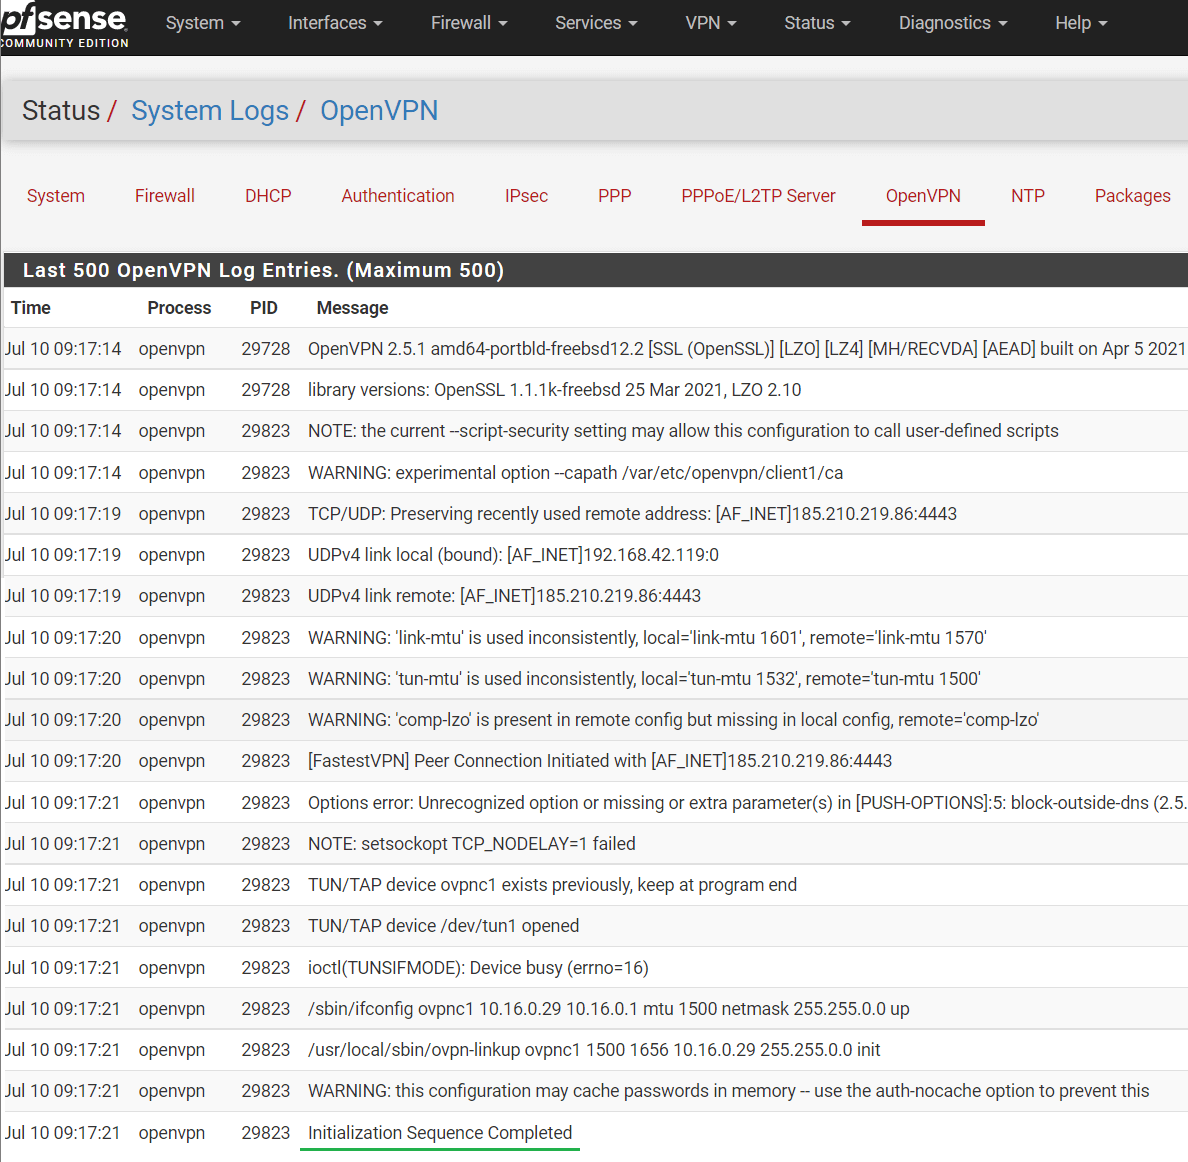
Step # 25: Check the VPN client status from Status > OpenVPN and it should be “UP“.

To Check the OpenVPN logs click Status > System Logs > OpenVPN.
You’ve completed the OpenVPN setup on your pfSense.
To stop the OpenVPN connection when needed, click VPN > OpenVPN. Then under the “Service” column, click the “Stop openvpn service” icon.
Troubleshooting:
–> OpenVPN client is connected and up but there is no internet access.
To troubleshoot this issue, follow the steps given below.
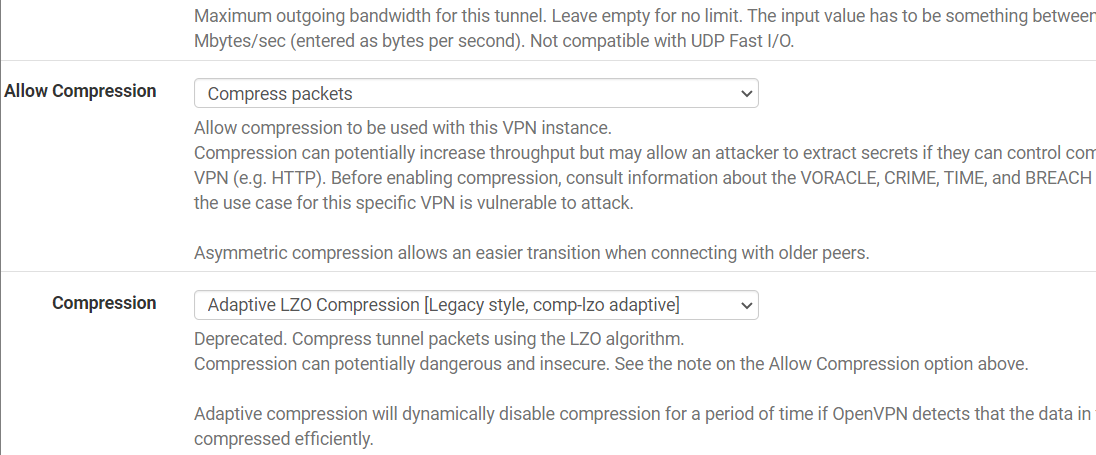
1. Go to VPN > OpenVPN > Clients.
2. Scroll down to the “Tunnel Settings” section. In the “Allow compression” field, select either “Compress Packets” or “Decompress incoming, do not compress outgoing”.
3. Then in the “Compression” field, select “Adaptive LZO compression [Legacy style, comp-lzo-adaptive”].