How to Change the DNS Servers on Windows
Why Change DNS Servrers on Windows?
There are many reasons why you would want to change DNS servers on Windows. Firstly, it helps access multiple restricted websites. Secondly, changing Windows DNS servers aids in private browsing and better speeds while surfing the internet. However, even though it doesn’t work exactly like VPN servers, it might come in handy. Don’t know how to get started? The guide below will show you how.
How to Change DNS Servers on Windows
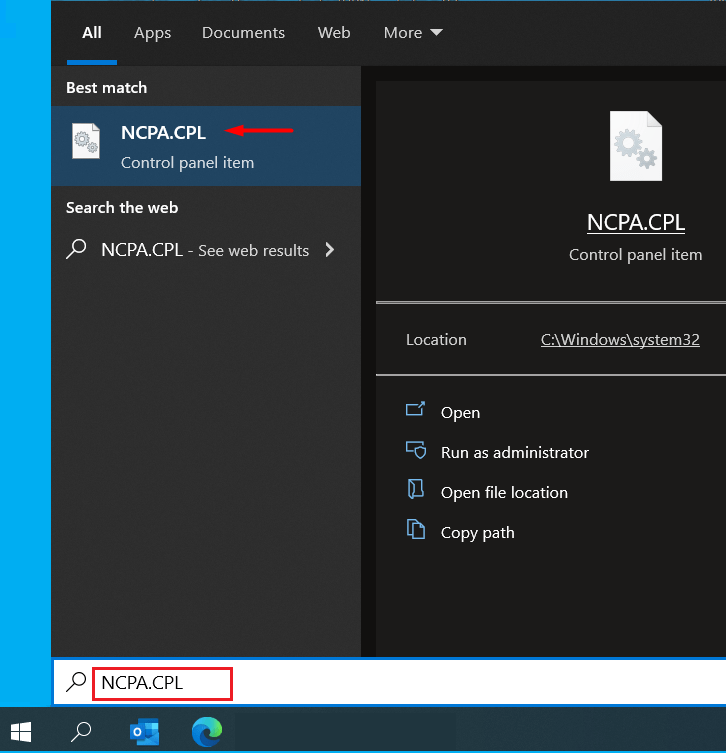
Step #1: Type in NCPA.CPL on Windows search and press the Enter key. It will open Windows “Network Connections”.
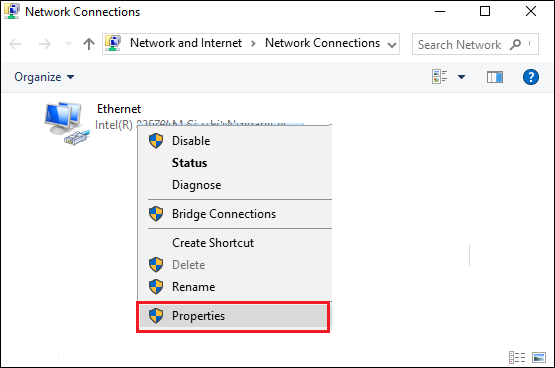
Step #2: Right-click on your active internet connection adapter, (Ethernet/Wireless/ Wifi/ Local Area Connection) and open its properties.
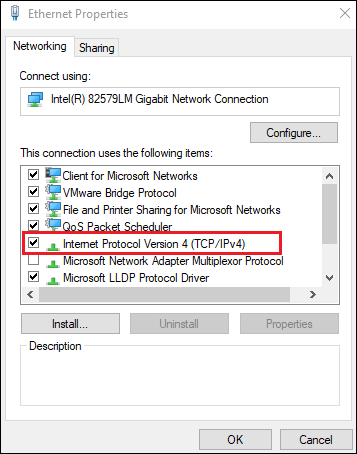
Step #3: Double click on Internet Protocol Version 4 (TCP/ IPv4)
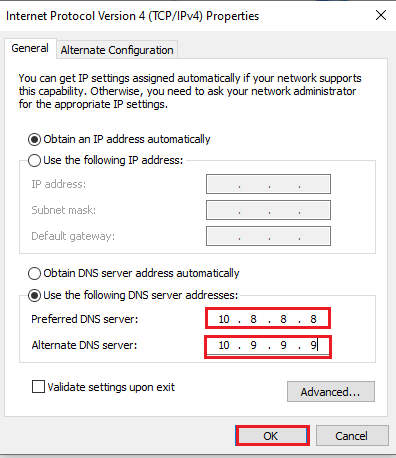
Step #4: Select “Obtain DNS server address automatically”. Then click OK to close the window.

Enter the DNS servers 10.8.8.8 and 10.9.9.9 in the field and then click OK to close the window.
You can now safely connect with FastestVPN to protect any leaks on your Windows.
