Set up iKev2 Manual set up on Windows 8
This tutorial explains how to setup FastestVPN with IKEv2 protocol on Windows 8 using Windows built-in VPN settings
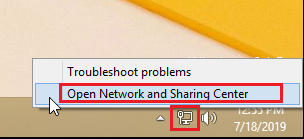
Step #1: Click on your LAN/ WiFi icon on the taskbar and open “Network and Sharing Center”.
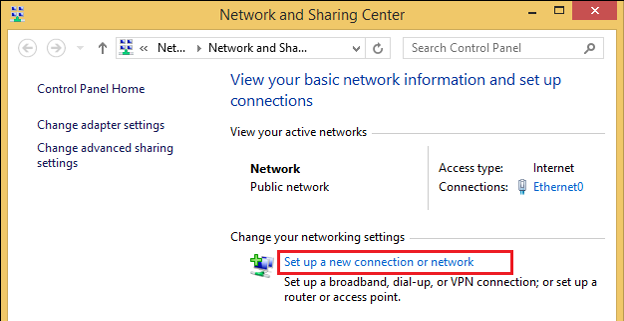
Step #2: Click on Set up a new connection or network.
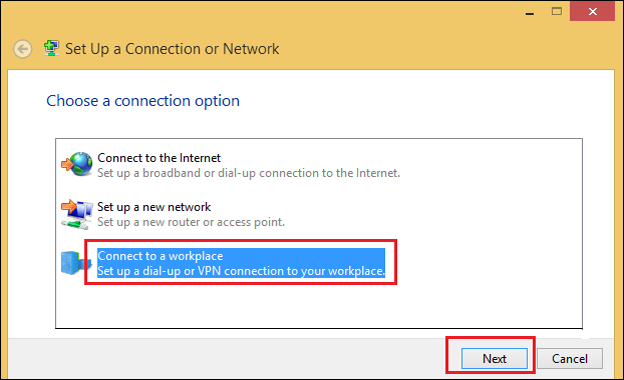
Step #3: Select Connect to a workplace and click Next.
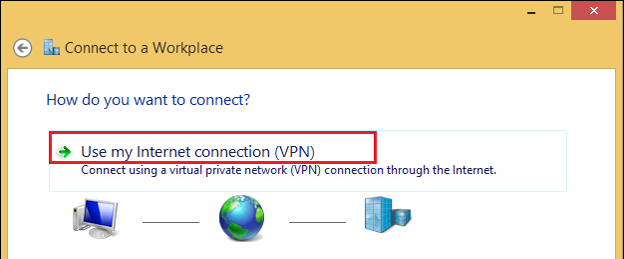
Step #4: Select Use my Internet connection (VPN).
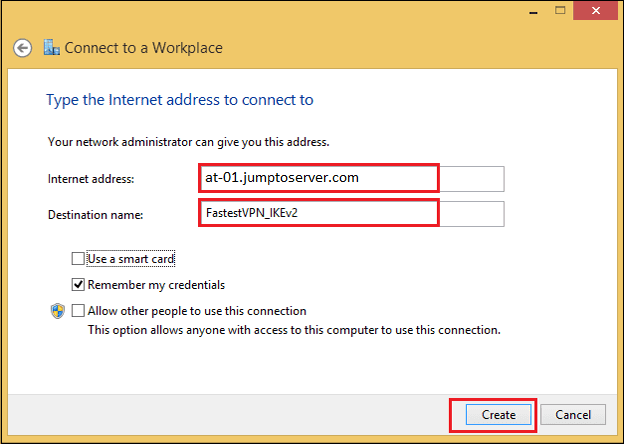
Step #5: In “Internet address” enter your desired FastestVPN server address. For example Singapore: sg-01.jumptoserver.com.
Click here to get FastestVPN server address list.
In “Destination name” enter “FastestVPN_IKEv2” (or whatever you like).
Click on Create.
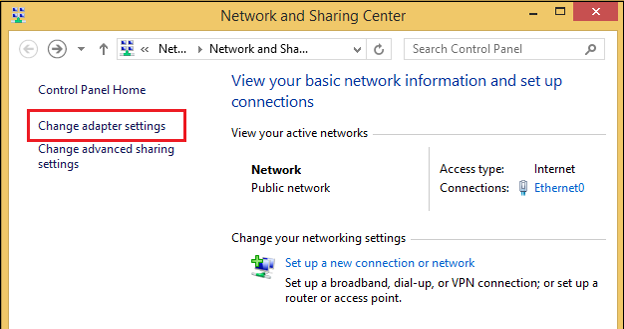
Step #6: Now click on Change Adapter Settings in the Network and Sharing Center.
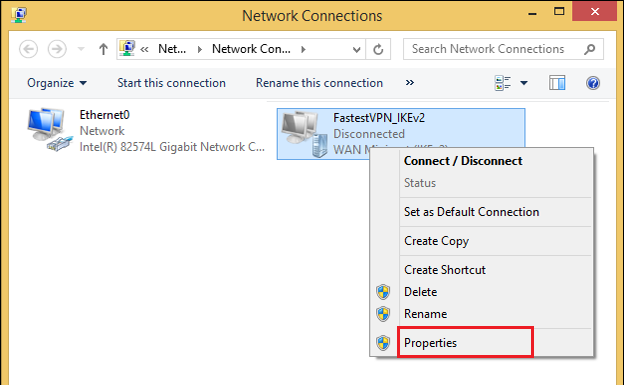
Step #7: Right-click on the VPN profile you just created and click Properties.
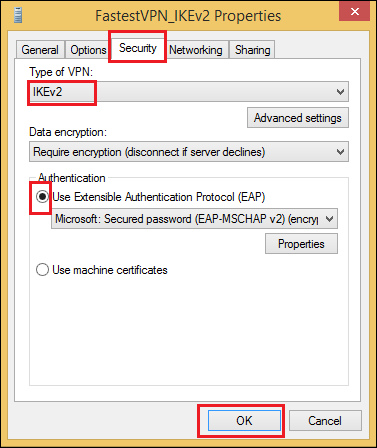
Step #8: Click the Security tab. Select “IKEv2” in Type of VPN.
Enable Use Extensible Authentication Protocol (EAP).
Click on OK to close the “Properties” Window.
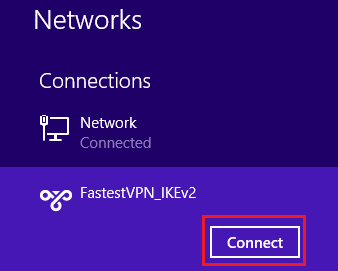
Step #9: Click on the Network icon on taskbar, select your VPN profile and click on Connect.
Step #10: Enter your FastestVPN username and password and click on OK.
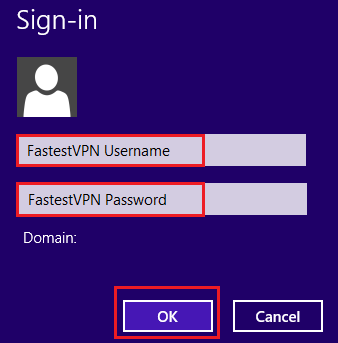
It will be connected shortly.

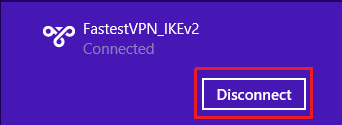
When you need to disconnect from VPN, click on the Disconnect button under your VPN profile.