Manually Set Up OpenVPN for MacOS Using the Tunnelblick Client
OpenVPN for MacOS Using the Tunnelblick Client
Note: Tunnelblick client is only compatible with macOS versions 10.10 and above.
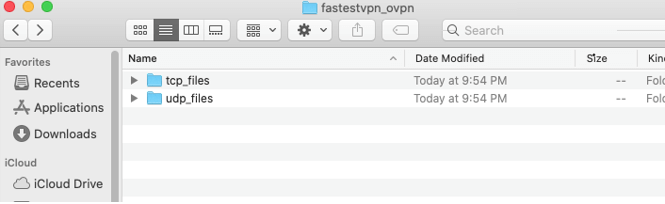
- Click here to install FastestVPN OpenVPN TCP and UDP server configuration files.
- Click this link to install TunnelBlick for Mac. Head to Home>Download the latest stable release.
- Double-click the downloaded file to run the installation process.
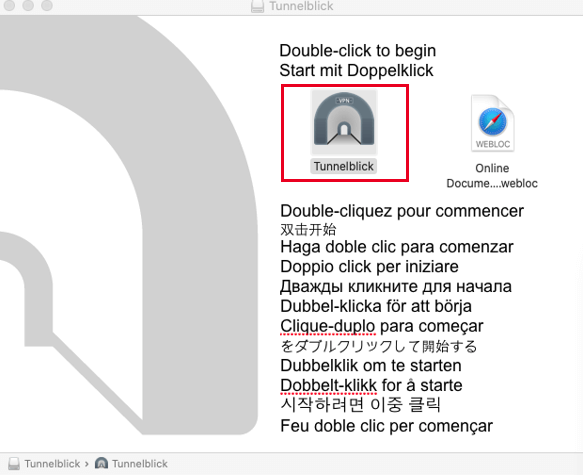
- You’ll see the following screen. Select TunnelBlick.
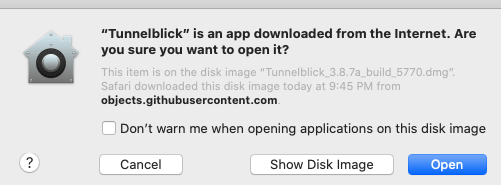
- You’ll be asked for user confirmation. Click on Open.
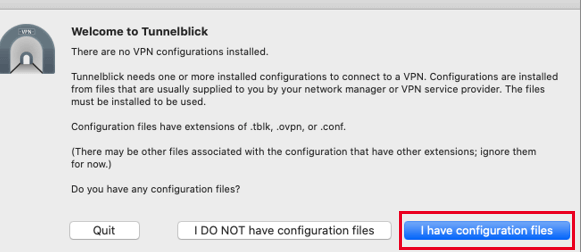
- Once the app opens, select “I have configuration files.”
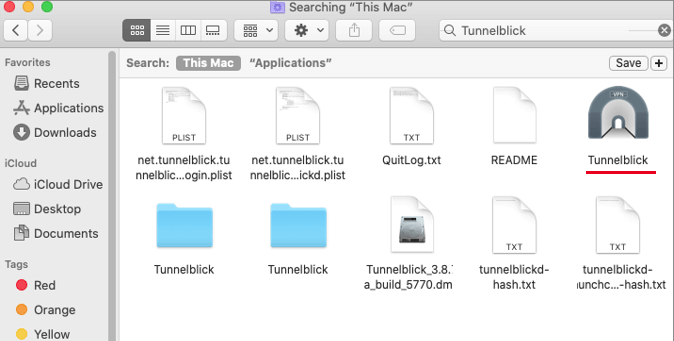
- Go to the Application folder on your device. Find and open the TunnelBlick app by double-clicking the app icon.
- Go to the Downloads folder. Find and unzip the fastestvpn_ovpn file, which you downloaded in the first step of this tutorial.
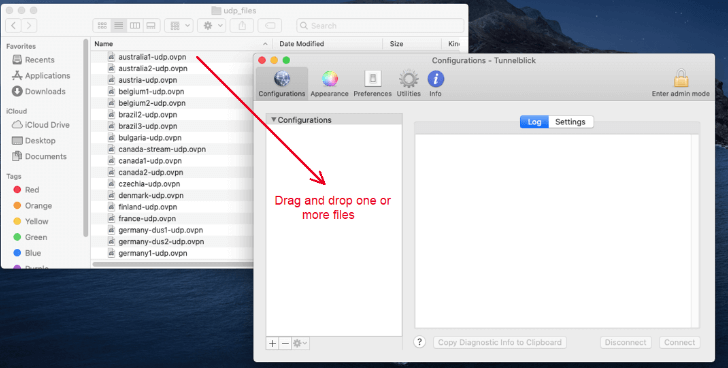
- In the background, you already have the TunnelBlick app open as well. Side by side, open the server files too. Now, drag and drop the server files you plan to use. For example, the Australia and Belgium files.
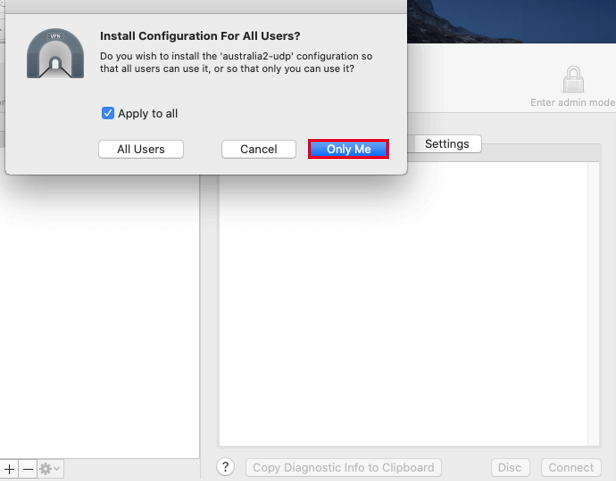
- You’ll see a box mentioning “Install Configuration for all users.” Click on Only Me.
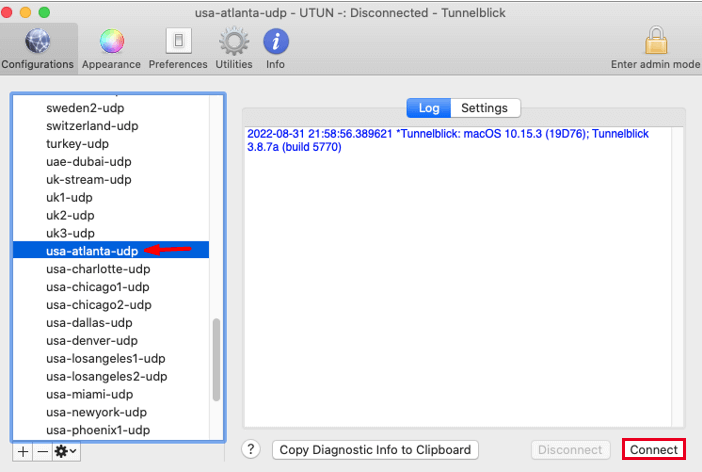
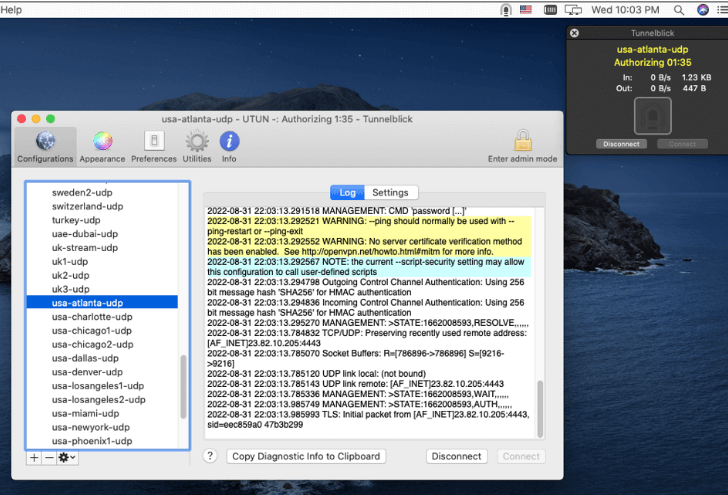
- Maximize the TunnelBlick app screen and select the server location from the files you previously dropped there. Once selected, click on Connect.
- Enter your FastestVPN credentials, i.e., username and password, and checkmark “Save in Keychain” if you want the credentials saved for this specific server. Click on “OK”.
- The connection is now under process.
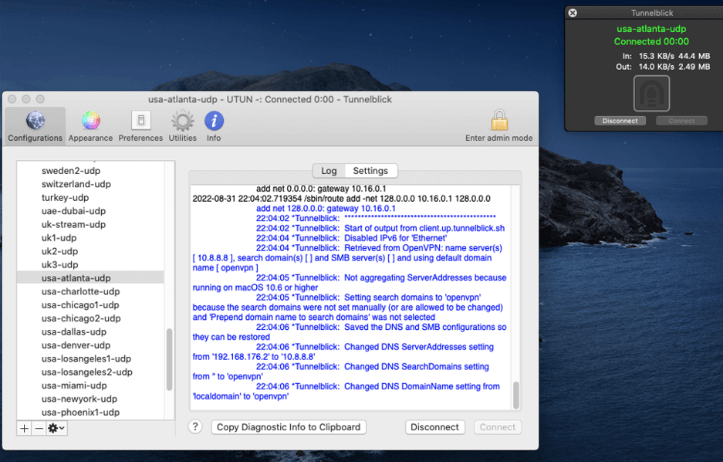
- The VPN has been connected.
Disconnect VPN Using the TunnelBlick Client
If you want to disconnect from the VPN, you can easily do that using the “Disconnect” option. Here’s how you can do that:
- You’ll see a TunnelBlick icon on the Menu Bar of your Mac device. Click on it.

- You’ll see a drop-down menu. The server you’re currently connected to will appear with the option to disconnect. For example, Disconnect USA-Atlanta.
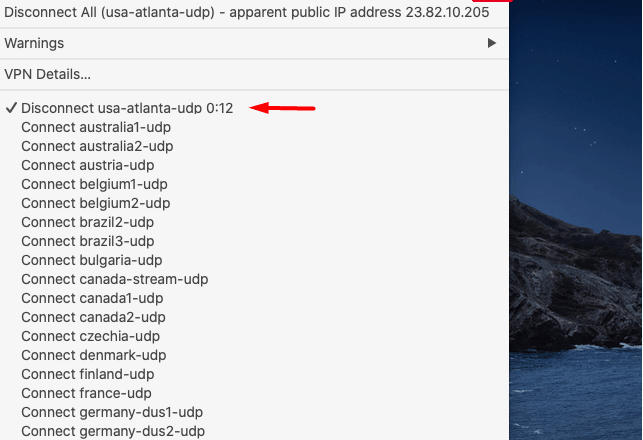
- Click on it. The VPN has been disconnected.
