IPSec VPN Setup for Mac OS X
This tutorial explains how you can manually set up the FastestVPN with Cisco IPSec (Internet Protocol Security) VPN protocol on macOS X
MacOS Compatibility:
- Mac OS 10.7 and later versions
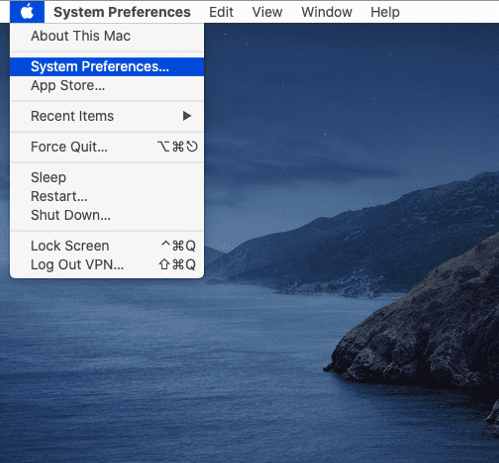
Step #1: Click on the Apple logo and select System Preferences.
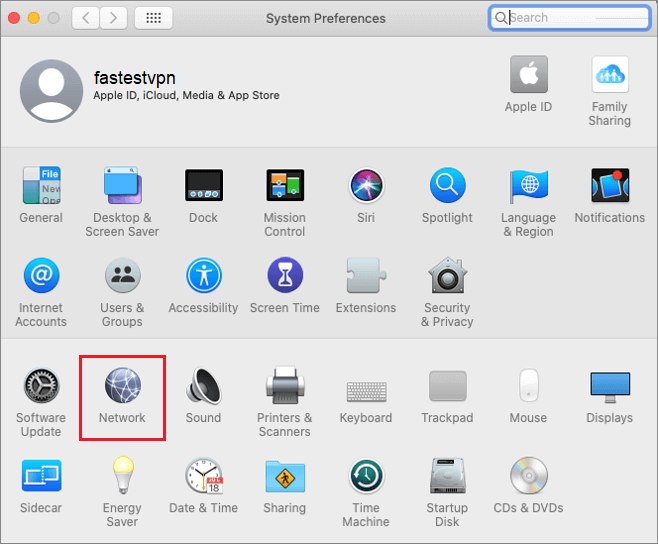
Step #2: Click on Network.
Step #3: Click on the “+” sign to add a VPN connection. Then provide the following info:
- Interface: VPN
- VPN Type: Cisco IPSec
- Service Name: FastestVPN_IPSec (or whatever name you like for your VPN connection
- Click on “Create”

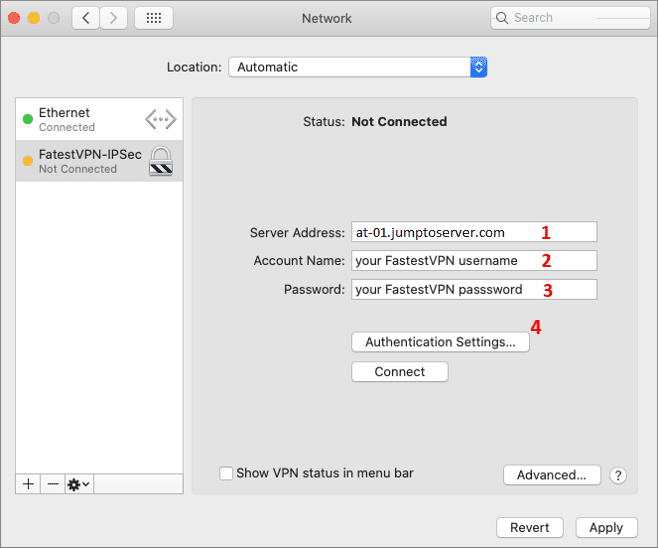
Step #4: Now select your IPSec VPN profile and enter the following details:
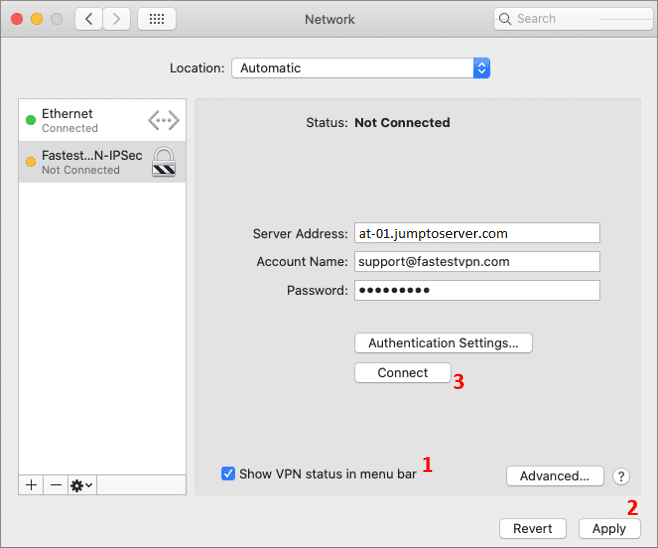
- Server Address: Your desired server address as in this case Austria server address: “at.jumptoserver.com”. Click here to get the complete list of FastestVPN server addresses
- Account Name: Your FastestVPN Username
- Password: Your FastestVPN Password
- Click on “Authentication Settings”
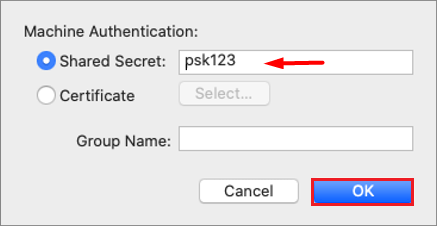
Step #5: In Shared Secret, type psk123 and click OK.
Step #6: Now checkmark “Show VPN status in menu bar”. Click on “Apply” and press the Connect button.
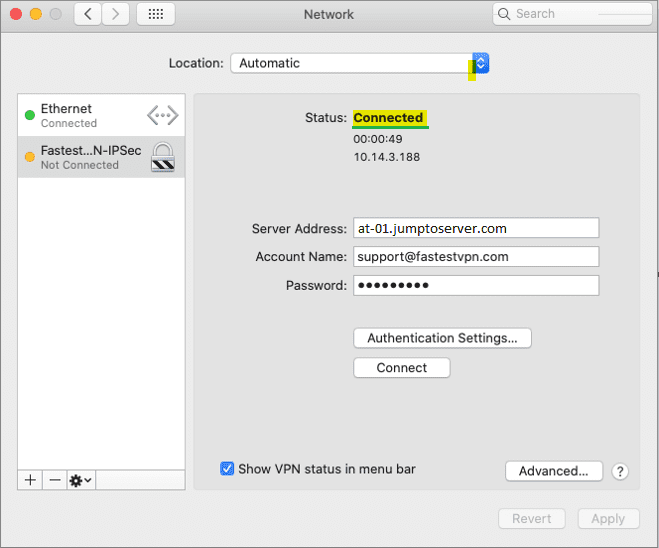
You are Connected to the FastestVPN with Cisco IPSec protocol.
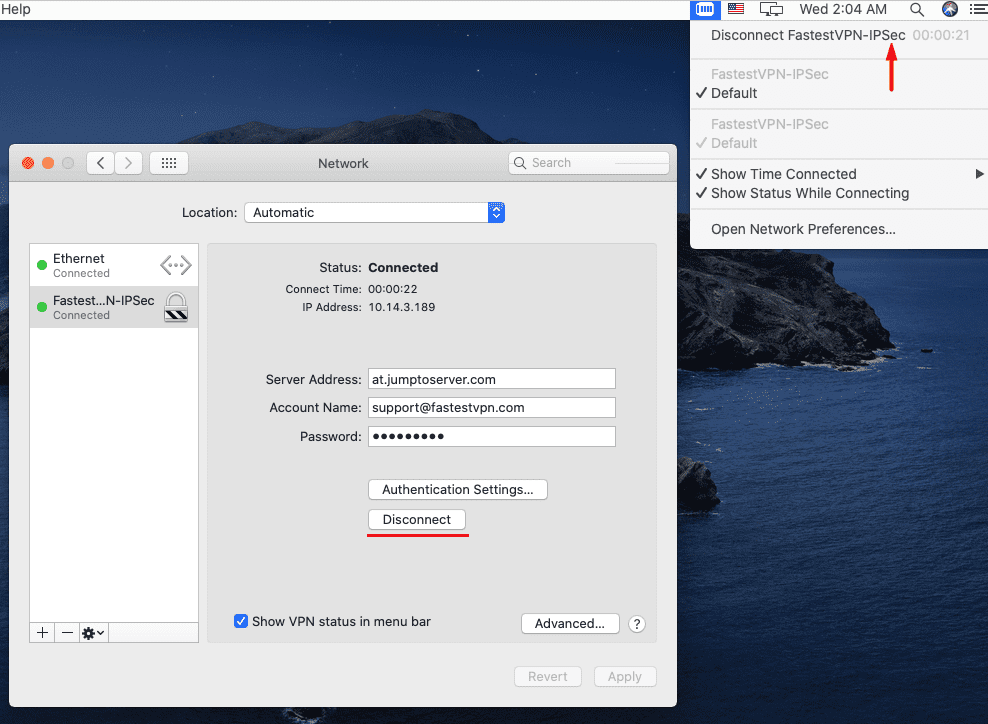
How to Disconnect:
Click on the connected VPN profile name and then click Disconnect.
Useful Tip:
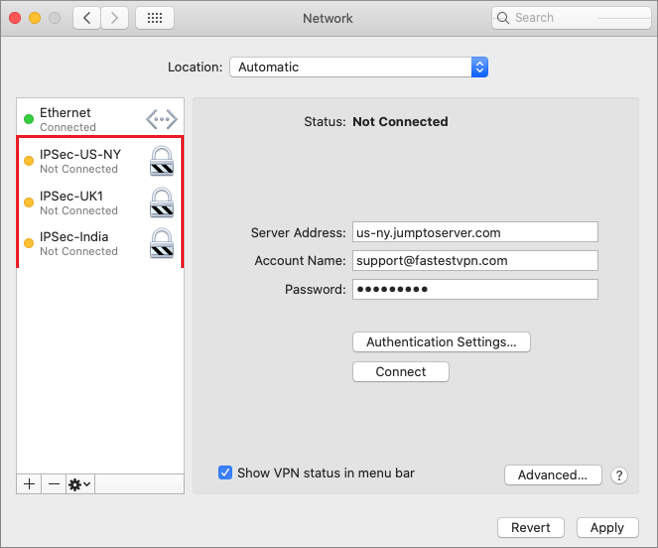
You can create multiple Cisco IPSec VPN profiles and connect to anyone when needed.