How to Configure FastestVPN Using IKEv2 VPN Setup For Mac OS
IKEv2 VPN Setup For Mac OS
Note: FastestVPN is only compatible with Mac OS version 10.11 and above. In this tutorial, you’ll learn how to configure FastestVPN manually using the IKEv2 VPN protocol on macOS.
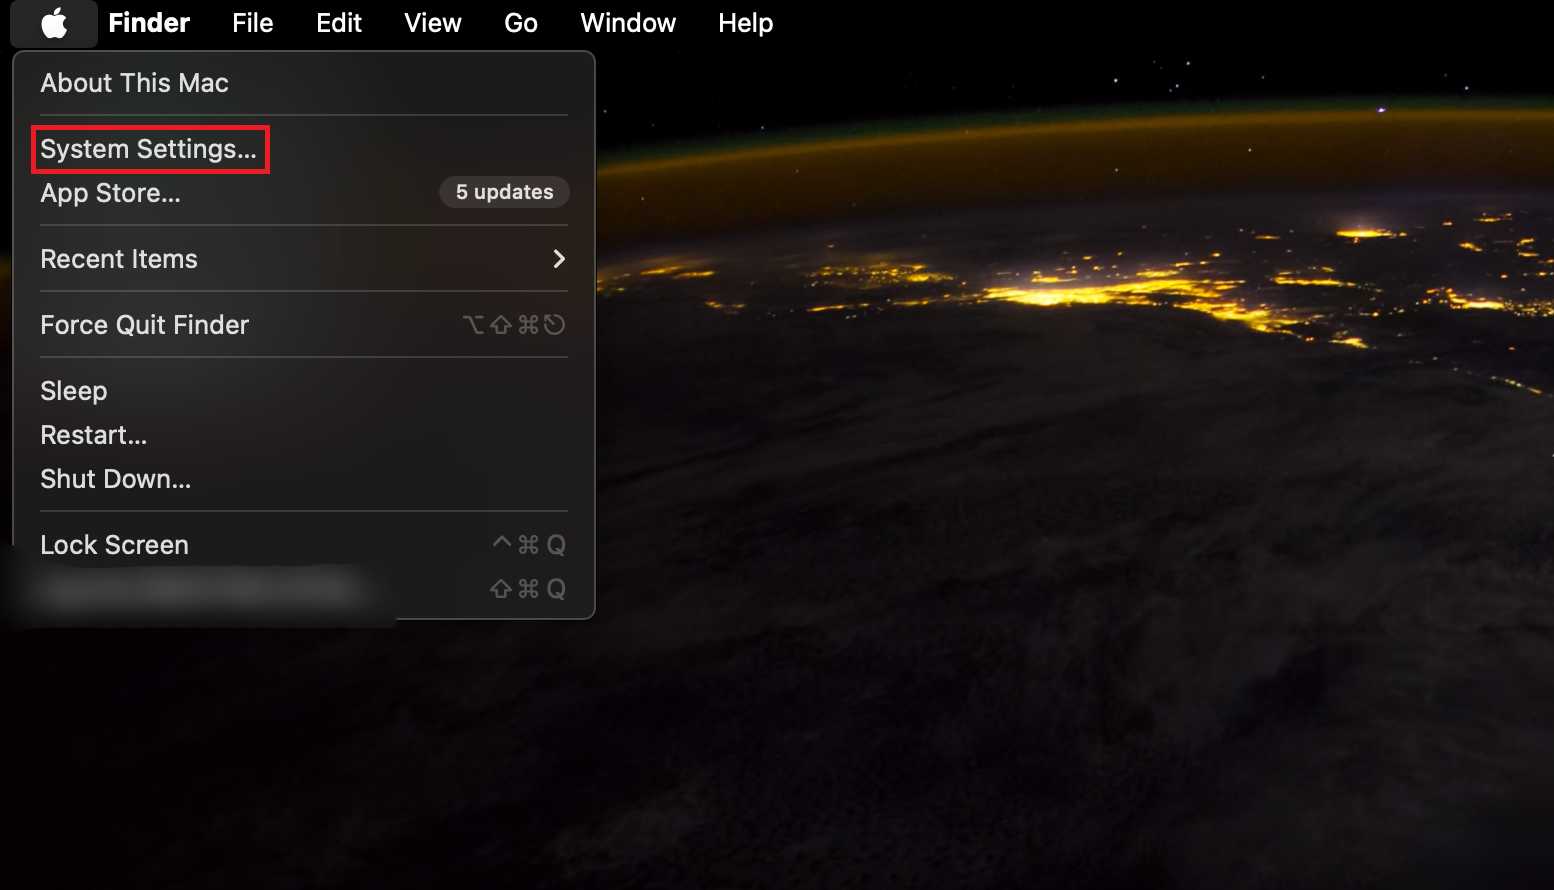
- Find the Apple logo from the top-left of the screen. Click on the logo>System Settings.
- Click on Network.
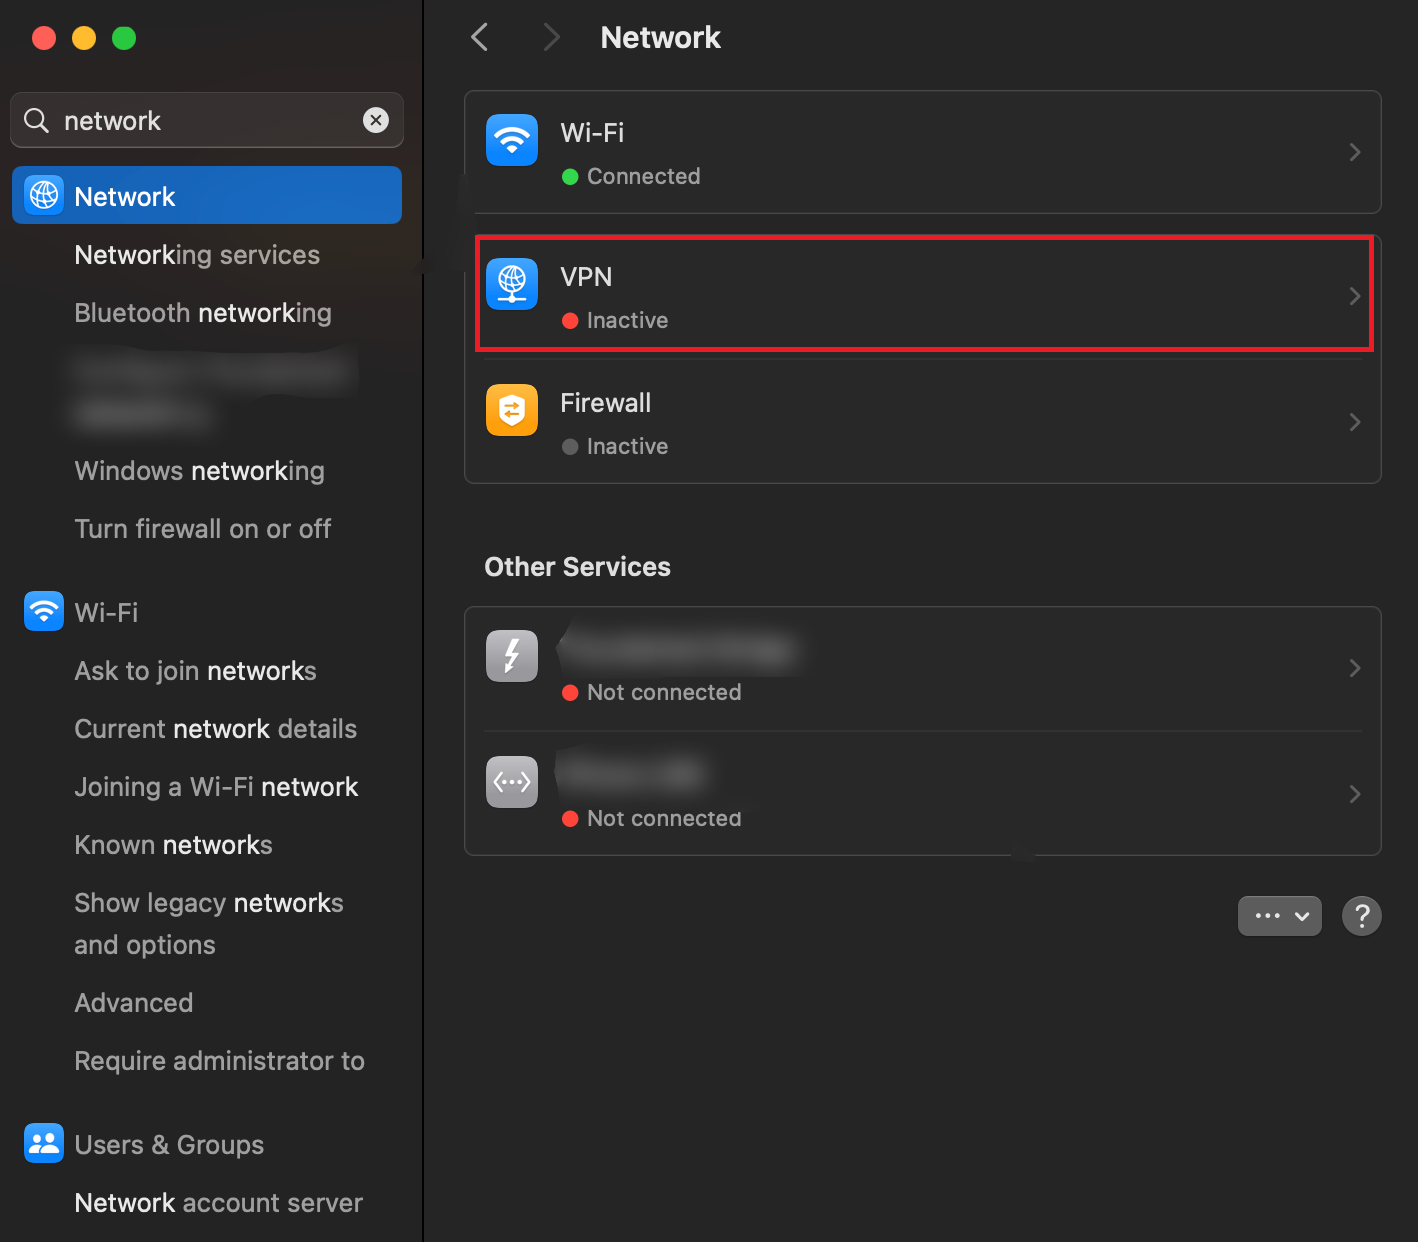
- From the left section, click on + to add a VPN connection.

- Once done, enter the following information:
Interface: VPN
VPN Type: IKEv2
Service Name: FastestVPN_IKEv2 (or whatever name you like for your VPN connection
Click on Create.
- Once the profile is created, click on it.
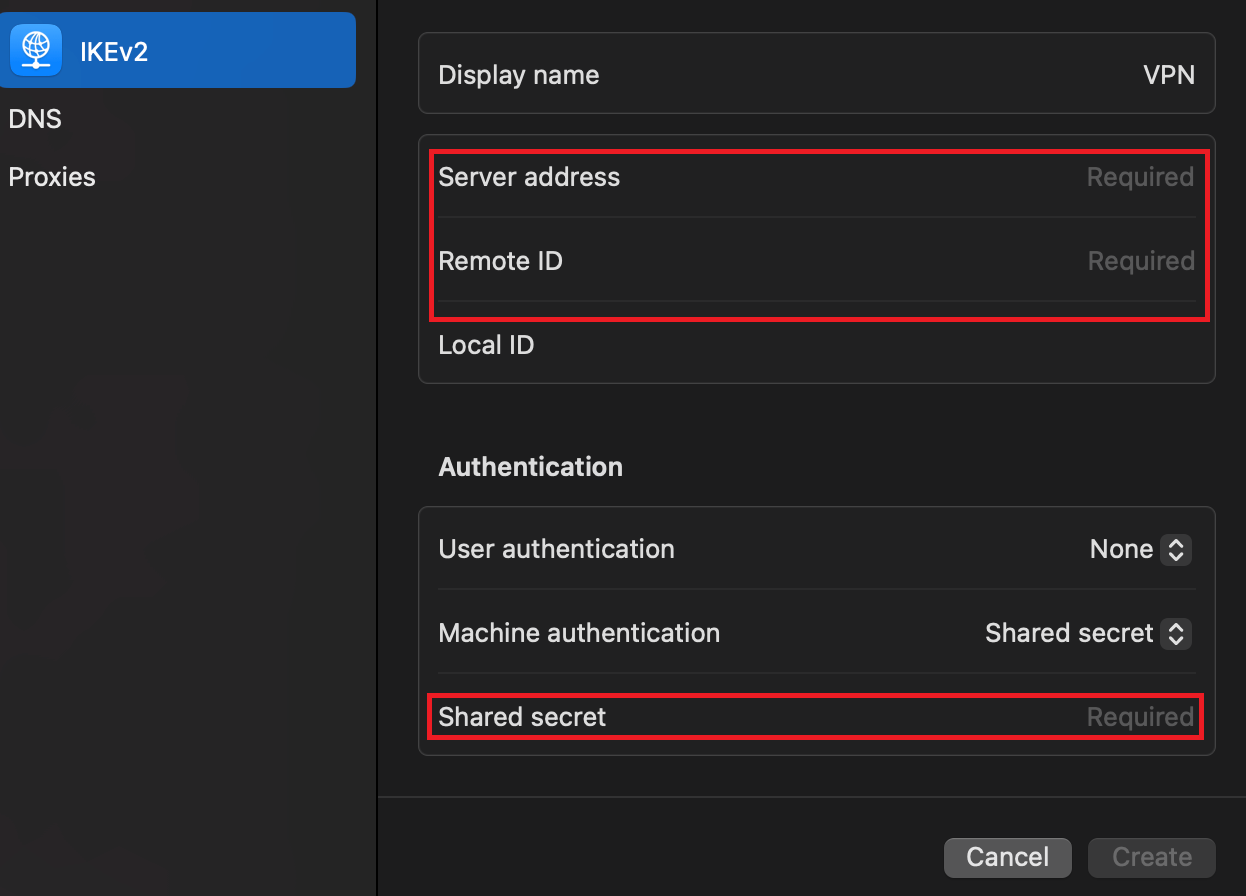
- After the profile opens, enter the following details:
Server Address: Your preferred VPN server address, for example, the “Austria” server address, is at.jumptoserver.com. Click here to get the complete list of FastestVPN server addresses.
Remote ID: Type in jumptoserver.com
- Click on “Authentication Settings”.
- Enter your FastestVPN’s credentials, i.e, the username and password. Click OK.
- Click on the Show VPN status in the menu bar to checkmark the option.
- Click Apply.
You’re now connected to the IKEv2 VPN protocol.
You can disconnect the VPN by clicking on your profile icon from the menu bar. A dropdown menu will appear. Click on Disconnect FastestVPN-IKEv2.
