OpenVPN Setup for Chromebook
This tutorial explains how you can manually set up the FastestVPN with OpenVPN protocol on your Chromebook, Chrome OS, or Chromium OS.
Step #1: Download FastestVPN Config Files for OpenVPN TCP and UDP from here.
Step #2: Press Ctrl+Alt+T on your keyboard to access the Terminal.
Once the terminal is opened, you should see this: crosh>

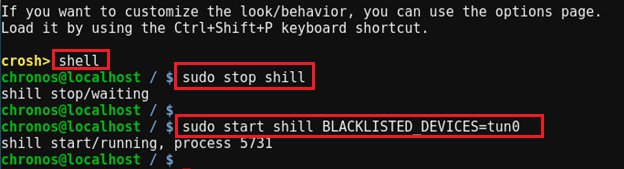
Step #3: Type in these command lines one by one.
shell
sudo stop shill
Wait for around 10 seconds and then enter the next command line.
sudo start shill BLACKLISTED_DEVICES=tun0
Step #4: Now you need to unzip FastestVPN server config files which you downloaded in Step 1. Enter these command lines:
cd ~/Downloads
unzip Fastestvpn_ovpn

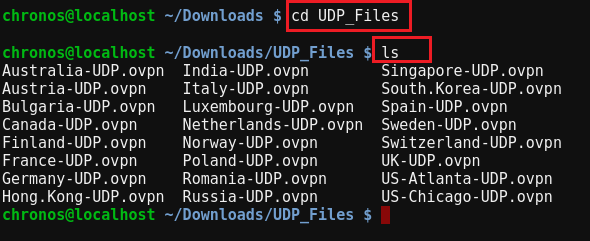
Step #5: Enter this:
cd UDP_Files (OR cd TCP_Files depending on the protocol you want to connect)
ls
It would list all the FastestVPN servers.
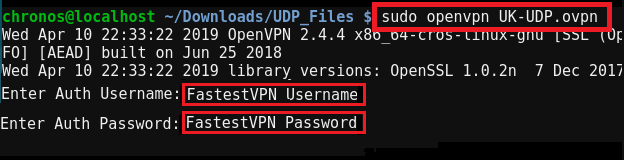
Step #6: Finally, connect to the VPN by entering this command line: sudo openvpn [Your desired server name]
Example: sudo openvpn UK-UDP.ovpn
Then enter your FastestVPN username, then password respectively.
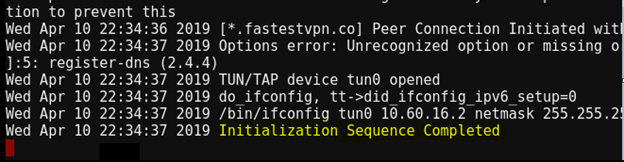
Once the highlighted message “Initialization sequence completed” appears that means you are connected to the OpenVPN on Chromebook.
To further confirm that you are connected to the VPN, visit
fastestvpn.com/what-is-my-ip OR iplocation.com and you should find the VPN server IP and location instead of your actual info.
Note: Do not close the terminal tab till you are using the VPN,
To Disconnect the VPN, press Ctrl+C on the same terminal.
If you are unable to browse the internet or some websites after connecting to the OpenVPN on Chrome, then read the directions given below.
Unable to Browse After Connecting to OpenVPN on Chrome OS?
Follow the steps given below after connecting to VPN if there is no or partial browsing.
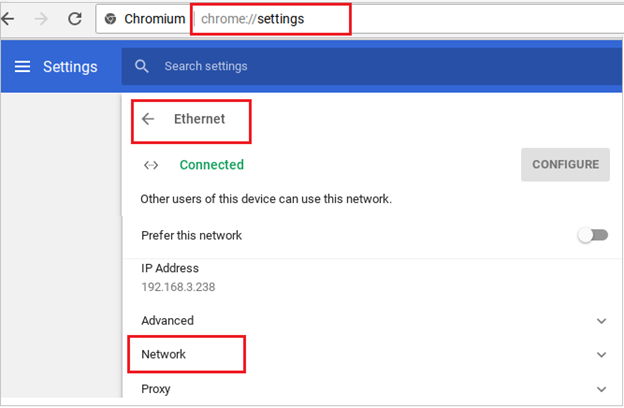
Open Chrome Settings chrome://settings/
Click on your Internet Connection (Ethernet or WiFi)
Select “Network”
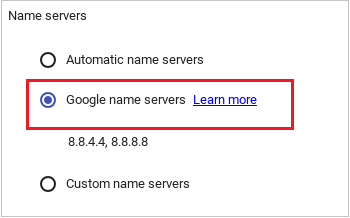
Select “Google name servers” and click anywhere outside the Network section to save the settings.
Alternatively, you can also add any other DNS to the “custom name servers” field such as OpenDNS addresses are entered in the screenshot below.
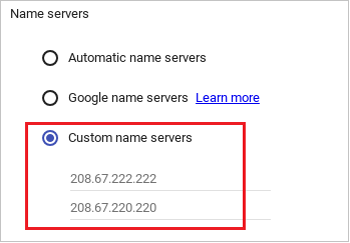
You can also add FastestVPN DNS addresses after connecting to the VPN which are 10.8.8.8 and 10.9.9.9 respectively. However, after disconnecting from VPN, remove them and select “Automatic name servers” otherwise you might be unable to browse the internet.
Enjoy Complete Online Freedom with the FastestVPN Speed!!
