Synology NAS (L2TP)
This tutorial explains how you can set up the FastestVPN on Synology NAS DiskStation Manager (DSM) with the L2TP protocol. Follow these steps to set up the NAS VPN.
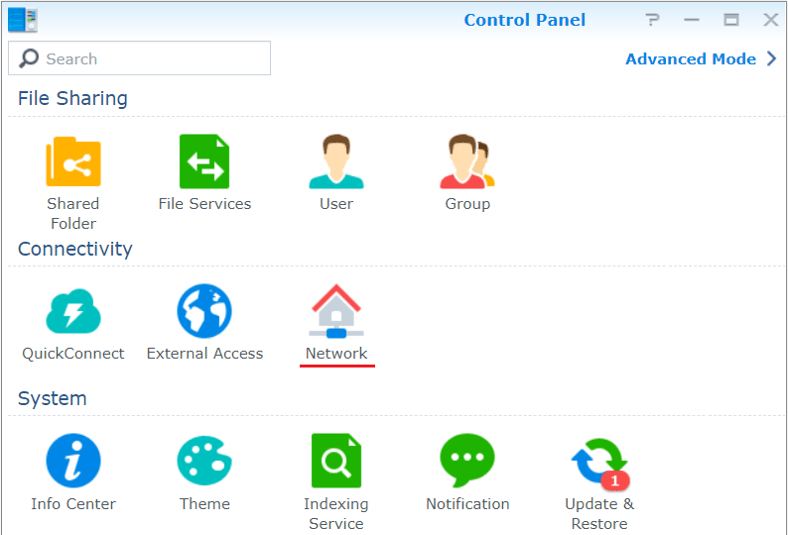
Step #1: On your DSM dashboard, open Control Panel and then click Network.
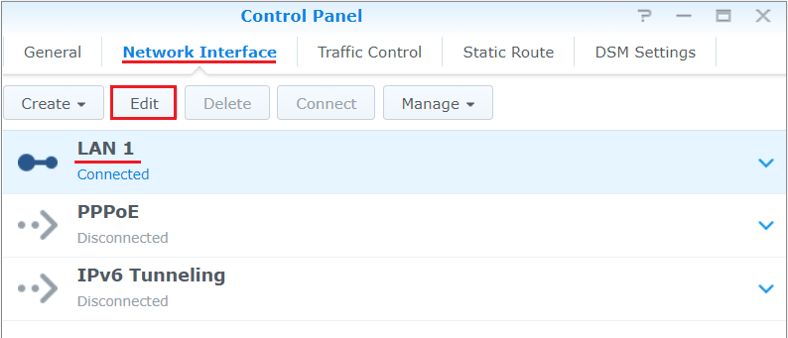
Step #2: Click the Network Interface tab. Click LAN and then click the Edit button.
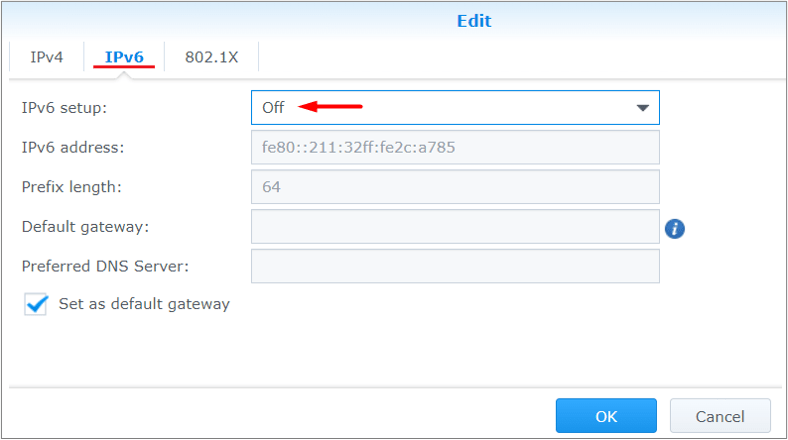
Step #3: Click the IPv6 tab and turn off the IPv6. Then click OK.
Step #4: Reboot your Synology.
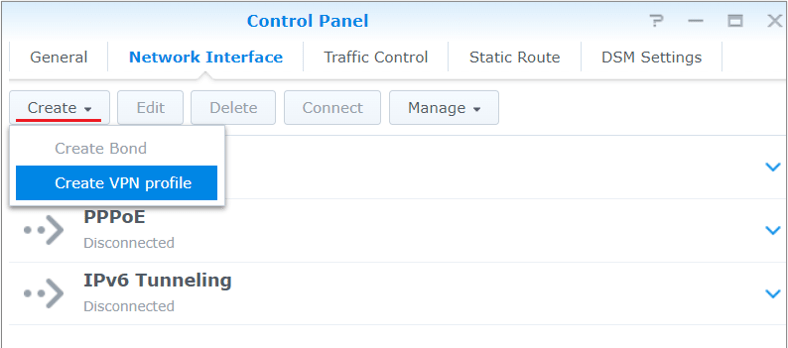
Step #5: Click the Network Interface tab and click Create > Create VPN Profile.
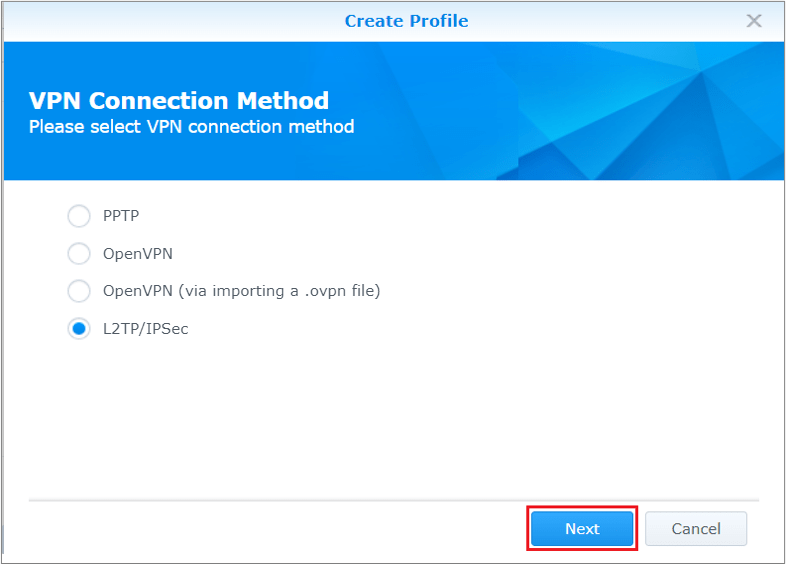
Step #6: Select L2TP.
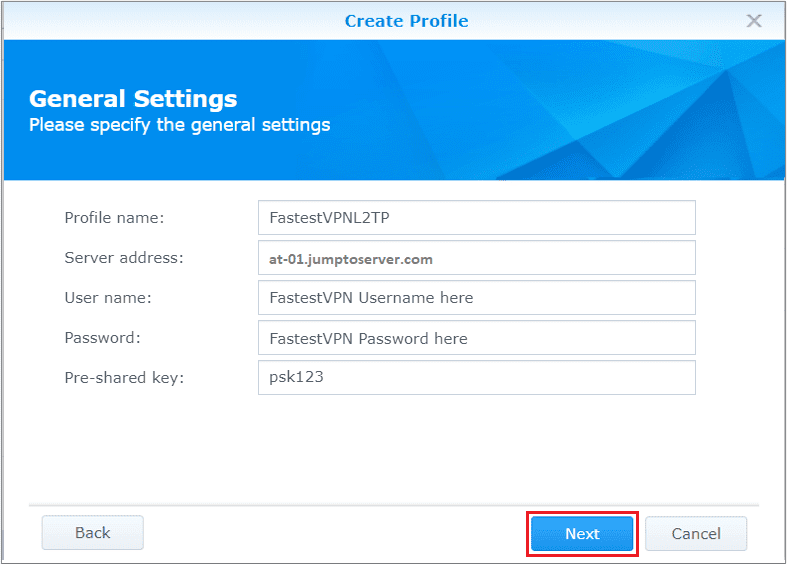
Step #7: Provide the following info:
- Profile name: Any name for the VPN such as “FastestVPNL2TP”
- Server address: Enter your desired FastestVPN server address. As In this case Austria server address at-01.jumptoserver.com. Click here to find the complete server list.
- User name: Your FastestVPN username
- Password: Your FastestVPN password
- Pre-shared key: psk123
- Click Next
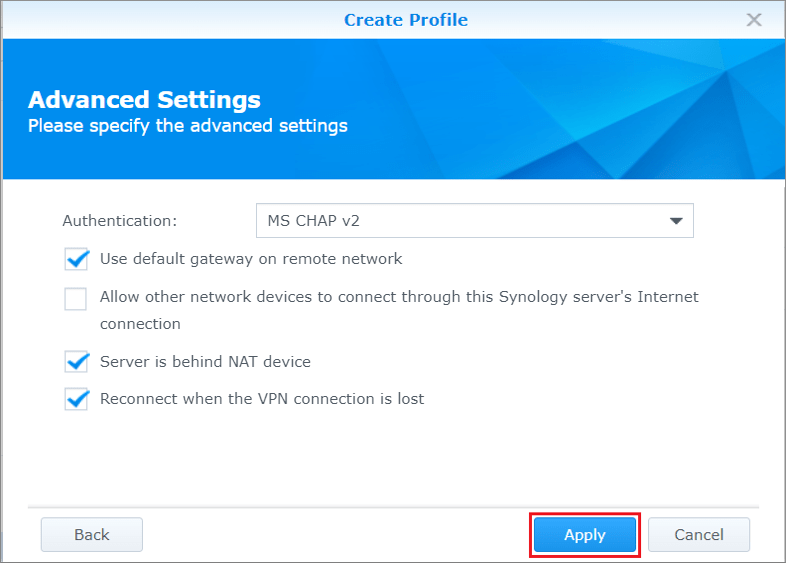
Step #8: Provide the following info:
- Authentication: MS CHAP v2
- Use default gateway on remote network: Checked
- Allow other network devices to connect: Optional, depending on your preference
- Server is behind NAT device: Checked
- Reconnect when the VPN connection is lost: Checked
- Click Apply
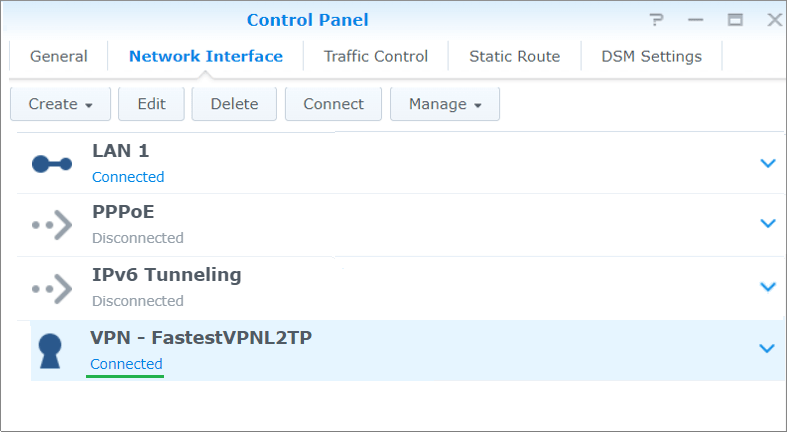
Step #9: Your FastestVPN L2TP profile has been created. Click on it, and then click Connect
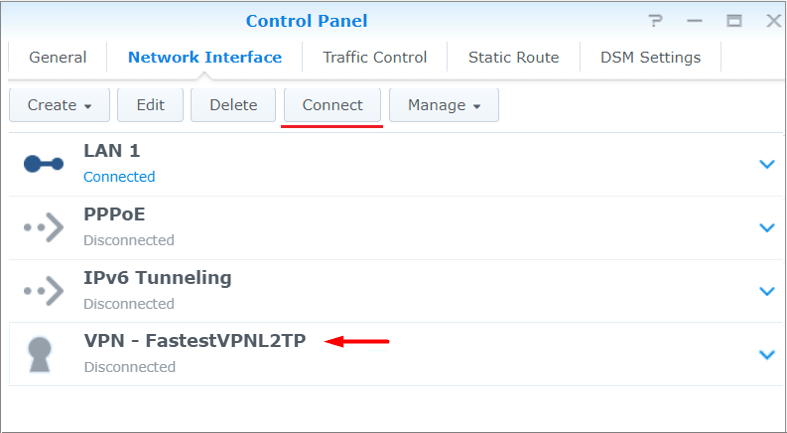
FastestVPN has been connected on your Synology NAS with the L2TP protocol.