How to Set up FastestVPN on Asus Router With OpenVPN
This tutorial explains how you can set up the FastestVPN on Asus Router with the OpenVPN protocol. Follow these steps to set up the Asus Router VPN.
Step #1: On a browser address bar, enter router.asus.com. Sign in with your router’s login username and password. By default, both of them are admin.
Step #2: Download FastestVPN OpenVPN server config files from here. Extract the downloaded folder.
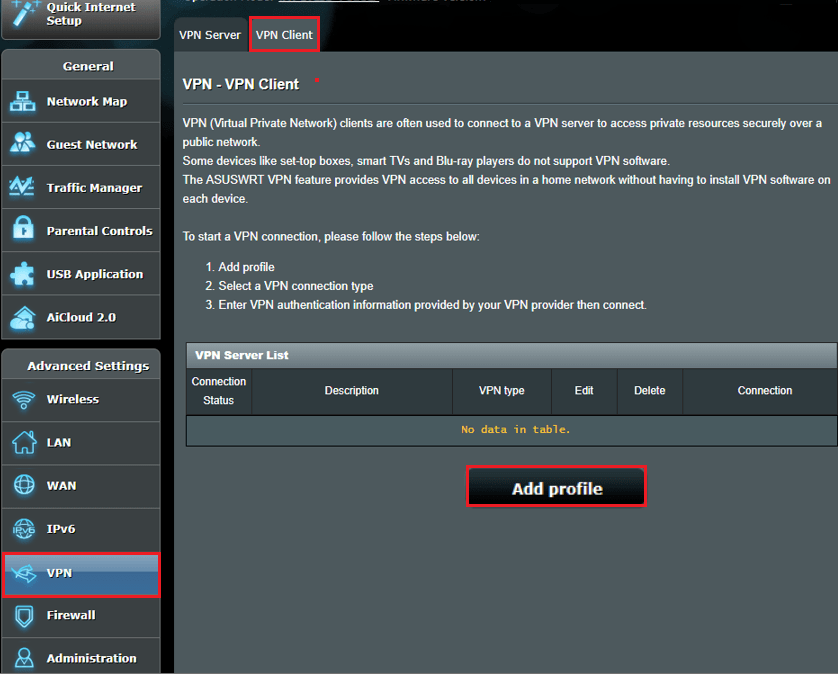
Step #3: On the Asus router configuration panel, click on VPN on the left sidebar. Then click VPN Client tab and click Add profile.
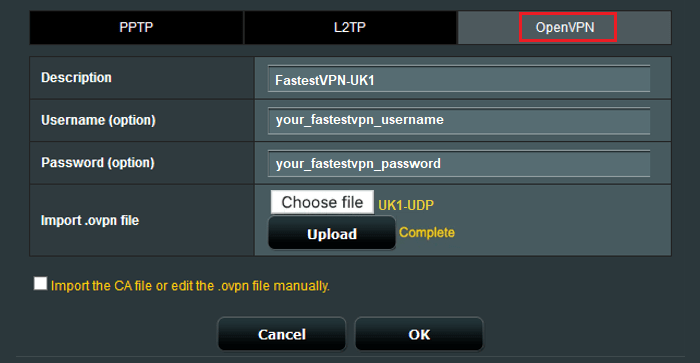
Step #4: Click “OpenVPN” and fill out the details as given below:
- Description: Any name for your VPN connection. Such as FastestVPN-UK1 in this case
- Username: Your FastestVPN Username
- Password: Your FastestVPN Password
- Import .ovpn file: Click the “Choose File” (or Browse) button. Then navigate to the location where you saved your unzipped configuration files earlier. Select your desired file such as “UK1-UDP”.
- Click the Upload button. A “Complete” message would appear.
- Click OK
Step #5: Click Activate to initiate the OpenVPN connection.

Once the blue checkmark appears under the “Connection Status” column, that means you are connected to the FastestVPN on your Asus router.

To find the IP address after conencting to VPN, visit fastestvpn.com or theipinfo.com.
To disconnect from FastestVPN, click on the “Deactivate” button in the “VPN Server List” section
