How to Disable IPv6 on Linux
This tutorial explains how to disable IPv6 on Linux operating systems
Disabling IPv6 Temporarily
Open the terminal and enter these commands as super user:
sudo sysctl -w net.ipv6.conf.all.disable_ipv6=1
sudo sysctl -w net.ipv6.conf.default.disable_ipv6=1
sudo sysctl -w net.ipv6.conf.lo.disable_ipv6=1
To verify if the IPv6 is disabled, run the following command. If its output is 1, that means the IPv6 has been successfully disabled. While the output 0 means it is enabled.
cat /proc/sys/net/ipv6/conf/all/disable_ipv6
Note: With this method, IPv6 will only be temporarily disabled. The next time you reboot, it will be enabled again.
Disabling IPv6 Permanently
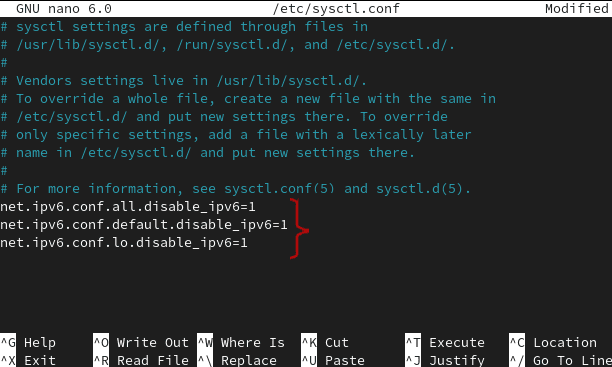
Step #1: Edit the sysctl.conf file by running the following command as a super user:
sudo nano /etc/sysctl.conf
Note: If it says that “nano command not found”, then install it by running sudo apt install nano or sudo yum install nano according to the Linux distro in use.
Step #2: Now add the following lines at the bottom.
net.ipv6.conf.all.disable_ipv6=1
net.ipv6.conf.default.disable_ipv6=1
net.ipv6.conf.lo.disable_ipv6=1
Step #3: Save the changes by pressing Ctrl+O and return to the terminal by pressing Ctrl+X.
Step #4: Now enter the following command on the terminal for the changes to take effect:
sudo sysctl -p
To re-enable the IPv6, edit the systcl.conf again (Step 1), and remove the lines which you added in Step #2. Then save the file.
To check the IPv6 status, run the following command. If its output is 1, IPv6 is disabled. While the output 0 means it is enabled.
cat /proc/sys/net/ipv6/conf/all/disable_ipv6
