Set up WireGuard on Windows
This tutorial explains how to set up FastestVPN with WireGuard protocol on Windows 10 using the official WireGuard Client
Step #1: Download the WireGuard client for Windows from the its official website. Install it on your PC, and then open the application.
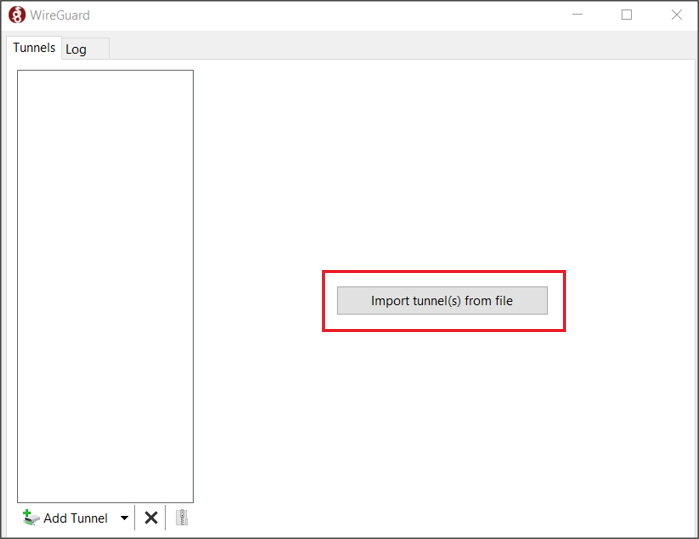
Step #2: Inside the WireGuard app, click on the “Import tunnel(s) from file” button and select the WireGuard configuration file from your PC.
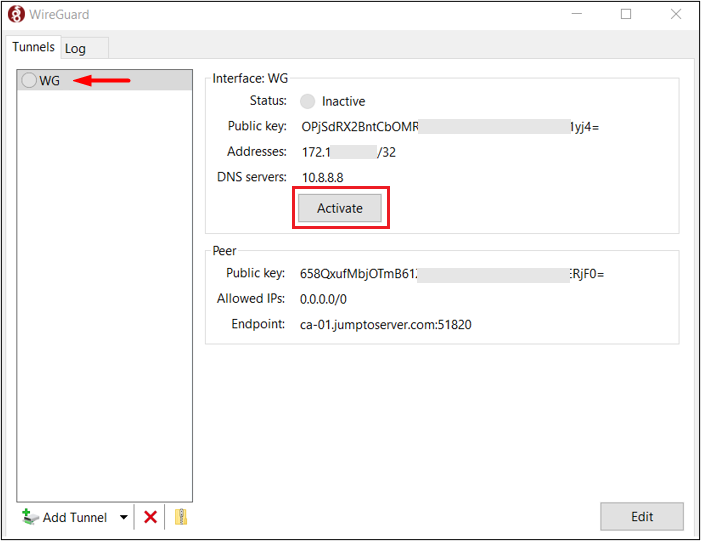
Step #3: Once imported, the file will appear in the left panel. Click the “Activate” button to start the VPN connection.
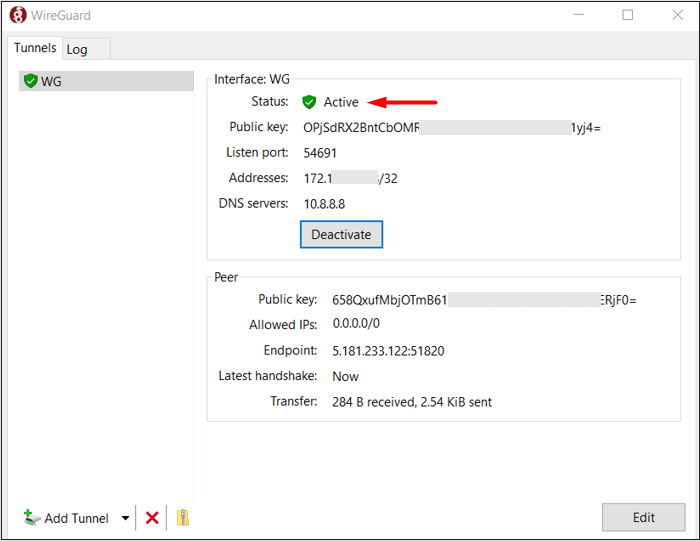
Your WireGuard VPN is now active and successfully connected.
Note: If you do not have your WireGuard .conf file, please contact our support team via an email at support@fastestvpn.com
To check your IP and location over the VPN, use the IP & location checker tool.
Change Server Address (Optional)
To connect to another server address, click on the tunnel in the left-side panel, then click the “Edit” button in the bottom-right corner of the WireGuard client. After that, update the server address in the configuration file on the line next to “Endpoint”, and save the changes.
Example: Endpoint = us-dl.jumptoserver.com:51820
