Setup VPN on Kali Linux With OpenVPN
This tutorial explains how to set up the Kali Linux VPN with the OpenVPN protocol using the network manager.
If you want to set up the VPN on Kali via command line, follow the guide here.
Step #1: Open the terminal and enter the following command:
sudo apt install network-manager-openvpn network-manager-openvpn-gnome
It will ask for the Kali admin password. Enter it.
Step #2: Download the FastestVPN OpenVPN server config files from here.
Step #3: Click on the downloaded file and extract it.
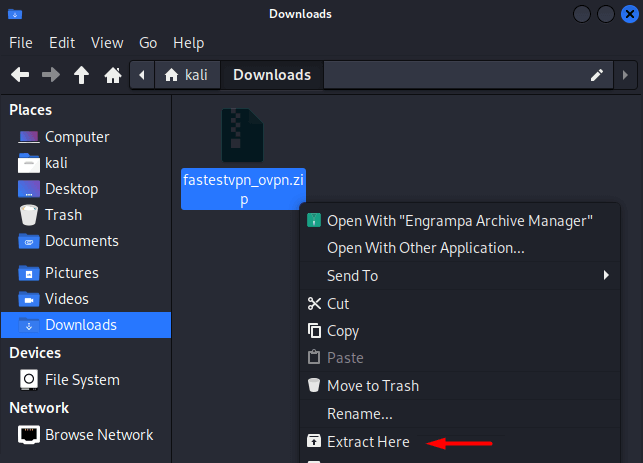
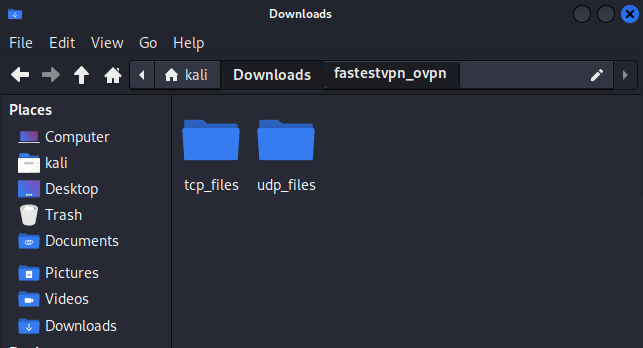
In the extracted folder, you’ll find two separate folders for configuration files of TCP and UDP servers.
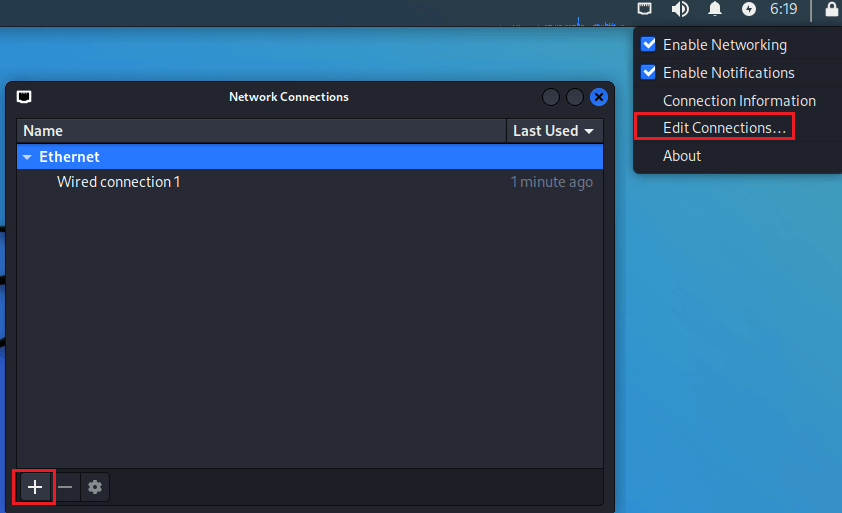
Step #4: Right-click on the Network icon and click Edit Connections. Then click the “+” sign.
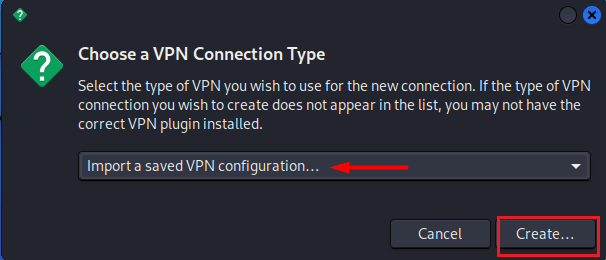
Step #5: Select Import a saved VPN configuration and click Create.
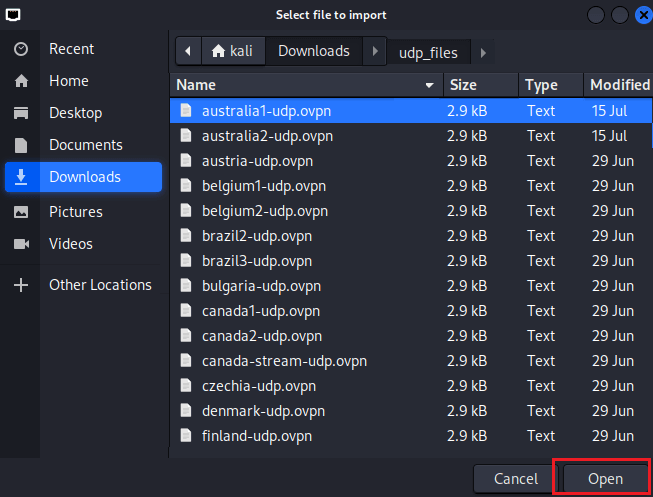
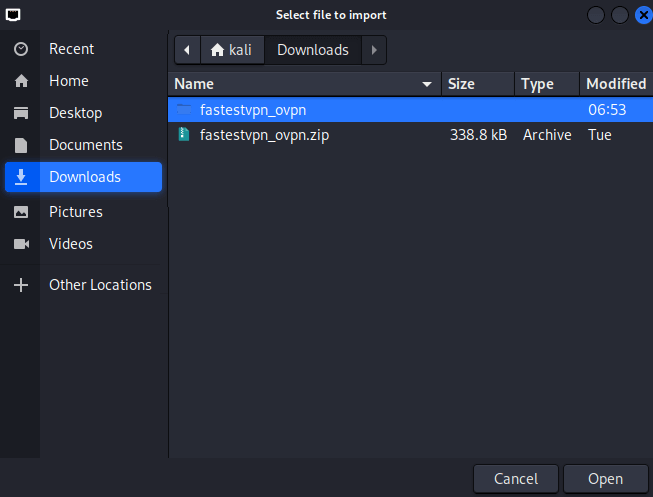
Step #6: Navigate to the fastestvpn_ovpn folder and click any of the folders TCP or UDP depending on the protocol you want to connect to.
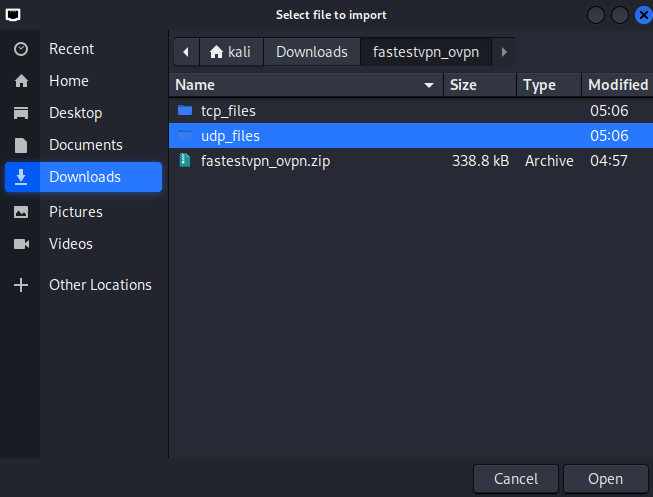
Step #7: Select your desired VPN server location to which you want to connect, such as “Australia1”.
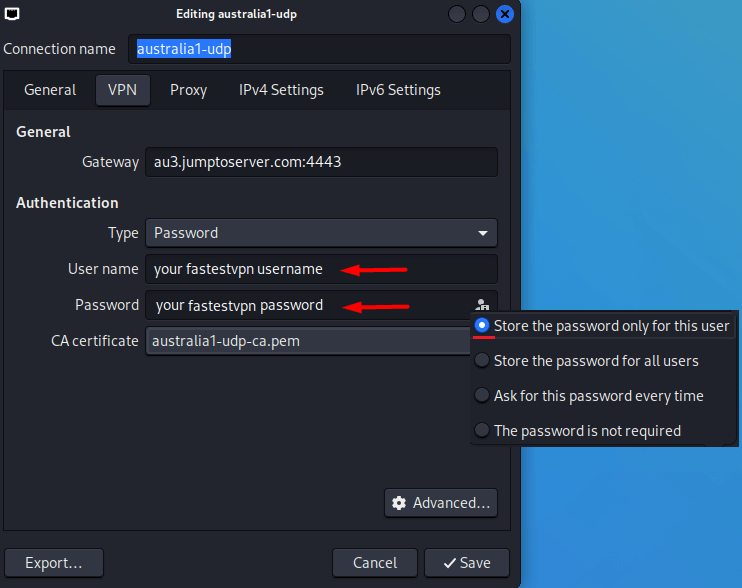
Step #8: Enter your FastestVPN username and password. Select an option to store the password.
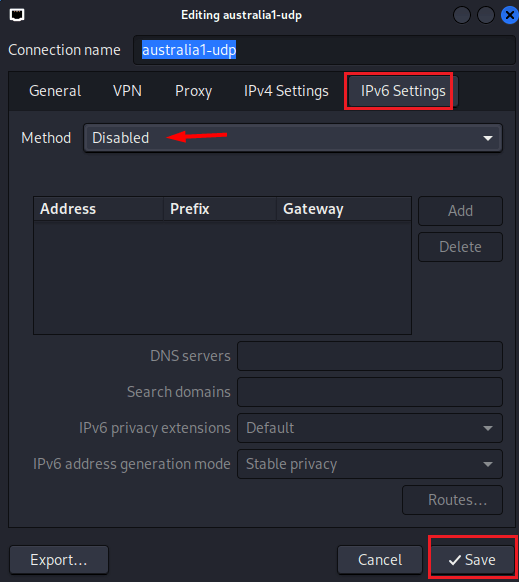
Step #9: Click the IPv6 Settings tab and select Disabled. Then click on Save.
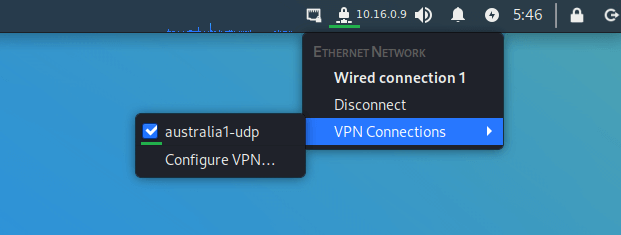
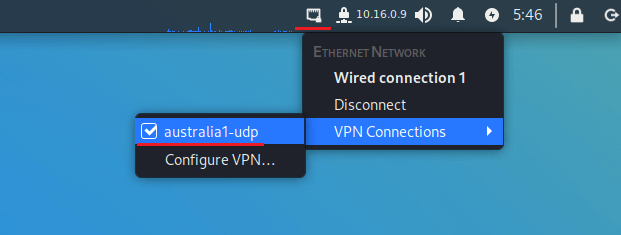
Step #10: Click on the network icon, then “VPN connections” and click on the VPN profile name that you just created.
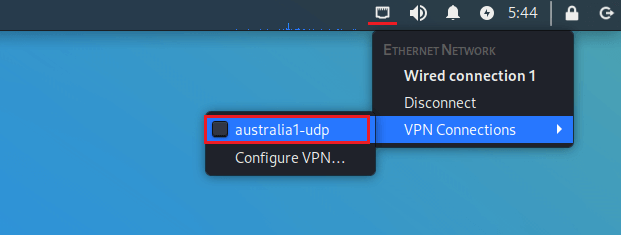
The lock icon and the check sign show that your VPN has been connected.
To disconnect from the VPN, click on the connected VPN connection name.


