How to Set up FastestVPN on Tomato Router With OpenVPN
This tutorial explains how you can set up the FastestVPN on Tomato Router with the OpenVPN protocol. Follow these steps to set up the Tomato Router VPN.
Step #1: Log in to your router’s web setup page.
Step #2: Click VPN Tunneling, and select OpenVPN Client
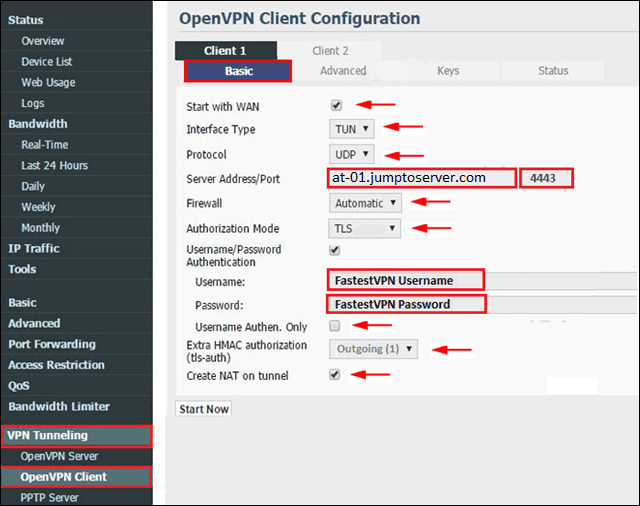
Step #3: Click on the Basic tab and provide the following information.
- Start with WAN: Check
- Interface Type: TUN
- Protocol: Choose between TCP and UDP
- Server Address/Port: Enter the FastestVPN server address you wish to connect to. Such as: for Austria server address : at-01.jumptoserver.com [Complete list of FastestVPN server addresses is available here]
- Port: 4443
- Firewall: Automatic
- Authorization Mode: TLS
- Username/Password Authentication: Check
- Username: Your FastestVPN username
- Password: Your FastestVPN password
- Username Authen. only: Uncheck
- Extra HMAC authorization: Outgoing (1)
- Create NAT on tunnel: Check
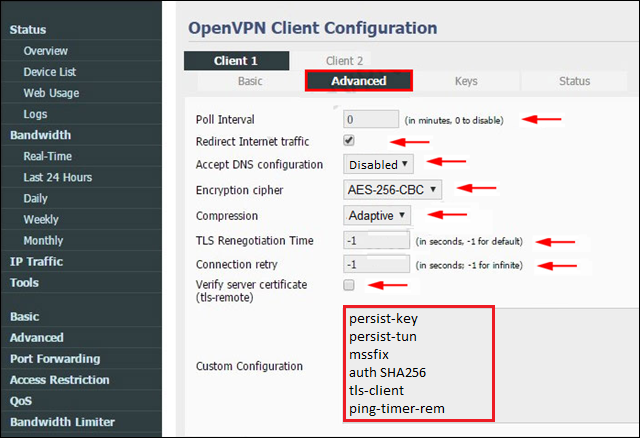
Step #4: Click the Advanced tab and provide the following information:
- Poll interval: 0
- Redirect Internet Traffic: Check
- Accept DNS configuration: Disabled
- Encryption cipher: AES-256-CBC
- Compression: Adaptive
- TSL Regeneration Time: -1
- Connection retry: -1
In the Custom Configuration field, enter the following text.
persist-key
persist-tun
mssfix
auth SHA256
tls-client
ping-timer-rem
Step #5: Now download FastestVPN OpenVPN config files from here. Extract the files and open any of them with a notepad such as “Australia-UDP”
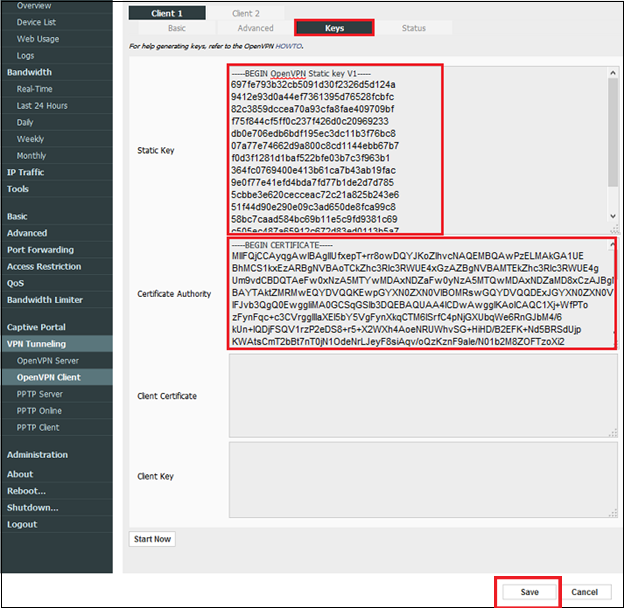
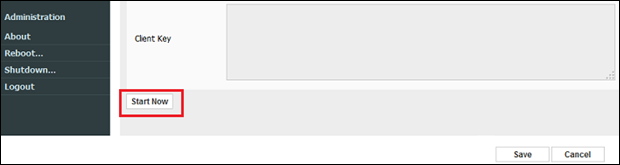
Step #6: On the router’s settings page, click on the Keys tab and fill in the fields as described below:
- From the config file that you opened in Step 5, copy the text between <tls-auth> </tls-auth> tags and paste it into the “Static Key” field
- From the same file, copy the text between <ca> </ca> tags and paste it into the “Certificate Authority” field.
- Leave other fields to their default and click on “Save” at the end of the page
Step #7: Click on Start Now and wait for 1-2 minutes. You will be connected.
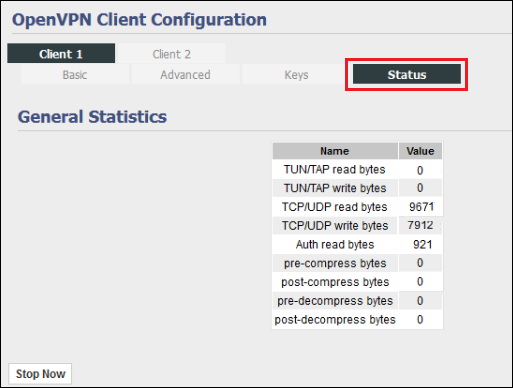
To confirm the VPN connectivity, click on the Status tab.