How to Set up FastestVPN on OpenWRT Router With OpenVPN
This tutorial explains how you can set up the FastestVPN on OpenWRT Router with the OpenVPN protocol. Follow these steps to set up the OpenWRT Router VPN.
- This tutorial was created on OpenWRT v 21.02.3 Luci.
Step # One: Install the required OpenVPN package
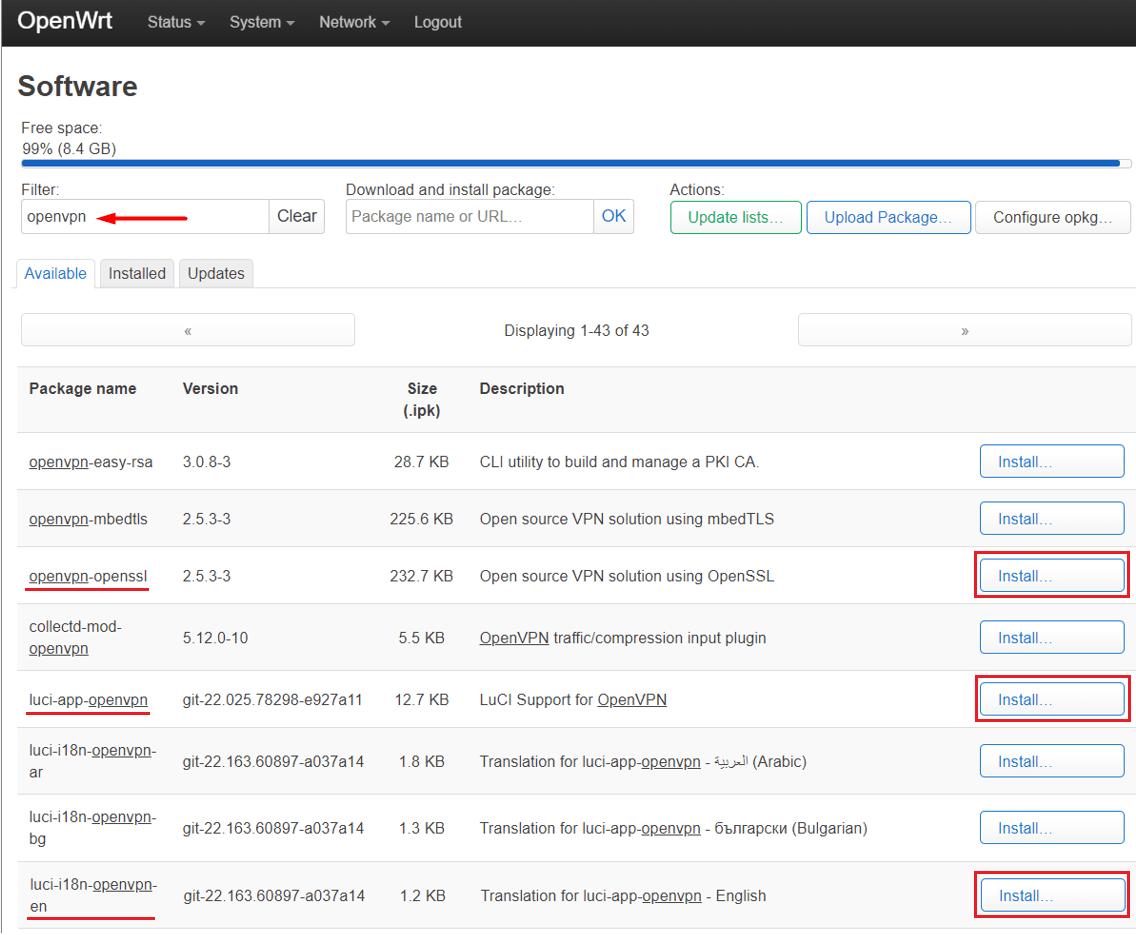
1. Log in to your router’s web interface and click System > Software.
2. Click Update lists. Wait until the process is complete and then click Dismiss.
3. Enter Openvpn in the filter field. Find and install these three packages.
- openvpn-openssl
- luci-app-openvpn
- luci-i18n-openvpn-en
4. Reboot your router.
Step # Two: Create your VPN profile
1. Download FastestVPN OpenVPN server configuration files from here. Extract the files.
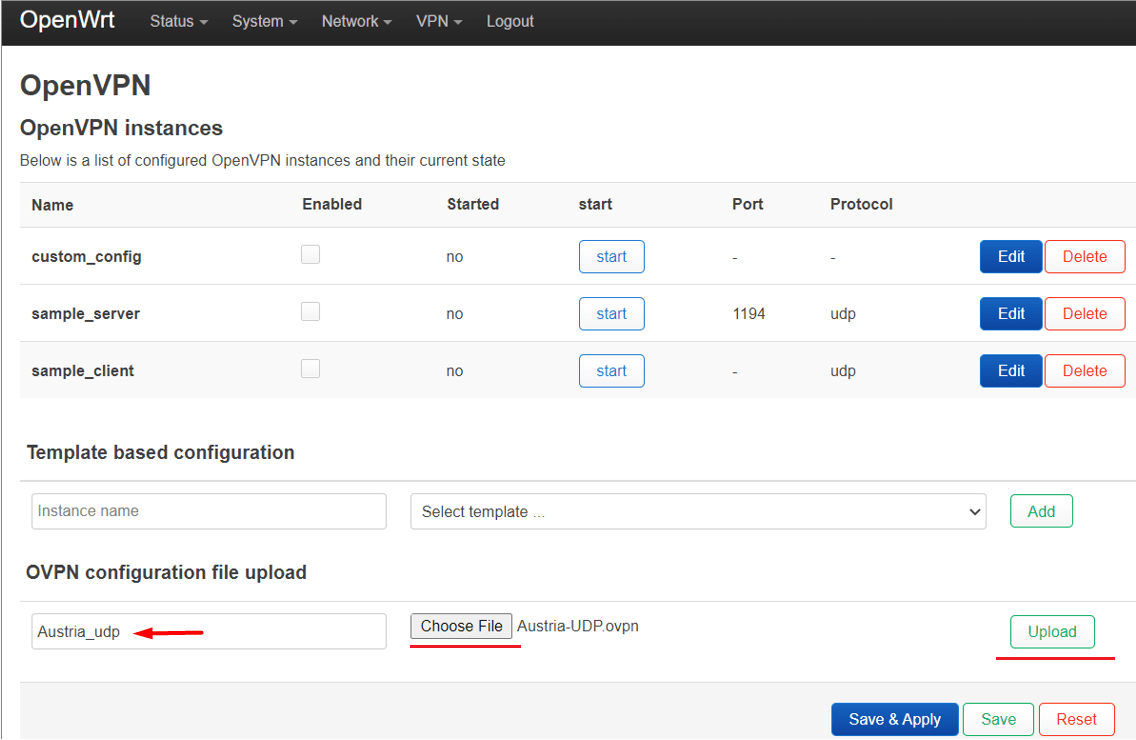
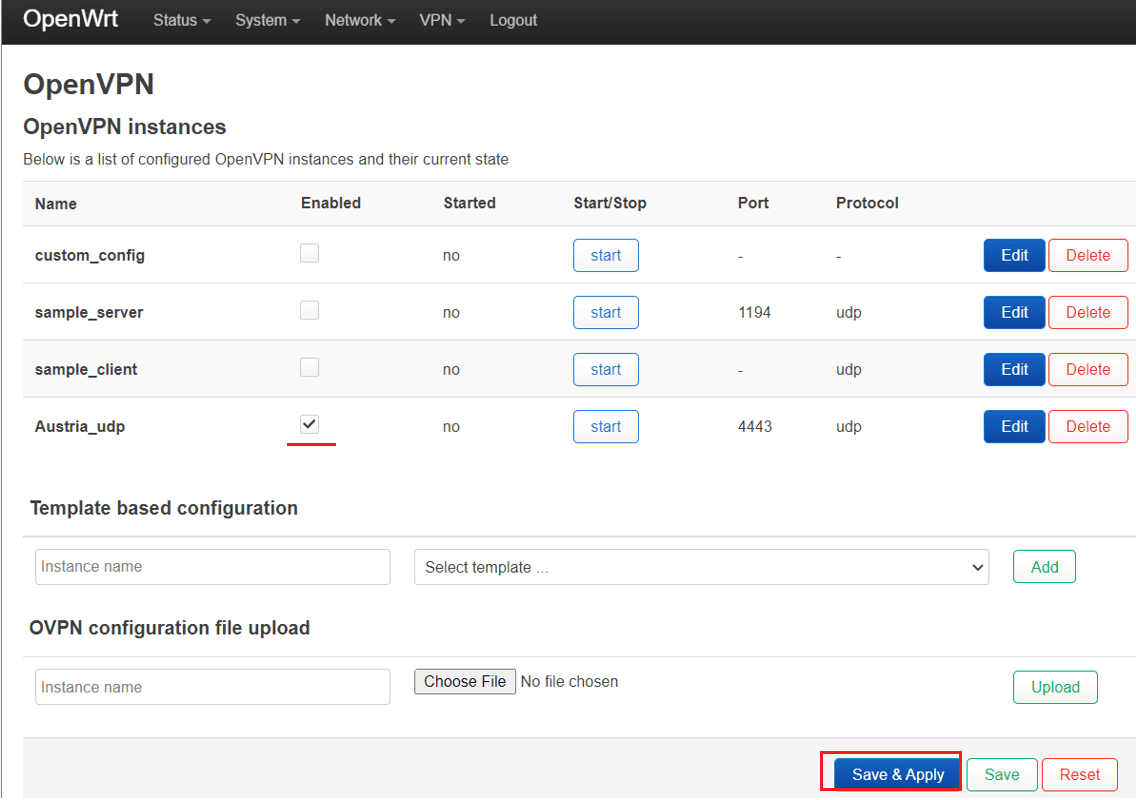
2. On your OpenWRT WebUI, click VPN > OpenVPN.
3. Under “OVPN configuration file upload”, provide this info:
- Enter an instance name for your VPN, such as I entered Austria_UDP
- Click “Choose File”. Then navigate to the location where you saved the config files, and select your desired server file such as “Austria-UDP”
- Click on the “Upload” button
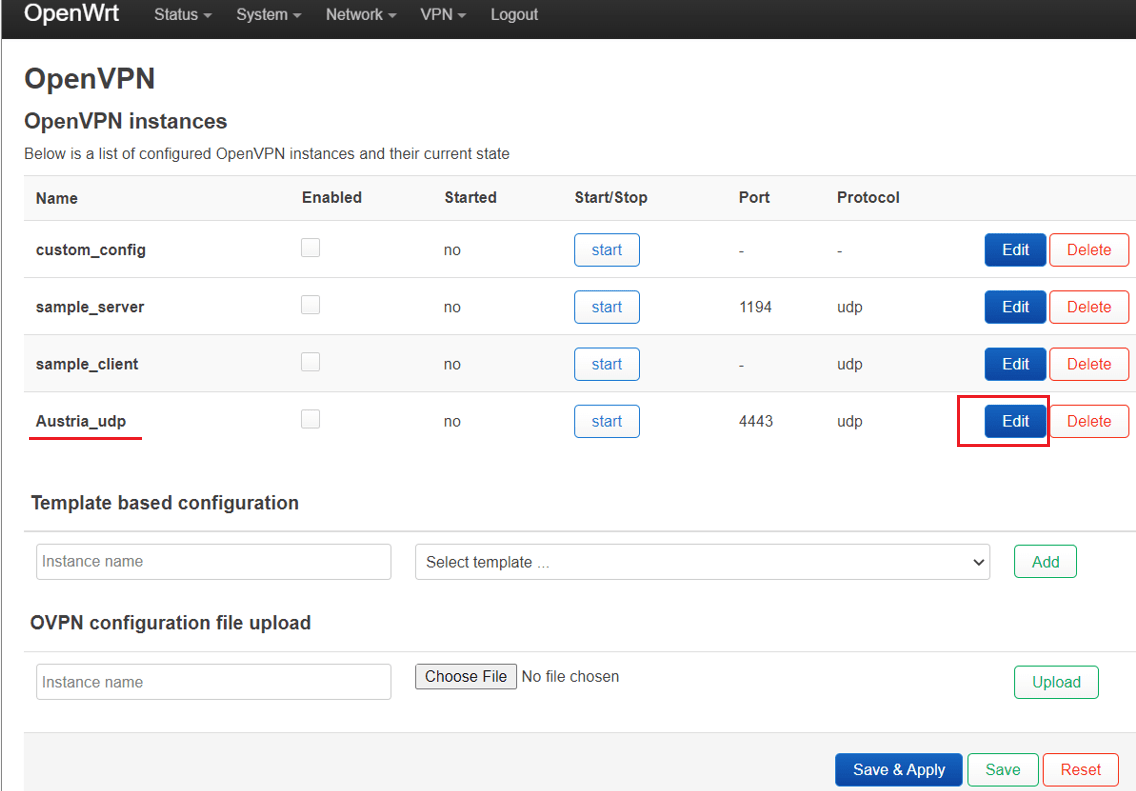
4. Now click on “Edit” next to your created VPN instance name.
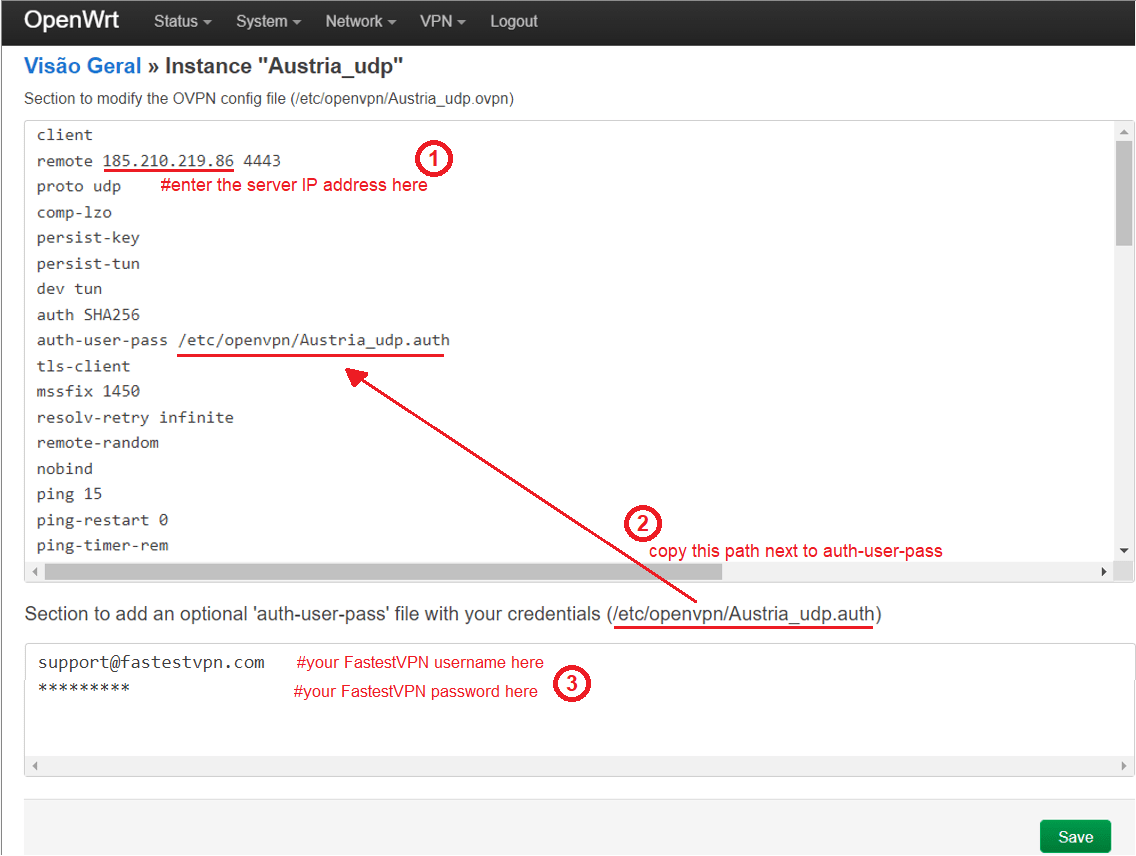
5. Make these three changes:
- i. On the second line, replace the VPN server address with its IP address. To get the IP address of a server, visit here.
- ii. Copy the text that appears between parentheses() above the second box, and paste it next to “auth-user-pass”
- iii. In the second text box, enter your FastestVPN username and FastestVPN password in two separate lines as shown in the image. Make sure to enter them precisely.
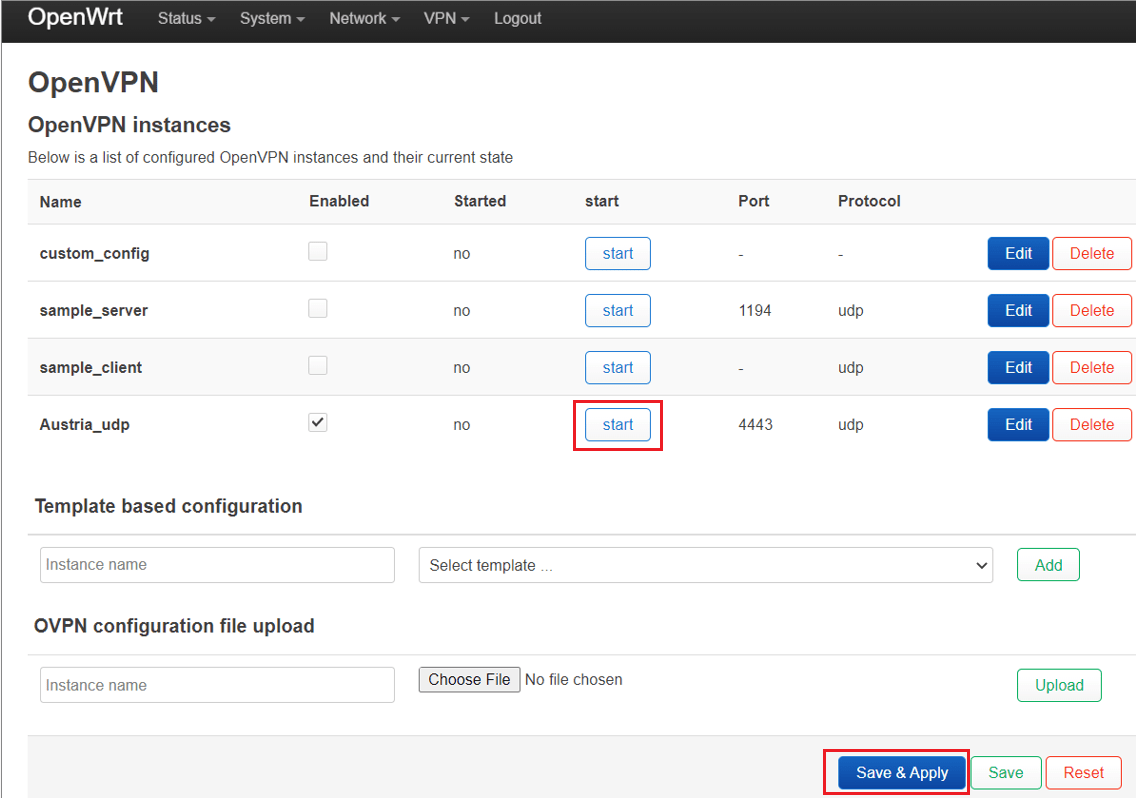
6. Return to VPN > OpenVPN. Tick the “Enabled” checkbox and click Save and then Save & Apply.
Step # Three: Add an interface
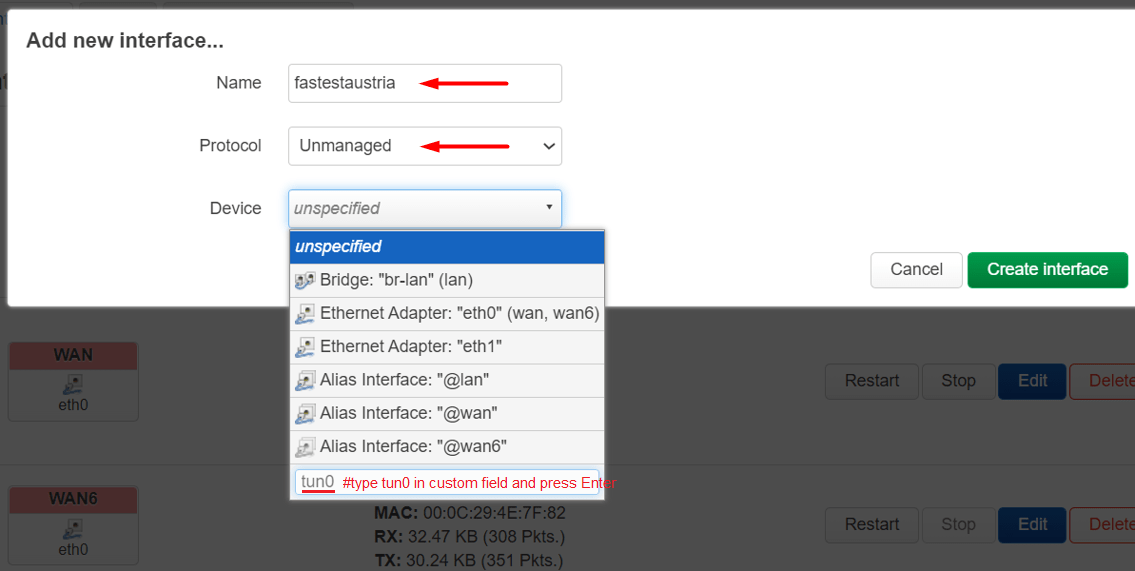
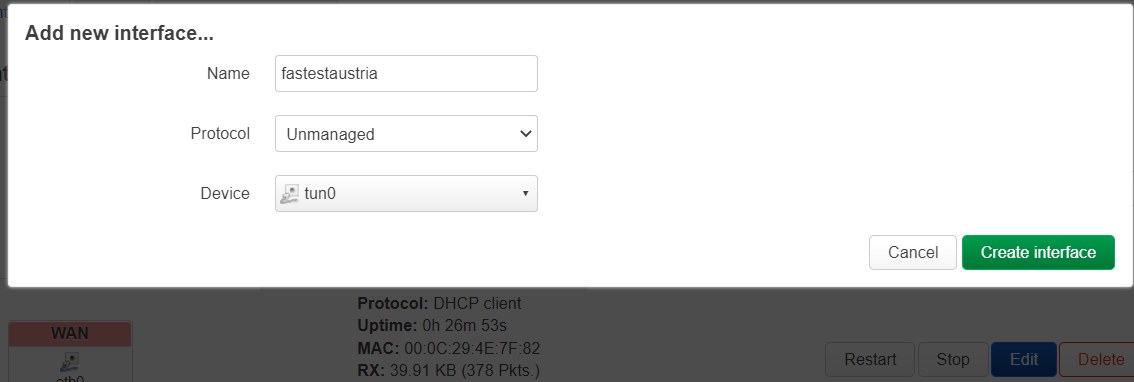
1. Click Network > Interface. Click Add new interface.
2. Enter the following information:
- Name: Give it a name, such as fastestaustria
- Protocol: Unmanaged
- Interface: Type tun0 next to the custom field and press enter
3. Click “Create interface”.
In the “Interface properties”, make sure that “Bring up on boot” is enabled.
Click Save and then Save & Apply.
Step # Four: Create a Firewall zone
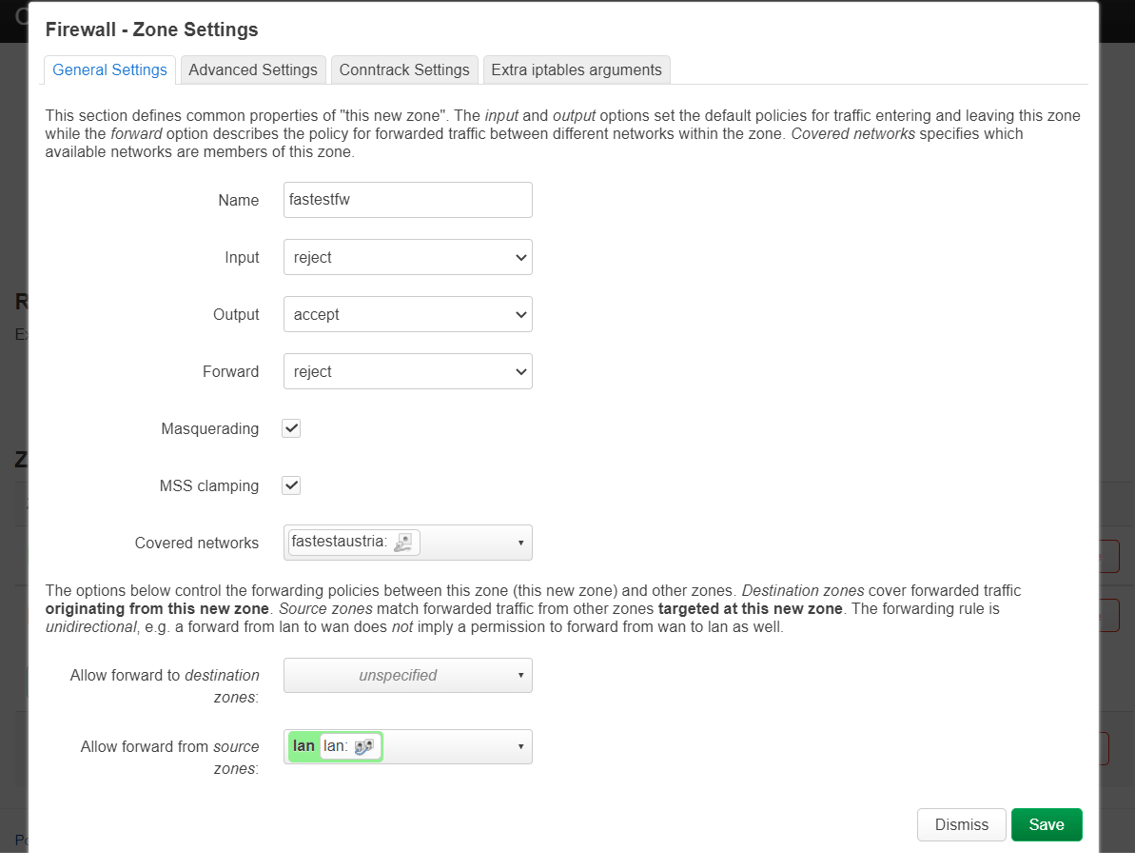
1. Click Network > Firewall. Click the Add button at the bottom left side.
2. Provide the following information:
- Name: Give it a name such as fastestfw
- Input: Reject
- Output: Accept
- Forward: Reject
- Masquerading: Checked
- MSS clamping: Checked
- Covered networks: Select your FastestVPN interface, which is fastestaustria in this case.
- Allow forward to destination zones: Unspecified
- Allow forward from source zones: Select “LAN”. (and also select “wifi” if you have a wifi interface)
- Click Save and then Save & Apply.
Step # Five: Add DNS servers
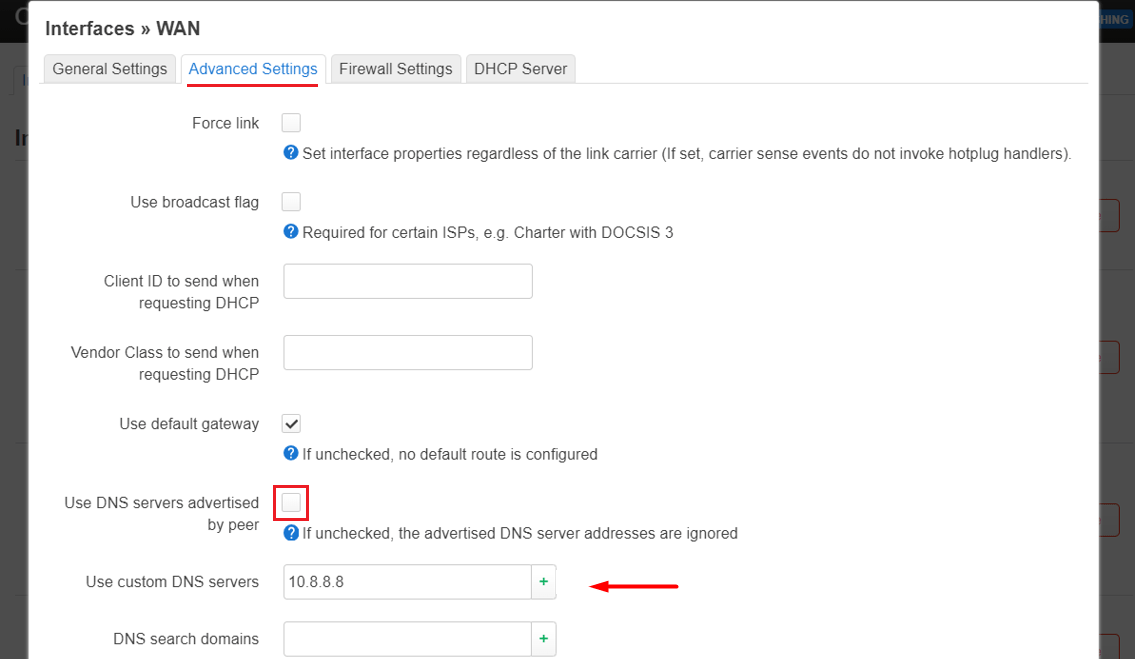
1. Click Network > Interface.
2. Switch to the “Advanced settings” tab. Uncheck “User DNS servers advertised by peer”. Then add a DNS address such as 10.8.8.8.
Note: After completing the OpenVPN connection, if you get browsing issues, then replace this DNS address with another one such as 208.67. 222.222 or 8.8.8.8 or 1.1.1.1
3. Click Save and then Save & Apply.
Step # Six: Starting the OpenVPN connection
Click VPN > OpenVPN. Click Save and then Save & Apply. Wait for a minute.
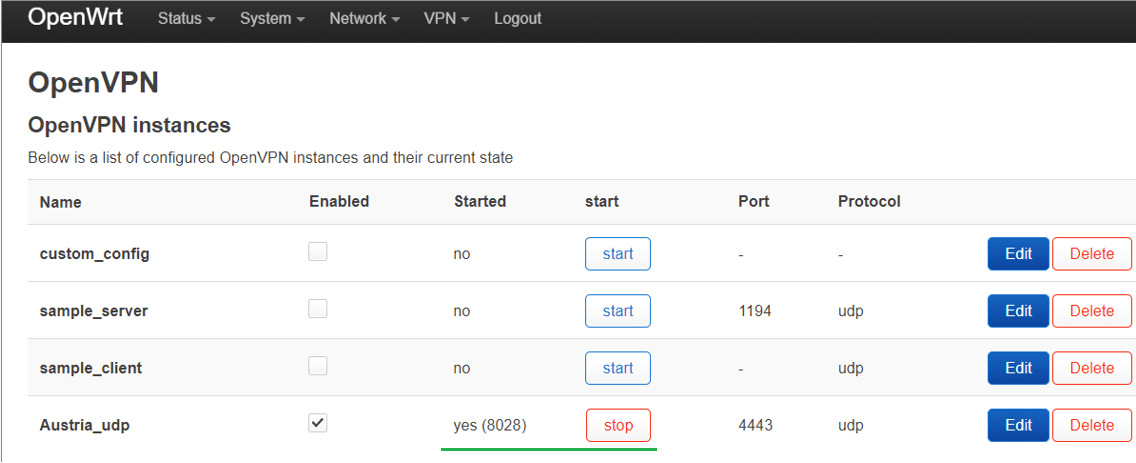
Finally, click the Start button next to your VPN profile name.
OpenVPN client has been started successfully.
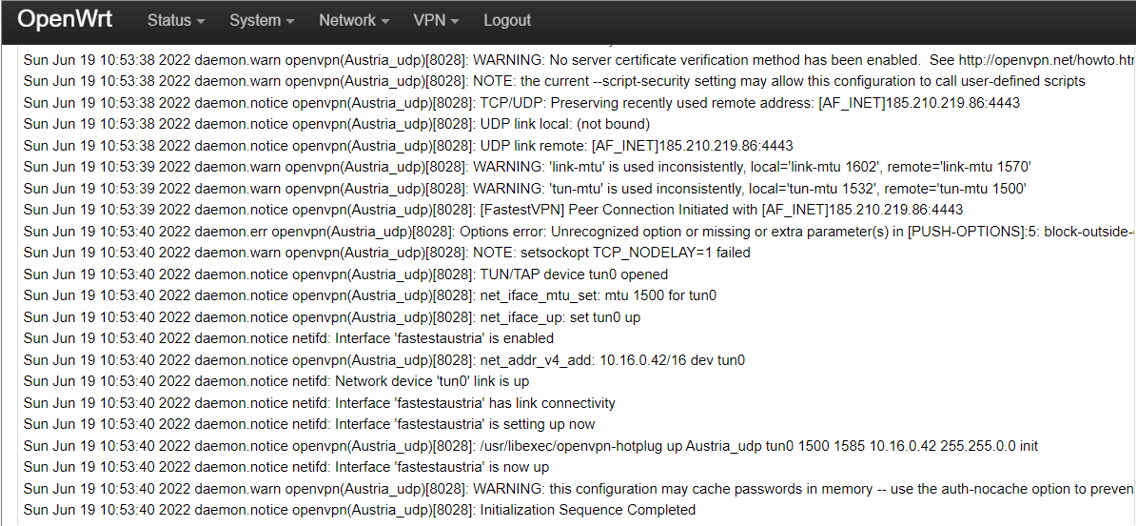
You can find the OpenVPN logs in Status > System Logs.
Optional Step: Configure a Kill Switch
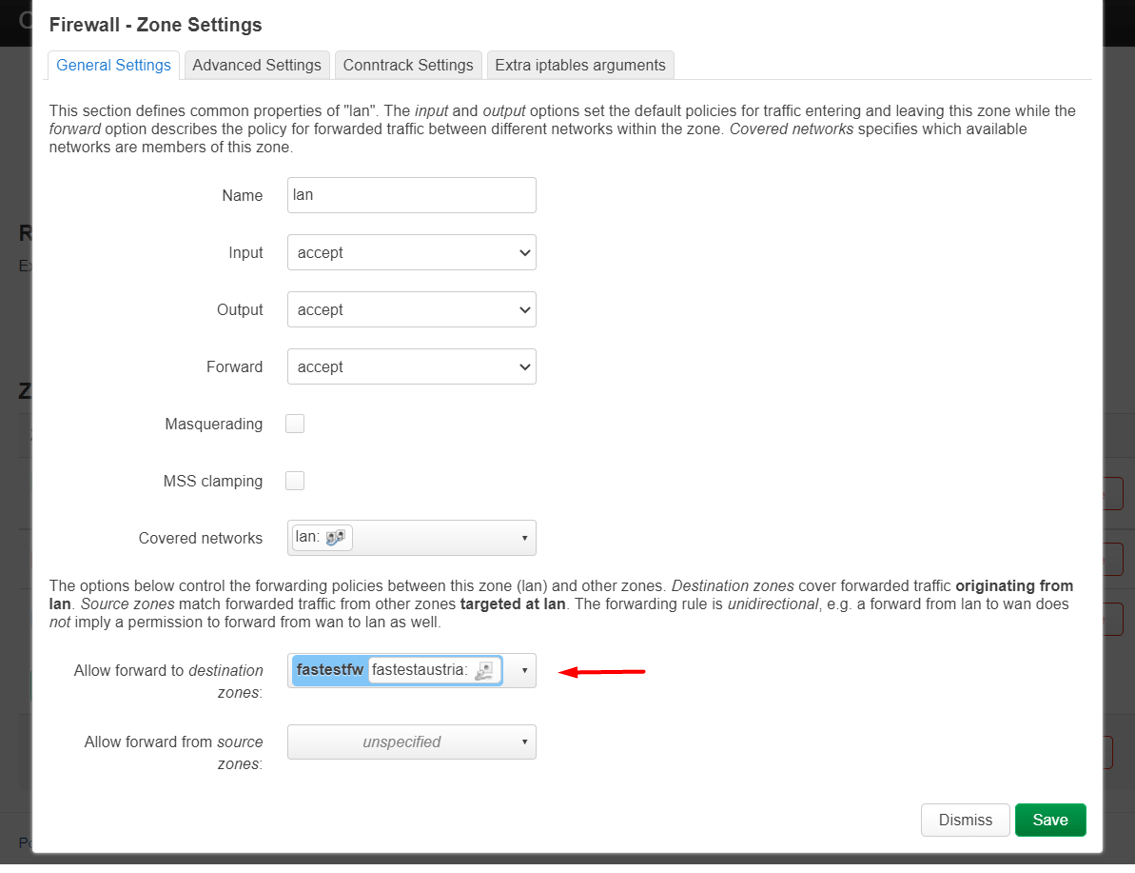
- Click Network > Firewall. Next to the “LAN” firewall zone, click Edit.
- Remove “WAN” from the “Allow forward to destination zones” field.
- Click Save and then Save & Apply.


