How to Set up FastestVPN on MikroTik Router With PPTP Protocol
This tutorial explains how you can set up the FastestVPN on MikroTik Router with the PPTP protocol. Follow these steps to set up the MikroTik Router VPN.
On a browser, open your router’s web setup page by typing in 192.168.88.1 in the address bar. Then log into it by entering the router’s username and password. The default username is admin without a password.
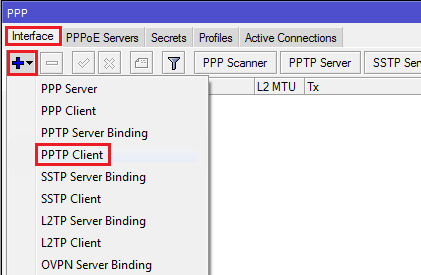
Step #1: Click on the “PPP” option on the left side menu.
Click Interface
Click + and then PPTP Client
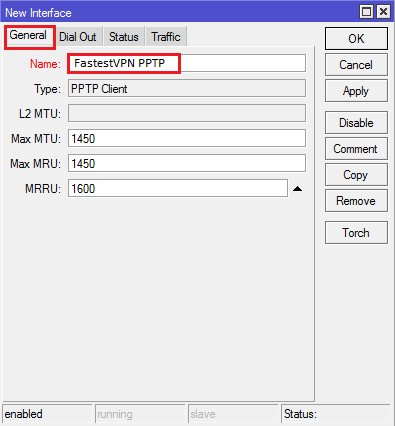
Step #2: In the General tab, enter a name for your VPN connection such as FastestVPN PPTP. Leave the MTU and Max MRU fields as default.
Step #3: Click on “Dial Out” and enter the following info:
- Connect to: Your desired server address; as in this case Austria address at-01.jumptoserver.com. Here you can find the complete list of FastestVPN Server addresses.
- User: Your FastestVPN Username
- Password: Your FastestVPN Password
- Allow all authentication methods
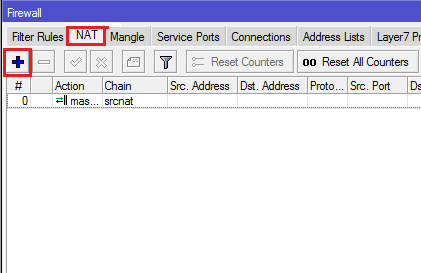
Step #4: In the left side menu, click on IP -> Firewall
Then in the “NAT” tab click “+” button.

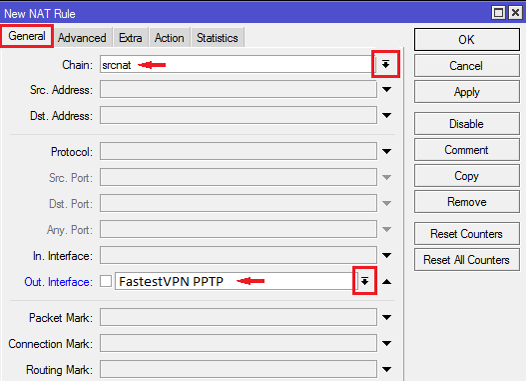
Step #5: In the “General” tab select “srcnat” for the Chain fields
In the “Out. Interface” choose FastestVPN PPTP, name of the VPN connection chosen by you.
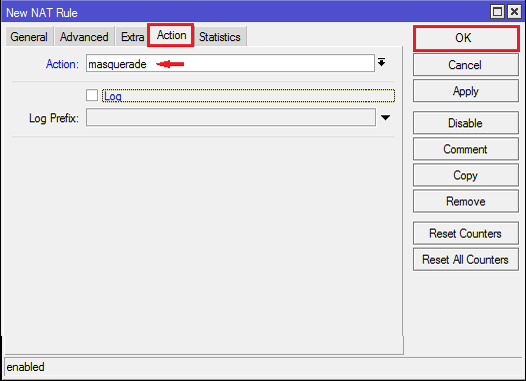
Step #6: In the “Action” tab select “masquerade” and click OK.
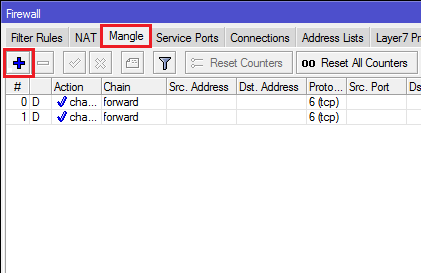
Step #7: You’ll come back to the “Firewall” window. There, in the “Mangle” tab, click “+“.
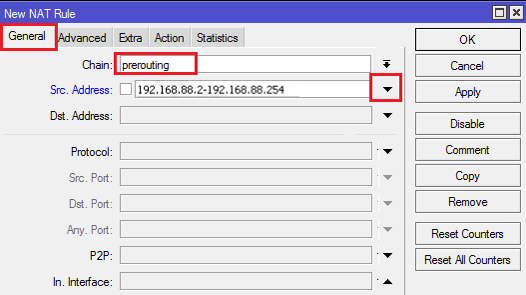
Step #8: In the “General” tab, select “Prerouting” for the chain field.
In “Src. Address” enter either an IP, or IP range which you want to be routed through VPN connection
Note: The IP entered here is just an example (192.168.88.2-192.168.88.254).
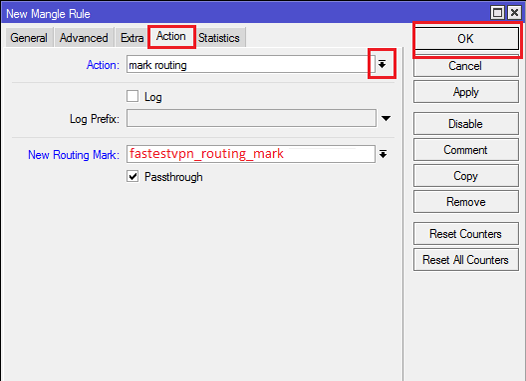
Step #9: Go to the “Actions” tab. Select mark routing in the “Action” field.
In “New Routing Mark”, enter whatever you like such as “fastestvpn_pptp_mark”
Click “OK
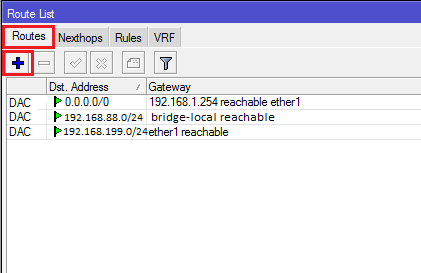
Step #10: Now click “IP” in the left side menu and select “Routes“
In the “Routes” tab click “+” button.
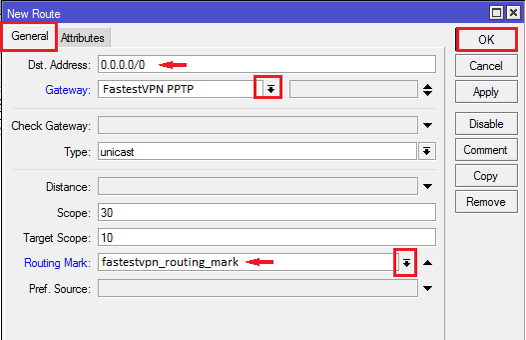
Step #11: “Dst. Address” should be “0.0.0.0/0”
—In the “Gateway” select the name of your VPN, as “FastestVPN PPTP” in this case.
—In the “Routing mark” select the routing mark you created in Step 9.
Click OK
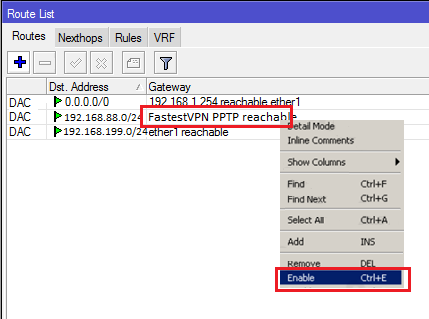
Step #12: You’ll be back to the “Routes” list where you should see your VPN connection. Right click on it and select “Enable“
Step #13: On the left side menu, click IP -> DNS
Add “8.8.8.8” in the first DNS field and “8.8.4.4” in the second DNS. If you have only one DNS field, click the arrow down so that another box will show up.
Click “OK” after that.

You are connected to FastestVPN on MikroTik router now.
Note: If your MikroTik router is acting as a DHCP client, then make sure that the DHCP settings do not overwrite the manually entered DNS and for this:
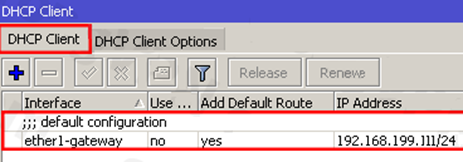
Click “IP” in the left side menu and select “/DHCP Client‘
Once the “DHCP Client” appears, double click on your DHCP client entry.
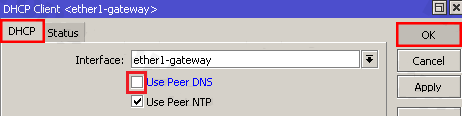
Uncheck “Use Peer DNS option and click “OK“.