How to Set up FastestVPN on DD-WRT Router With OpenVPN
This tutorial explains how you can set up the FastestVPN on a DD-WRT Router with the OpenVPN protocol. Follow these steps to set up the DD-WRT Router VPN.
Step #1: On a browser address bar, enter 192.168.0.1. Sign in with your router’s login username and password. By default, both of them are admin. If it doesn’t work, check your router’s manual to find out its default gateway address.
Step #2: Click Setup > IPv6. Then select “Disable” and click Save and Apply Settings.
Step #3: Click Services > VPN.
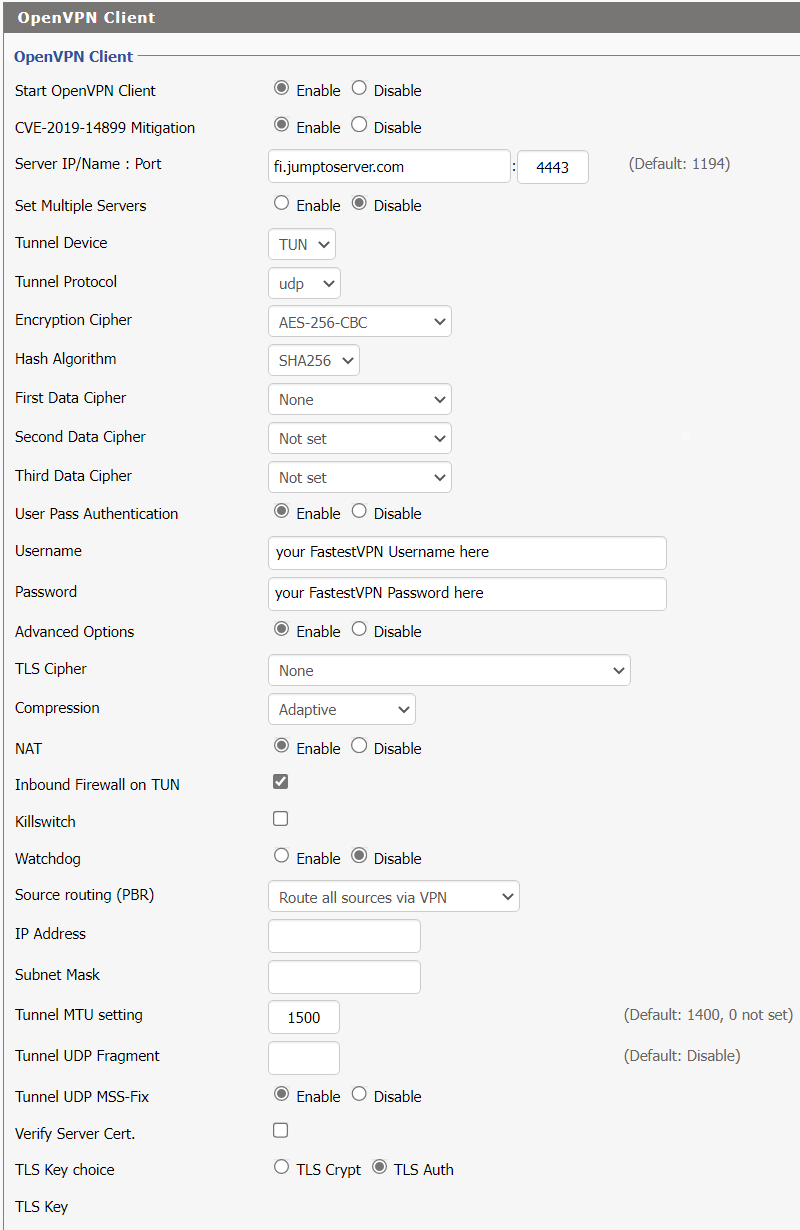
Step #4: Scroll down to the “OpenVPN Client” section, and add the following information:
- Start OpenVPN Client: Enable
- Server/ IP Name : Port : Enter your desired FastestVPN server location address. Find the complete list of server addresses here
- Add “4443” in the “Port” field
- Tunnel device: TUN
- Tunnel Protocol: udp (or you can choose TCP)
- Encryption Cipher: AES-256 CBC
- Hash Algorithm: SHA256
- First Data Cipher: None
- Second Data Cipher: Not set
- Third Data Cipher: Not set
- User Pass Authentication: Enable
- Enter your FastestVPN username and Password in their fields
- Advanced Options: Enable
- TLS Cipher: None
- Compression: Adaptive
- NAT: Enable
- Inbound Firewall: Enable
- Tunnel MTU Settings: 1500
- Tunnel UDP-MSS-Fix: Enable
- Verify Server Cert.: Unchecked
- TLS Key choice: TLS auth
- Leave other fields to their default
Note: If there are no “Username” and “Password” fields on your setup page, you are possibly using an older DD-WRT version. Scroll down to the last section of this page for further instructions in that case.
Step #5: Scroll down to the Additional Config box, enter the following lines:
pull
persist-key
persist-tun
tls-client
remote-cert-tls server
log /tmp/openvpn.log
verb 1
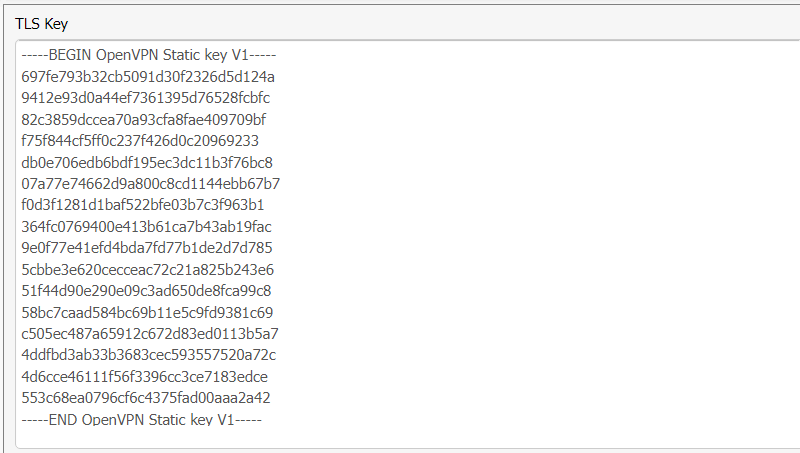
Step #6: Now download FastestVPN server config files from here. Open any file such as “Austria-UDP” with a text editor. Copy the text that starts with ‑‑‑‑‑BEGIN OpenVPN Static key V1‑‑‑‑‑ and ends with ‑‑‑‑‑End OpenVPN Static key V1‑‑‑‑‑. Paste the text into the “TLS Key” box.
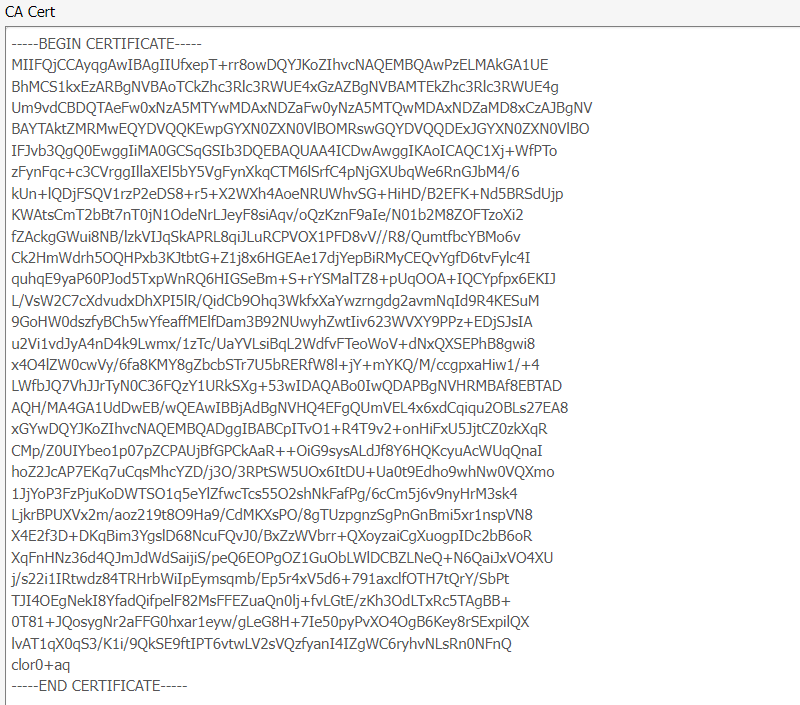
Step #7: Now from the same text file, copy the text that starts with ‑‑‑‑‑BEGIN CERTIFICATE‑‑‑‑‑ and ends with —–END CERTIFICATE—–. Paste the text into the CA Cert box.
Step #8: Click Save and Apply Settings. Wait for 1-2 minutes.
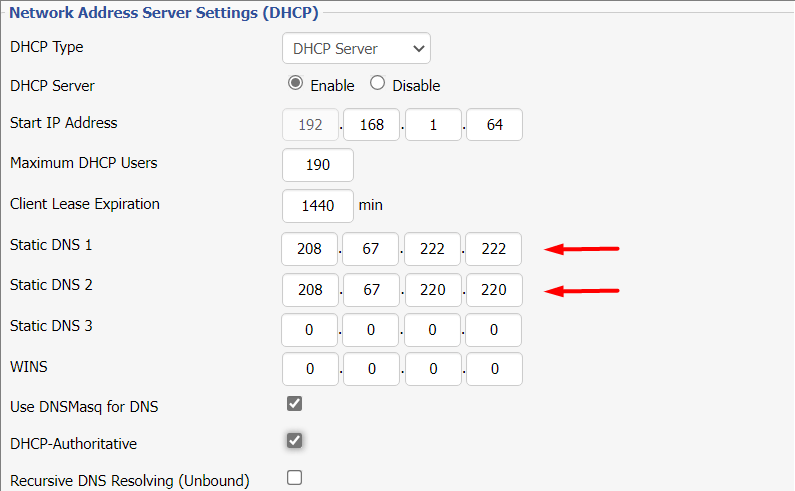
Step #9: For the DNS issues, it is recommended to add a custom DNS address to your router. For this, click Setup > Basic Setup.
Scroll down and under to the “Network Address Server Settings (DHCP)” section. In Static DNS 1, add 208.67.222.222 and in Static DNS 2, add 208.67.220.220 and click “Save” and “Apply settings”.
Note: You can also add Google DNS addresses 8.8.8.8 and 8.8.4.4 but they might not work in some geographical regions such as China.
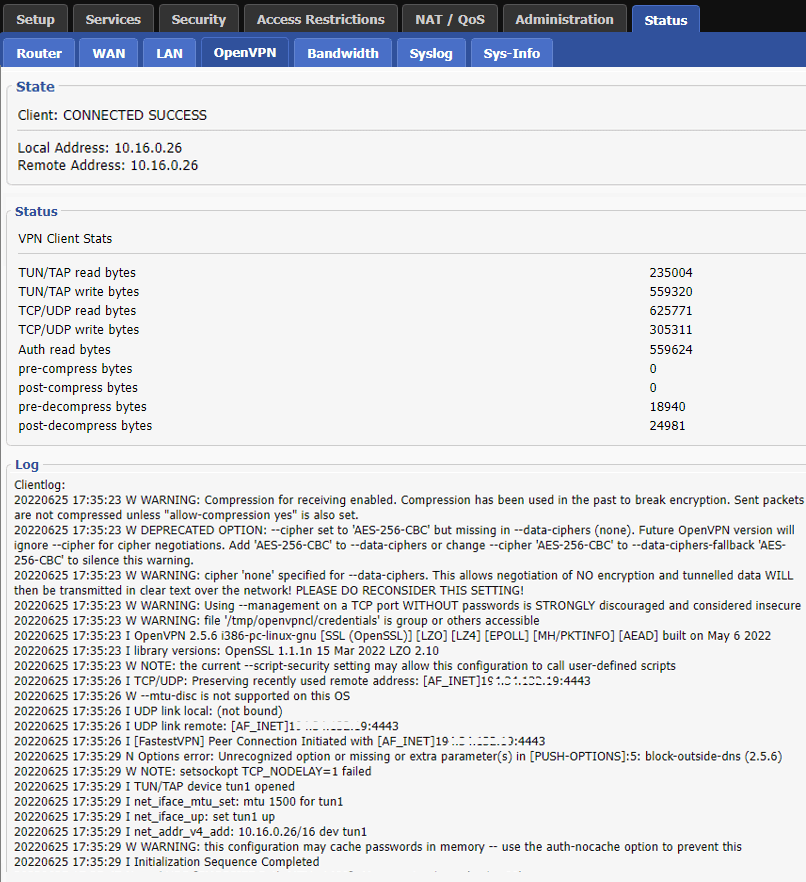
Step #10: To check the VPN connectivity status, click Status > OpenVPN
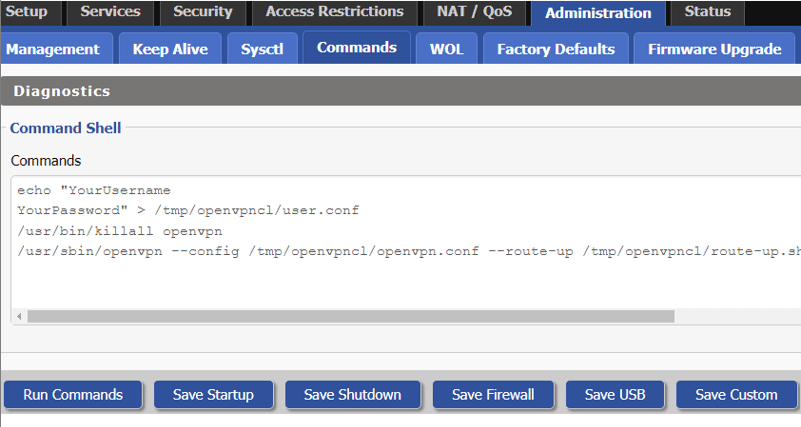
Optional Step: For the routers with no “Username” and “Password” fields
1. Click Administration > Commands. Add the following text.
echo “YOURUSERNAME
YOURPASSWORD” > /tmp/openvpncl/user.conf
/usr/bin/killall openvpn
/usr/sbin/openvpn –config /tmp/openvpncl/openvpn.conf –route-up /tmp/openvpncl/route-up.sh –down-pre /tmp/openvpncl/route-down.sh –daemon
Note: Make sure to replace “Yourusername” and “YourPassword” with your respective FastestVPN username and password. Then click the Save Startup button.
2. Now follow all the steps as given in the above guide to set up the VPN. When you reach Step 5, add an additional line there in the “Additional Config” box which is auth-user-pass /tmp/openvpncl/user.conf as given below.
pull
persist-key
persist-tun
tls-client
remote-cert-tls server
log /tmp/openvpn.log
verb 1
auth-user-pass /tmp/openvpncl/user.conf


