OpenVPN for Mac OS X Using the Viscosity VPN Client
This tutorial explains how you can manually set up the FastestVPN with the OpenVPN protocol using the Viscosity VPN Client on macOS X
MacOS Compatibility:
- Mac OS El Capitan (10.11) and later versions
Step #1: Download FastestVPN OpenVPN (TCP and UDP) config files from here.
Step #2: Download the Viscosity VPN client for macOS from here.
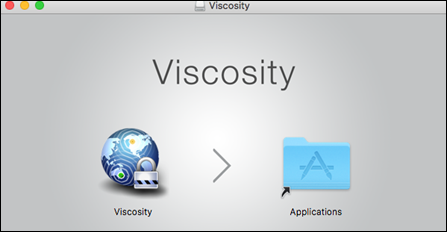
Step #3: Open Viscosity and drag and drop it to the Applications folder.
Step #4: Click Open

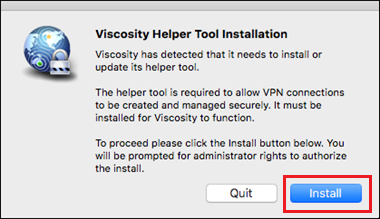
Step #5: Click on Install if the following message appears. Otherwise, proceed to the next step.
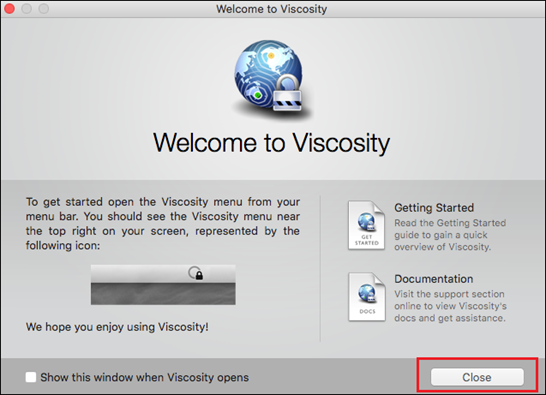
Step #6: Click Close
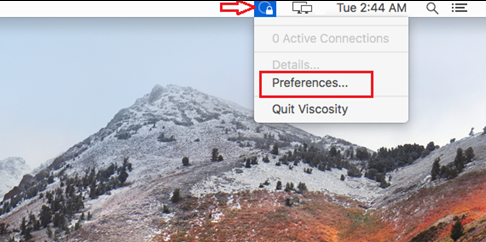
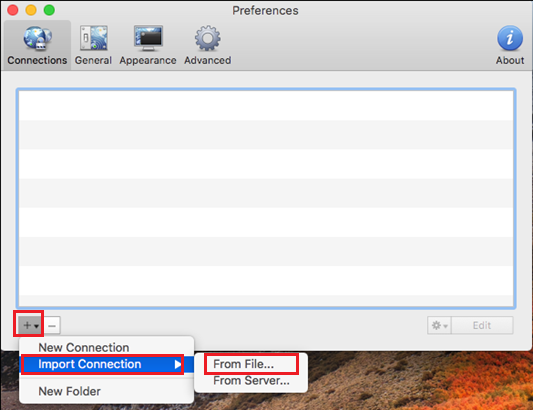
Step #7: Now click on the ‘Viscosity’ icon on your menu bar and click Preferences.
Step #8: On its Preferences Window, click + -> Import Connection -> From File
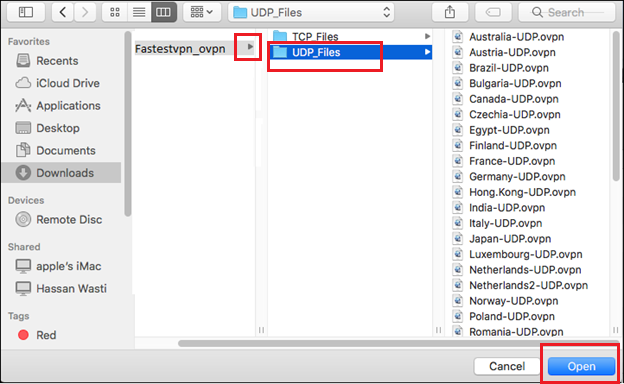
Step #9: Go to the Fastestvpn_ovpn folder which you downloaded in Step 1. Select TCP Files or UDP Files whatever protocol you want to connect to. Click on Open.
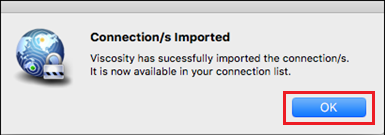
Step #10: Click OK
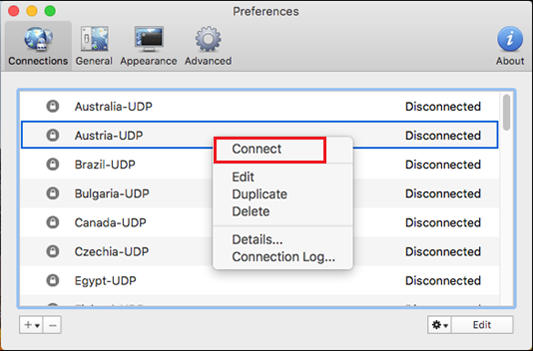
Step #11: Right-click on your desired server name and click Connect
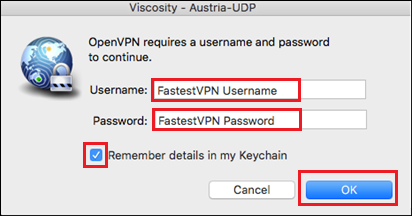
Step #12: Enter your FastestVPN Username and FastestVPN Password, check mark Remember and click OK.
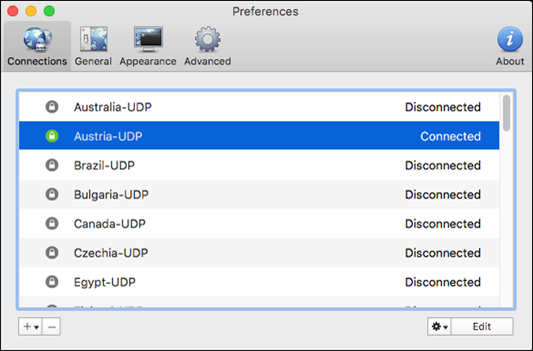
Step #13: After a few seconds, the VPN status should turn to Connected
When you want to Disconnect the VPN, click on the Viscosity menu bar icon, and click on the connected server name.

