Set up WireGuard Protocol on Linux
This tutorial explains how to set up the WireGuard Protocol on Debian Based Linux (Debian, Ubuntu, Mint, Kali and others) through the Command Line Interface, CLI.
Initial Step: It is recommended to update the outdated packages on your system by running the sudo apt update && sudo apt upgrade command.
Step #1: Switch to the root user by entering sudo -i and install WireGuard.
apt install wireguard -y
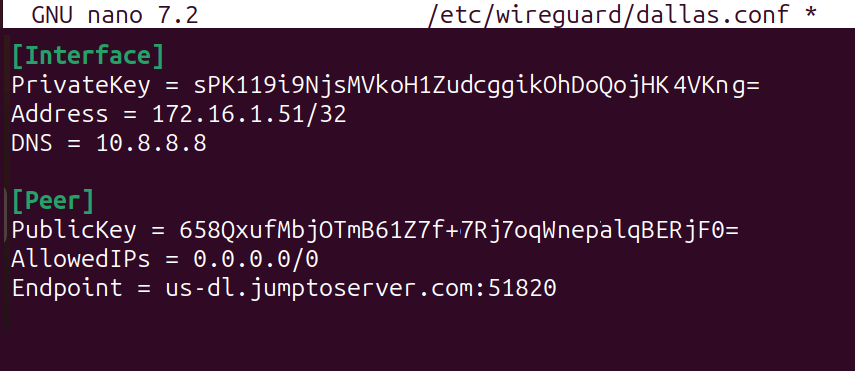
Step #2: Add your WireGuard conf file in the WireGuard directory.
sudo nano /etc/wireguard/dallas.conf
Note: In this example, the config file name is “dallas.conf” since we’ve added Dallas VPN server address in our file. You can choose any name for your config file such as london.conf or whatever you like.
Step #3: Open the WireGuard config file which is provided to you by FastestVPN and copy all its contents. If you do not have your WireGuard .conf file, please contact our support team via an email at [email protected]
Step #4: Now paste the copied text in /etc/wireguard/dallas.conf

Step #5: Save the file by pressing CTRL+O and then close it by pressing Ctrl+X.
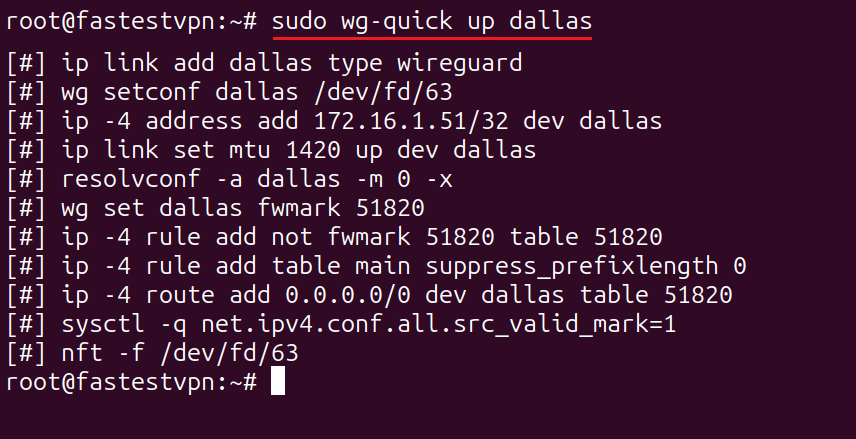
Step #6: Finally, run this command to activate the WireGuard VPN.
sudo wg-quick up dallas
Note: In the command above, add your WireGuard config name in place of dallas, and do not add .conf after it.
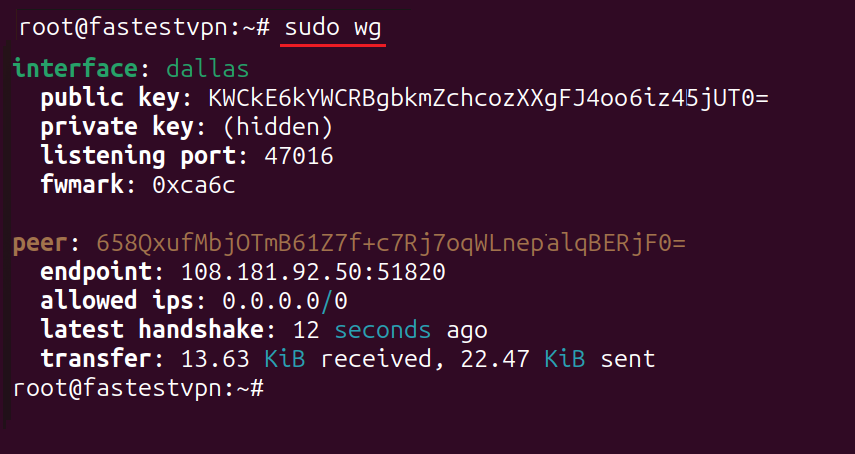
To verify the VPN connection, enter:
sudo wg
You can also visit a website such as iplocation.com to confirm that the VPN is working correctly.
To disconnect the WireGuard VPN, run the following command.
sudo wg-quick down dallas
No Internet Acces After Activating the WireGuard on Linux
If you lose the interet access after connecting to the WireGuard tunnel, open your .conf file and make sure that the line starting with “AllowedIPs” looks like this. (as shown in the screenshot below)
AllowedIPs = 0.0.0.0/0
Still, if it does not work, please change the VPN server address in the last line of the file.


