Setup VPN on Ubuntu With PPTP
This tutorial explains how to set up the Ubuntu Linux VPN with the PPTP protocol. It is compatible with Ubuntu Linux 12.10 and later versions
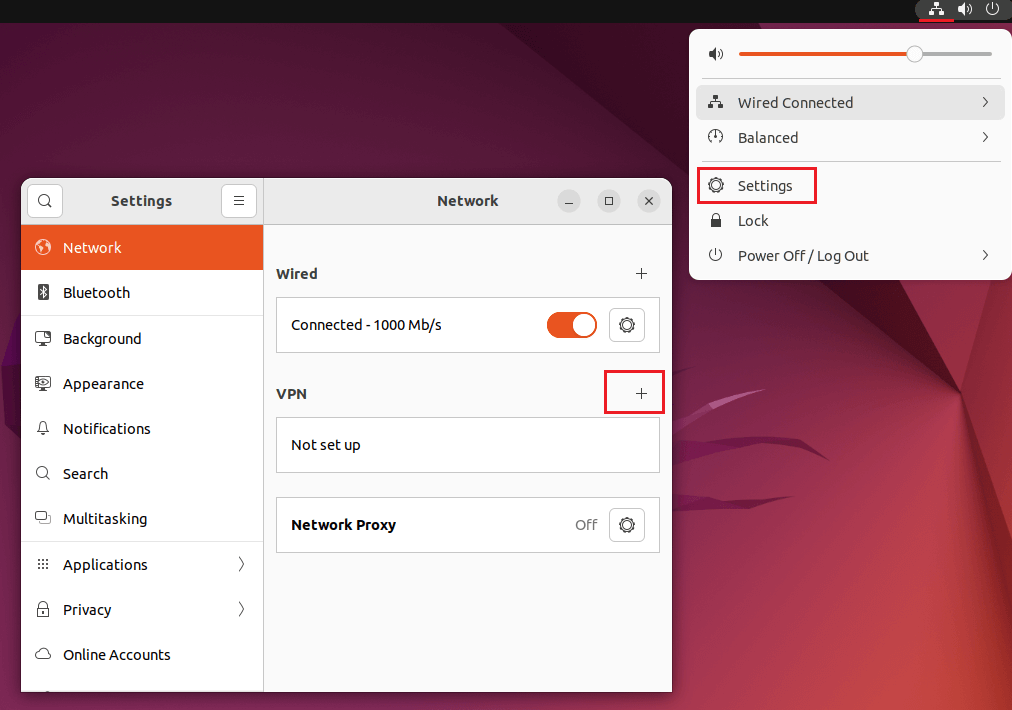
Step #1: Click on the Network icon and open the network settings. Then click the “+” sign next to VPN.
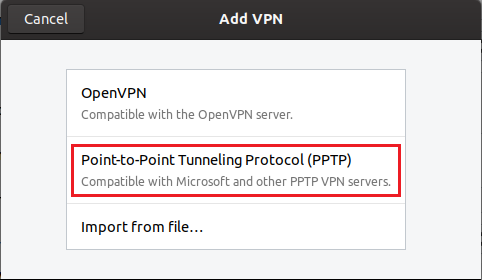
Step #2: Select Point-to-Point Tunneling Protocol.
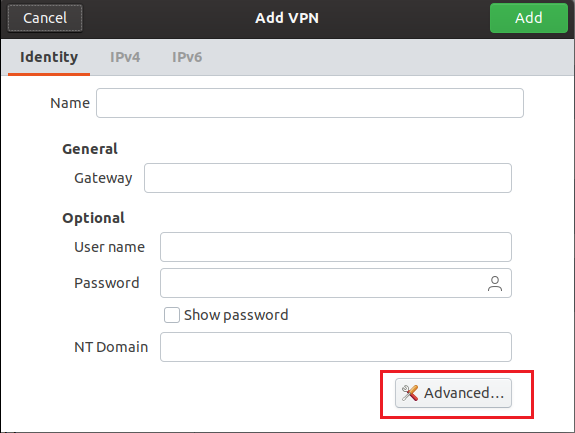
Step #3: Click on Advanced
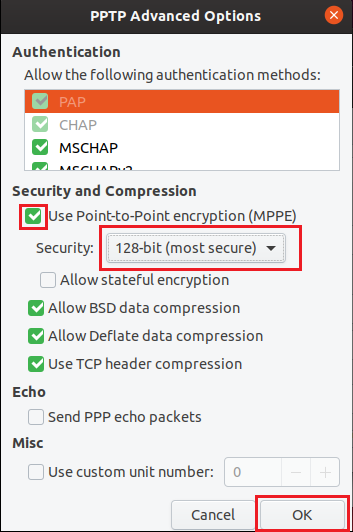
Step #4: In “Security”, select 128-bit (most secure) and click OK.
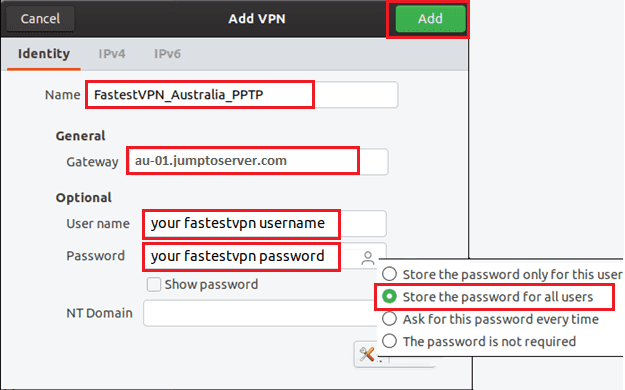
Step #5: Now on the Add VPN Window, enter the following details:
- Name: Give it a name such as “FastestVPN_Australia_PPTP”
- Gateway: Your desired FastestVPN server address. Click here to get the complete list of VPN server addresses.
- Username: Your FastestVPN Username
- Select an option to store your password
- Password: Your FastestVPN Password
- Click on Add at the top right side.
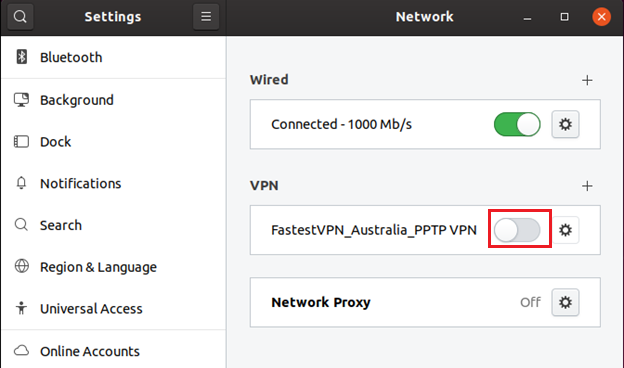
Step #6: Now your VPN profile has been created. Turn on its switch to connect to the VPN.
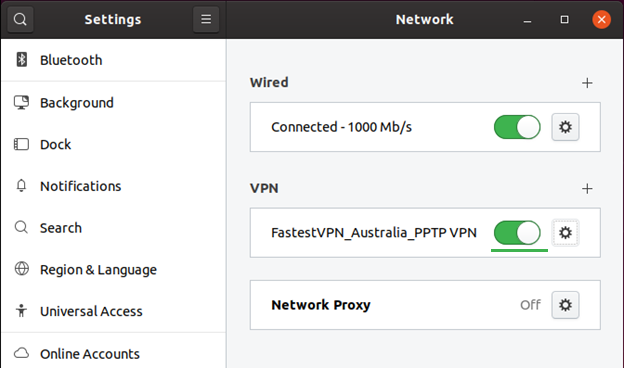
You are now connected to FastestVPN on Ubuntu with the PPTP protocol.

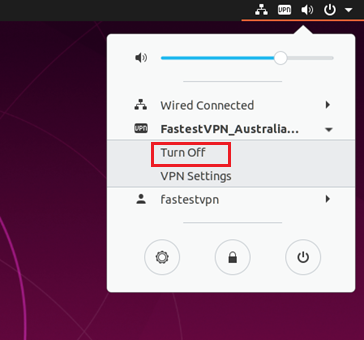
To disconnect the VPN click on the connected VPN connection name and click Turn Off.