Setup VPN on Kubuntu Linux With OpenVPN
- This tutorial explains how to set up a Kubuntu Linux VPN with the OpenVPN protocol.
- The following guide was created on Linux Kubuntu 24.04 KDE Desktop
Step #1: Open the Terminal/ Konsole and enter the following command to install the OpenVPN network manager.
sudo apt-get install network-manager-openvpn
Step #2: Download FastestVPN OpenVPN server config files for from here.
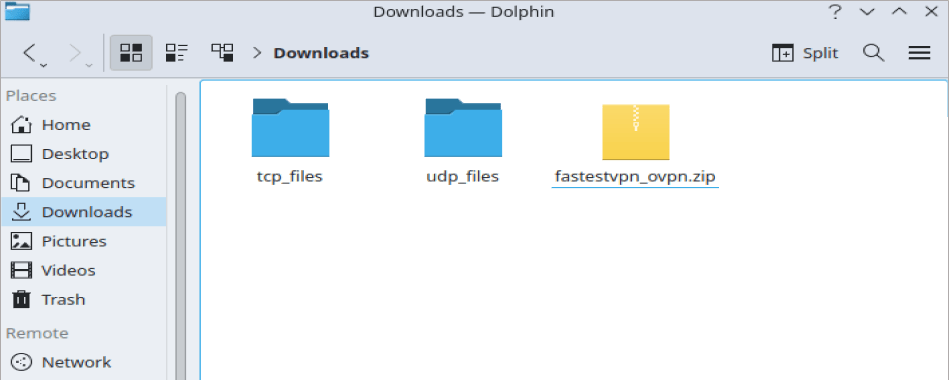
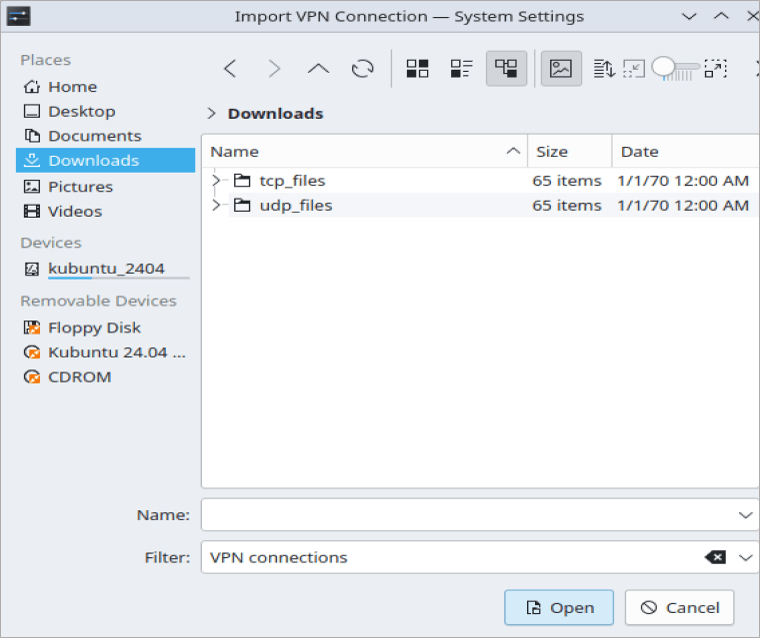
Step #3: Go to your ‘Downloads’ folder and extract the downloaded config files folder.

In the extracted folder, you will find two separate folders containing the TCP and UDP server files.
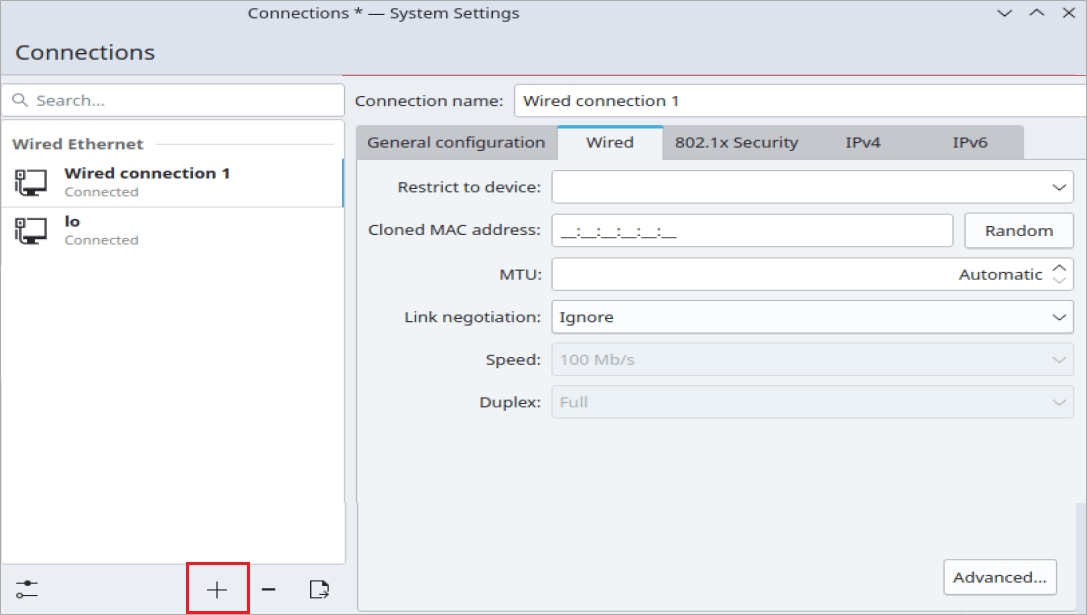
Step #4: Now right-click on your Network Connection icon and click “Configure Network Connections”.

Step #5: Click on the “+“sign.
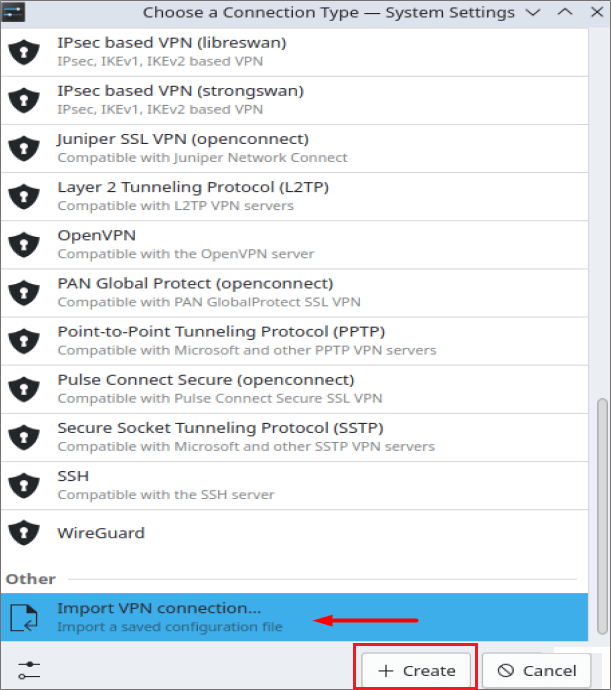
Step #6: Scroll down to the bottom, select Import VPN Connection and click the +Create button.
Step #7: Navigate to your Downloads folder where you’ve extracted the TCP and UDP files already. Open any of the folders, TCP or UDP, whatever OpenVPN protocol you want to connect to.
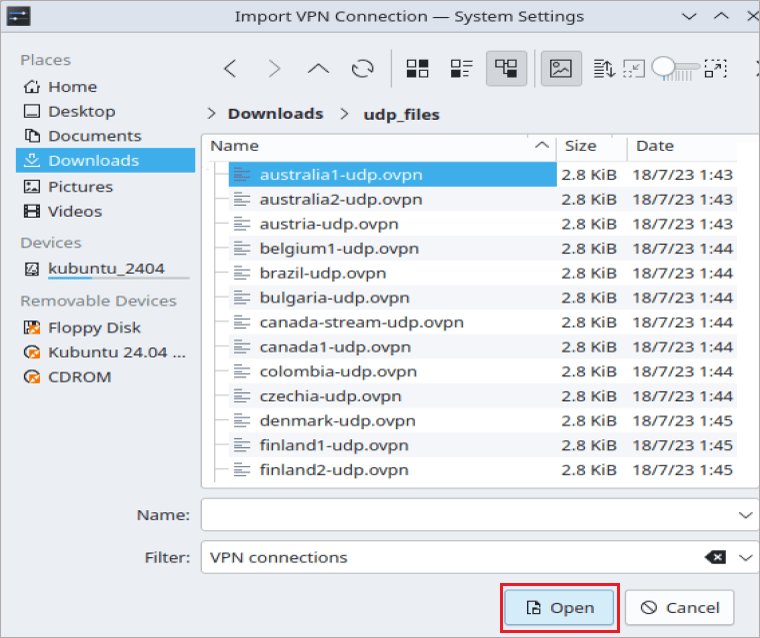
Step #8: Click on your desired VPN server file such as Australia1 in this case and click Open.
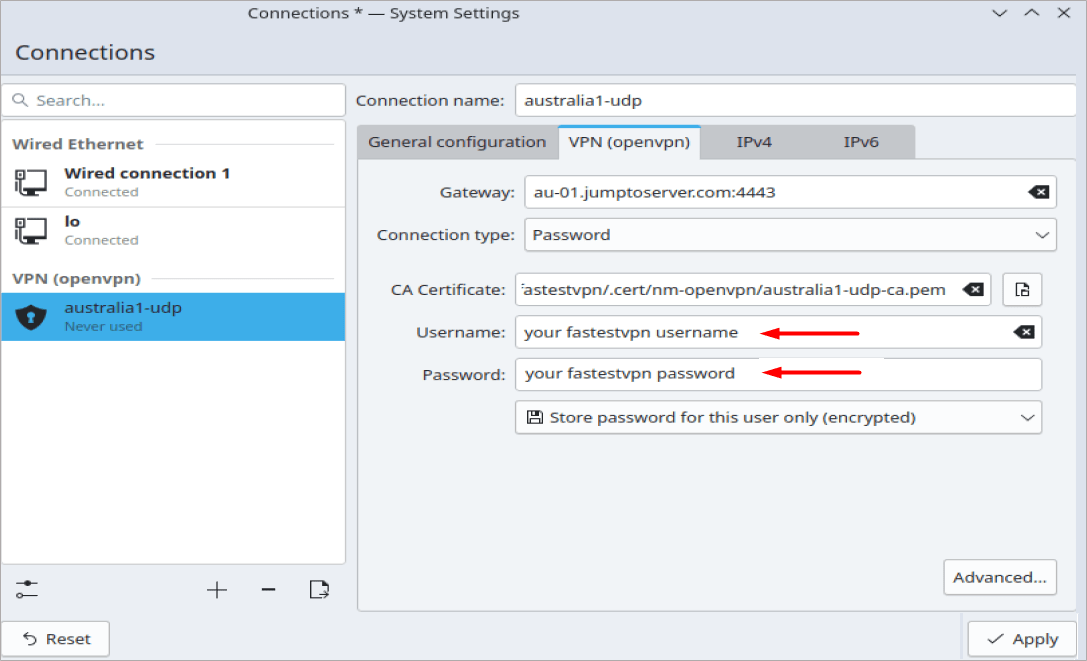
Step #9: Your VPN profile (Australia1 on the left side in this case) has been created. Enter your “FastestVPN Username” and “Password” in the respective fields.
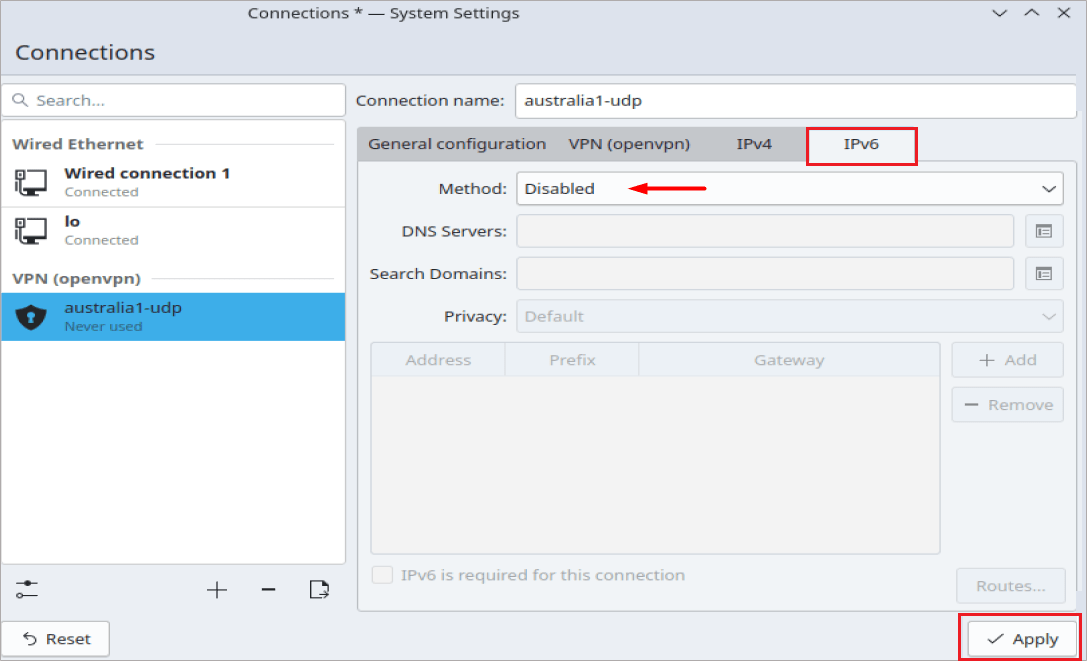
Step #10: Click the IPv6 tab and select Disable. Then click the Apply button.
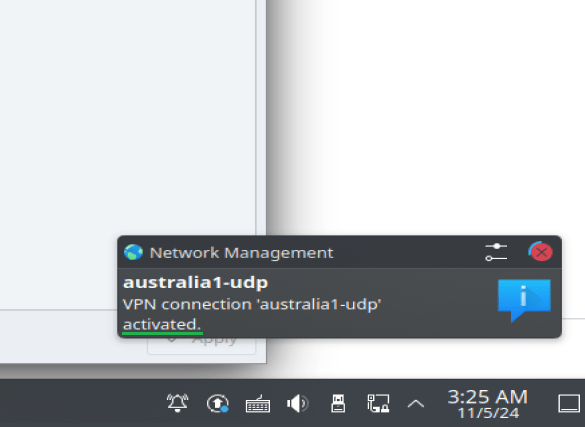
Step #11: Come back to the VPN (openvpn) tab, right click on your created VPN profile and click Connect.

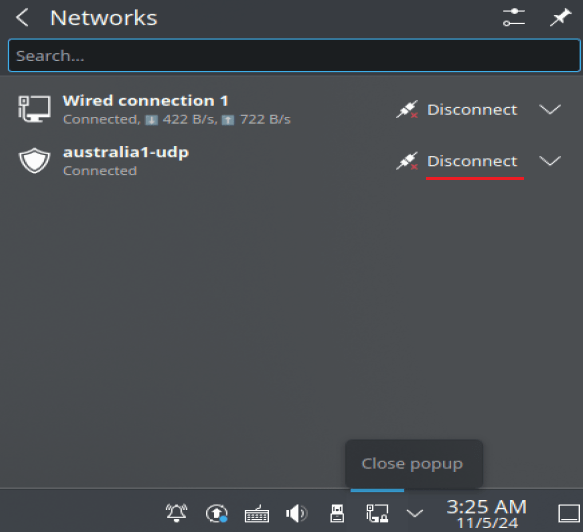
Your VPN conenction on Kubuntu with OpenVPN protocol will be activated shortly.
Later on, you can connect and disconnect the VPN from your network connections.