Setup VPN on Raspberry Pi With OpenVPN
This tutorial was created on Raspberry Pi with Desktop based on Debian Stretch version 9.
Step #1: Download FatestVPN OpenVPN server config files from here.
Step #2: Go to your ‘Downloads’ folder and extract the downloaded folder.
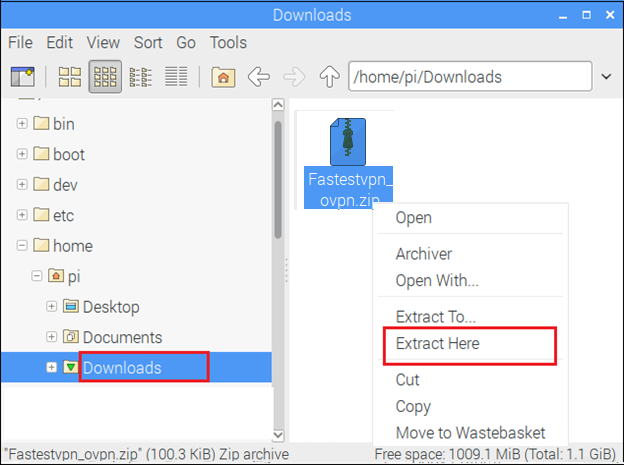
In the extracted folder, you will find two separate folders containing the TCP and UDP server files..

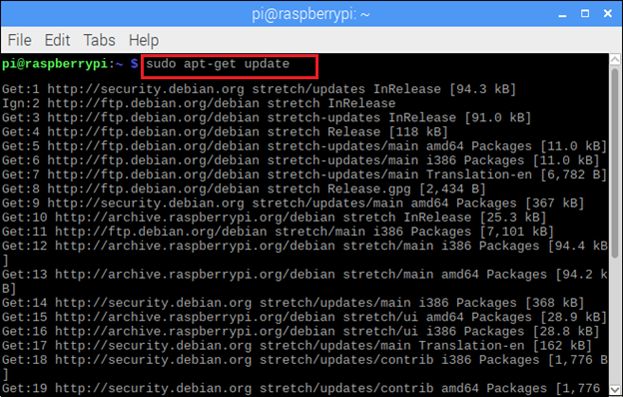
Step #3: Now you are suggested to update the outdated packages on your system. For that, open the terminal and enter the following command:.
sudo apt-get upgrade
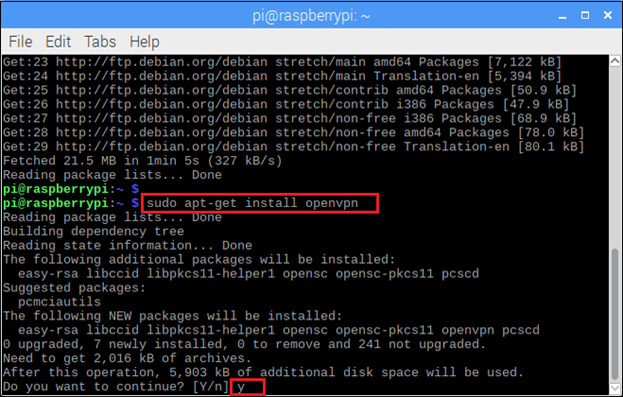
Step #4: Now you need to install the OpenVPN. In the Terminal, Enter these commands:
sudo apt-get install openvpn
Enter y for confirmation. OpenVPN will be downloaded shortly
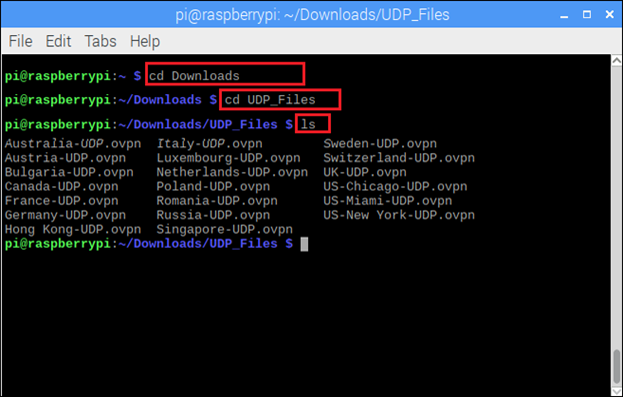
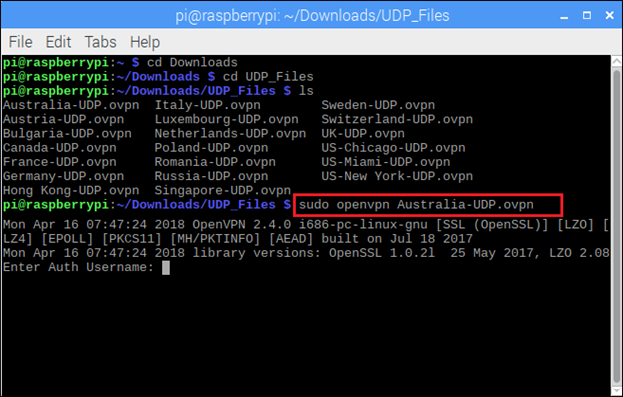
Step #5: Now access the config files directory. Enter these commands in the terminal.
cd Downloads
cd udp_files (or cd tcp_files whatever protocol you want to connect to)
ls
Step #6: Enter:
sudo openvpn [Your desired server name]
Example: sudo openvpn australia1-udp.ovpn
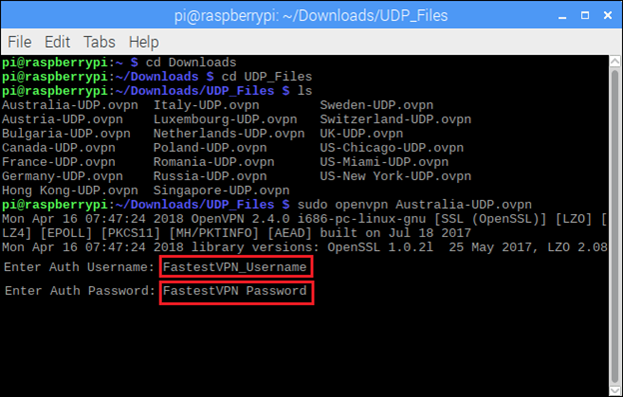
Step #7: Enter your FastestVPN username and password. Select an option to store the password.
Note: You might have a problem while adding the “@” sign in your username. If it happens then press shift + ‘ to add this sign. [Or you should update your keyboard layout for Raspberry Pi]
Step #8: Once the yellow highlighted message appears, that means you are connected.

To disconnect from the VPN, press Ctrl+C in the same terminal or in another terminal enter sudo killall OpenVPN
To connect to another server, repeat Steps 5 to 7.
