Set up a Kill Switch on Linux
This tutorial explains how to set up an internet kill switch on a Linux operating system.
This guide is applicable to Debian-based Linux operating systems (Debian, Ubuntu, Mint, Kali, MX, Deepin, etc.)
In this setup, you’ll add rules to the firewall to halt the internet traffic when your VPN is disconnected either by you or accidentally.
1. Install UFW:
It is recommended to update the outdated packages on your system by running the sudo apt update && sudo apt upgrade command.
Install the UFW (Uncomplicated Firewall) by entering: sudo ufw enable
2. Disable IPv6:
If you are sure that your internet provider does not provide IPv6, you can skip this step. Otherwise, follow these steps.
Open the terminal and enter these commands:
sudo echo 'net.ipv6.conf.all.disable_ipv6=1' | sudo tee -a /etc/sysctl.conf
sudo echo 'net.ipv6.conf.default.disable_ipv6=1' | sudo tee -a /etc/sysctl.conf
sudo echo 'net.ipv6.conf.lo.disable_ipv6=1' | sudo tee -a /etc/sysctl.conf
sudo sysctl -p
To verify if the IPv6 is disabled, you can run the following command. In case its output is 1, that means the IPv6 has been successfully disabled.
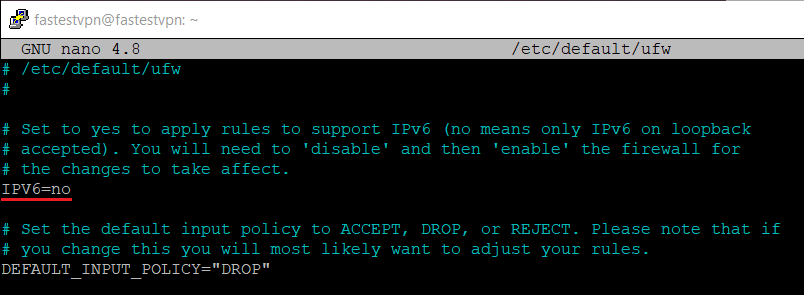
To stop the firewall (UFW) from automatically creating IPv6 rules, you need to edit the file /etc/default/ufw. To do this, run the following command.
sudo nano /etc/default/ufw
Now replace “yes” with “no” next to IPv6 as shown in the screenshot. Press Ctrl+X on your keyboard to save the changes and then enter y.
3. Connect to the VPN
For now, you need to disable the UFW by entering: sudo ufw disable
Connect to the VPN using the OpenVPN protocol. Setup tutorials are available here
4. Activate the Kill Switch
First, you need to get the IP address of the VPN server to which you are connected.
To do this, open a new terminal and enter: curl ifconfig.me
Take a note of the resulting IP address.
Note: If it says “curl command not found” then install it by entering sudo apt install curl and run the above command again.
Now add the UFW rules. Enter these commands to deny all traffic:
sudo ufw default deny outgoing
sudo ufw default deny incoming
Run the following commands to force the traffic to pass through the OpenVPN tunnel only.
sudo ufw allow out on tun0 from any to any
sudo ufw allow in on tun0 from any to any
Then add the following rule to allow only your VPN server IP through the firewall.
sudo ufw allow out from any to vpn.server.ip.address
Make sure to replace the IP address in the above command with the server IP address that you got in the above step.
Finally, enable the kill switch by entering: sudo ufw enable
You’re done! The UFW is enabled with the above defined rules, that means if your VPN gets disconnected, it will halt your internet traffic.
To get your internet access back, disable the UFW by entering sudo ufw disable
The UFW should be disabled before making a new VPN connection. To check the UFW status, enter sudo ufw status
To reset all UFW rules, run sudo ufw reset and also restart your networking by entering systemctl restart networking
